Introduction to Gourd Seed Preservation Tips
Hello, fellow homesteading enthusiasts and curious beginners! Welcome to our cozy corner where we unravel the secrets of sustainable living, one seed at a time. Today, we’re diving into the world of ‘Gourd Seed Preservation Tips,’ a topic that’s as fascinating as it is crucial for anyone embarking on the homesteading journey.
Gourd seed preservation isn’t just about saving seeds; it’s about preserving a legacy of biodiversity and self-reliance. Whether you’re dreaming of a lush garden filled with heirloom varieties or simply looking to reduce waste, understanding how to effectively preserve gourd seeds is a game-changer. It’s a practice that not only ensures a bountiful harvest year after year but also connects us to the age-old traditions of gardening and self-sufficiency.
Don’t worry if you’re new to this – we’ve tailored this guide specifically for beginners. We’ll walk you through the essentials of gourd seed preservation, from selecting the right seeds to storing them for maximum longevity. Our aim is to provide you with practical, easy-to-follow advice that demystifies the process and sets you up for success.
So, let’s embark on this journey together, nurturing our gardens and our connection to the earth, one preserved seed at a time.
Understanding Gourd Seed Preservation
At its heart, ‘Gourd Seed Preservation‘ is about saving the seeds from gourds for future planting. It’s a simple yet profound act of ensuring that the seeds you collect today can sprout into vibrant plants tomorrow, next year, or even several years down the line. Think of it as a bridge connecting one growing season to the next, a way to keep your garden self-sustaining and resilient.
Why Preserve Gourd Seeds?
- Economic Benefits: Saving seeds means you’re not buying new ones every season. This can be a significant cost-saver over time.
- Genetic Diversity: By preserving seeds, especially heirloom varieties, you’re helping to maintain genetic diversity in your garden. This diversity can lead to more robust plants.
- Adaptation to Local Conditions: Seeds from plants that have thrived in your specific garden conditions are likely to be more adapted and successful in subsequent plantings.
- Personal Satisfaction: There’s a unique joy in seeing a plant grow from a seed you saved. It’s a tangible connection to the cycle of life and growth.
Seed Viability and Longevity
Understanding seed viability and longevity is crucial in seed preservation. Viability refers to a seed’s ability to germinate, while longevity is how long a seed remains viable. Gourd seeds, when stored properly, can have a surprisingly long shelf life. Factors like moisture, temperature, and storage method play a significant role in determining how long your seeds will remain viable. We’ll delve into these factors in more detail in the upcoming sections, ensuring your seed-saving efforts are as fruitful as possible.
In essence, gourd seed preservation is more than just a gardening task; it’s a step towards self-reliance and sustainability. As we move forward, we’ll explore the practical aspects of this process, ensuring you have all the knowledge you need to make your homesteading journey a success.
Selecting Seeds for Preservation
Selecting the right seeds to preserve is a foundational step in the journey of gourd seed preservation. This process is not just about picking any seed; it’s about choosing the best representatives of your gourd plants that will ensure a robust and healthy future harvest. This selection process is critical because the seeds you save today are the plants you’ll grow tomorrow. Here’s how to navigate this crucial step:
Choosing the Right Gourd Seeds
- Healthiest Plants as Your Seed Source: Prioritize seeds from your healthiest and most productive gourd plants. These seeds are more likely to carry the genetic traits that made the parent plants thrive in your garden.
- Quality of the Fruit: Pay attention to the characteristics of the gourds. Select seeds from fruits that exhibit the qualities you value, such as size, shape, color, or taste.
- Awareness of Cross-Pollination: Be mindful of cross-pollination, especially if you grow multiple gourd varieties. Seeds from cross-pollinated plants may yield unpredictable results, so it’s best to choose seeds from plants with minimal exposure to other varieties.
Heirloom vs. Hybrid Seeds
- Heirloom Seeds: These are your go-to for seed preservation. They are open-pollinated and have been passed down through generations, known for their stable traits and genetic diversity.
- Hybrid Seeds: While they offer specific advantages like disease resistance, hybrids are not ideal for seed saving. The offspring of hybrids may not retain the parent plant’s desired characteristics.
Identifying Healthy and Viable Seeds
- Visual Inspection: Look for seeds that are full-bodied, without any signs of damage or disease.
- The Float Test: Place seeds in water; viable seeds typically sink, while less viable or dead seeds float.
- Texture and Color: Healthy seeds have a consistent texture and color. Any abnormalities can be a sign of potential issues.
Selecting the right seeds is more than just a task; it’s an investment in your garden’s future. By choosing wisely, you ensure that your homestead continues to flourish with each passing season.
Harvesting Gourd Seeds
Harvesting gourd seeds is a rewarding process that requires a bit of know-how and timing. Doing it right ensures that you get the best seeds for next season’s planting. Here’s a friendly guide to help you through each step:
Step-by-Step Instructions on How to Harvest Seeds from Gourds
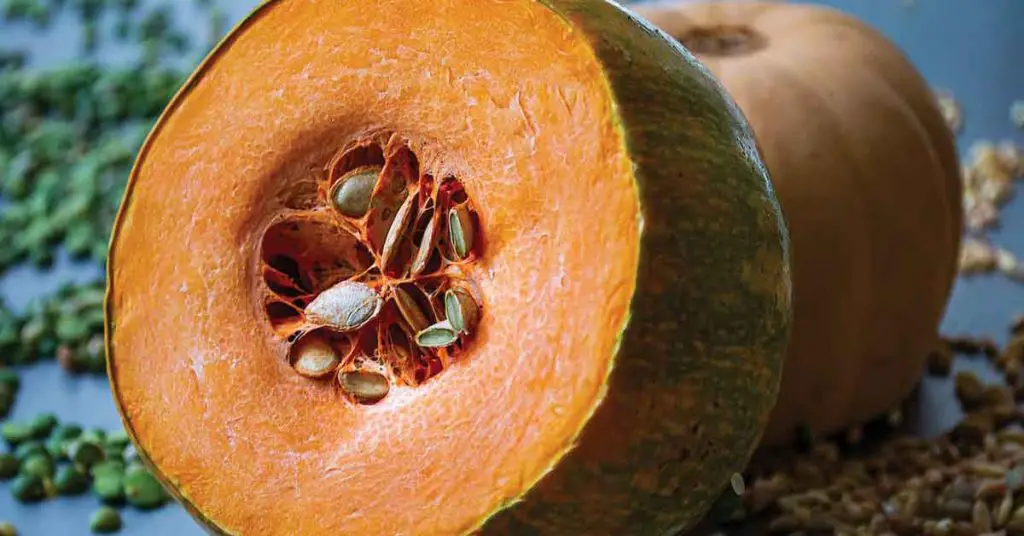
- Wait for the Right Time: Harvest seeds when the gourds are fully mature. This is typically when the stem dries out and the gourd’s skin hardens.
- Cutting the Gourd Open: Use a sharp knife to carefully cut the gourd. Aim to make a clean cut to avoid damaging the seeds inside.
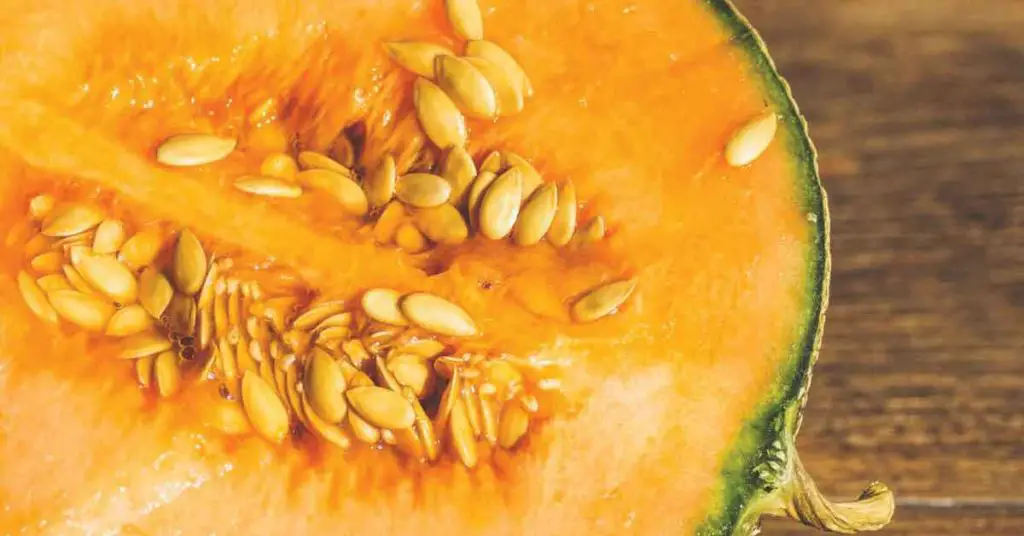
- Scooping Out the Seeds: Gently scoop out the seeds with a spoon. Be careful not to crush them.
- Separating Seeds from Pulp: In a bowl of water, gently wash the seeds to remove any clinging pulp. This step is crucial for preventing mold growth during storage.
Best Practices for Timing and Techniques
- Monitor Gourd Development: Keep an eye on your gourds as they grow. Timing is key; too early, and the seeds won’t be mature, too late, and they might start to rot.
- Gentle Handling: Treat the seeds delicately. Rough handling can damage the seed coat and affect germination.
- Use the Right Tools: Sharp, clean tools prevent infection and ensure a smooth harvesting process.
How to Handle Seeds Post-Harvest to Maintain Quality
- Drying the Seeds: Spread the seeds out on a paper towel or a screen in a well-ventilated area. They need to dry thoroughly to prevent mold.
- Storing for Short-Term: If you plan to plant them next season, store the dried seeds in a paper envelope in a cool, dry place.
- Long-Term Storage: For longer storage, an airtight container in a refrigerator can help preserve their viability.
Remember, the care you put into harvesting your gourd seeds directly impacts their quality and your future harvests. With these steps, you’re not just saving seeds; you’re preserving a legacy of your garden’s bounty.
Cleaning and Preparing Seeds
After harvesting your gourd seeds, the next crucial step is cleaning and preparing them for storage. This process is vital for preventing mold and ensuring the seeds remain viable for planting. Here’s a down-to-earth guide to get you started:

Detailed Guide on Cleaning Seeds Effectively
- Separate Seeds from Pulp: Gently remove the seeds from the pulp. A good tip is to do this in a bowl of water, as viable seeds will typically sink while the pulp and non-viable seeds float.
- Rinse Thoroughly: Rinse the seeds under running water to remove any remaining pulp or residue. A fine mesh strainer can be very helpful in this step.
- Inspect the Seeds: Post-rinse, inspect the seeds and remove any that are damaged or look unhealthy.
Importance of Removing Pulp and Residue
- Prevents Mold Growth: Pulp and residue can hold moisture, leading to mold growth which can ruin your seeds.
- Ensures Seed Quality: Clean seeds are more likely to be healthy and have a higher germination rate.
- Easier Storage and Handling: Clean seeds are easier to store and handle, reducing the risk of clumping or sticking together.
Drying Techniques for Optimal Preservation
- Air Drying: Spread the seeds out in a single layer on a clean, dry paper towel or cloth. Ensure they are in a well-ventilated area away from direct sunlight.
- Regular Turning: Turn the seeds every few hours to ensure they dry evenly.
- Testing Dryness: Seeds should feel hard and dry to the touch. A simple test is to try snapping a seed; if it breaks cleanly, it’s dry.
- Time Frame: Depending on the humidity and temperature, drying can take anywhere from a few days to a week.
Cleaning and preparing your gourd seeds might seem like a small step, but it’s a significant one in the journey of seed preservation. By following these simple yet effective techniques, you’re setting the stage for a successful planting season ahead.
Storing Gourd Seeds
Once your gourd seeds are clean and dry, storing them correctly is key to maintaining their viability. As a seasoned homesteader, I’ve learned that the right storage method can make all the difference. Let’s explore some effective ways to store your gourd seeds:
Various Storage Methods and Their Pros and Cons
Paper Envelopes:
- Pros: Allows seeds to breathe, reducing moisture buildup.
- Cons: Can be easily damaged by pests or water.
Glass Jars:
- Pros: Excellent for keeping seeds dry and safe from pests.
- Cons: Can be bulky and breakable.
Plastic Bags or Containers:
- Pros: Convenient and space-saving.
- Cons: Risk of moisture buildup if not sealed properly.
Discussing Ideal Storage Conditions
- Temperature: The cooler the better, ideally around 40°F (4°C). A fridge can be a great option.
- Humidity: Aim for low humidity. Using silica gel packets in your storage containers can help absorb any excess moisture.
- Darkness: Seeds last longer when stored in a dark place, as light can decrease their viability.
- Air Circulation: Good air circulation is important, especially if using airtight containers. Periodically airing them out can prevent moisture buildup.
Creative and Sustainable Storage Solutions
- Repurposed Items: Old film canisters, spice jars, or even pill bottles can be great for seed storage.
- DIY Seed Packets: Make your own seed packets from recycled paper. It’s eco-friendly and adds a personal touch.
- Labeling: Use a permanent marker or printed labels for easy identification. Include the seed type and date of harvest.
- Seed Libraries: Consider participating in a seed library where you can store and exchange seeds with other gardeners.
Storing your gourd seeds properly is not just about keeping them safe; it’s about preserving the potential of future harvests. With these tips, you can ensure that your seeds stay viable and ready for the next planting season, contributing to a sustainable and fruitful homesteading journey.
Monitoring and Maintaining Seed Viability
As an experienced homesteader, I know that storing seeds is just the beginning. Regularly monitoring and maintaining their viability is crucial for ensuring a successful harvest year after year. Here are some techniques and tips to help you keep your gourd seeds in top condition:

Techniques for Checking Seed Viability Over Time
Germination Test:
- How-To: Place a few seeds on a damp paper towel, fold it, and keep it in a warm place. Check for germination after a week.
- What to Look For: Sprouting indicates good viability. No sprouts may mean it’s time to refresh your stock.
Visual Inspection:
- Check for: Mold, discoloration, or any signs of damage.
- Action: Discard any seeds that show signs of spoilage to prevent them from affecting others.
Tips on Regular Monitoring and Maintenance of Stored Seeds
- Schedule Regular Checks: Mark your calendar for a bi-annual or annual seed check-up.
- Storage Environment: Reassess your storage conditions periodically. Make adjustments if you notice fluctuations in temperature or humidity.
- Rotate Your Stock: Use older seeds first to ensure they don’t go past their viability period.
When and How to Refresh Your Seed Stock
- Timeframe: Generally, gourd seeds remain viable for about 4-5 years, but this can vary. If your germination test results are low, it’s time to refresh.
- Sourcing New Seeds: Consider swapping seeds with fellow homesteaders or purchasing from reputable seed banks or local nurseries.
- Record Keeping: Keep track of when you acquired your seeds and their germination rates over time. This helps in deciding when to replace them.
Monitoring and maintaining seed viability is a blend of science and art. By staying vigilant and proactive, you can ensure that your gourd seeds are always ready for planting, supporting a sustainable and rewarding homesteading lifestyle.
Troubleshooting Common Issues
In the journey of gourd seed preservation, you might encounter a few roadblocks. But don’t worry, as an experienced homesteader, I’ve faced these challenges and can guide you through them. Here’s how to address and prevent common issues in gourd seed preservation:
Addressing Common Problems in Gourd Seed Preservation
Mold Growth:
- Cause: Excess moisture during storage.
- Solution: Ensure seeds are thoroughly dry before storing. Use silica gel packets in storage containers to absorb any residual moisture.
Pest Infestation:
- Common Culprits: Weevils, mites, and rodents.
- Solution: Store seeds in airtight containers. Consider natural deterrents like neem leaves or diatomaceous earth.
Reduced Seed Viability:
- Indicators: Poor germination rates.
- Solution: Regular viability tests. Store seeds in a cool, dark, and dry place.
Solutions for Issues Like Mold, Pests, and Reduced Viability
- Mold Prevention: Use breathable containers like cloth bags for short-term storage and check periodically.
- Pest Control: Regularly inspect your storage area for signs of pests. Clean and sanitize storage containers between uses.
- Maintaining Viability: Rotate your seed stock, using the oldest seeds first.
Preventative Measures to Ensure Long-Term Success
- Regular Monitoring: Keep an eye on your seeds, especially during seasonal changes when humidity and temperature can fluctuate.
- Proper Labeling: Label your seeds with the date of storage and type. This helps in tracking their age and viability.
- Education: Stay informed about best practices in seed preservation. Attend workshops, read relevant literature, and engage with the homesteading community for tips and updates.
Troubleshooting in seed preservation is all about being proactive and responsive. By understanding these common issues and implementing these solutions, you can ensure the longevity and health of your gourd seeds, paving the way for a bountiful harvest each year.
Engaging with the Homesteading Community
In the world of homesteading, particularly in areas like gourd seed preservation, the value of community engagement cannot be overstated. It’s not just about the individual practices on your homestead but also about the connections you forge and the collective wisdom you tap into. Here’s how you can immerse yourself in the homesteading community, enriching your journey with shared experiences and a wealth of knowledge.

Encourage Sharing Experiences and Tips Within the Community
- Start a Conversation: Dive into discussions on platforms like the Homesteading Forum, where you can share your gourd seed preservation stories and pick up new ideas from fellow enthusiasts.
- Social Media Groups: Join vibrant communities on Facebook or Instagram. These social platforms are excellent for exchanging photos, tips, and queries. Check out groups like Modern Homesteading for a start.
- Local Homesteading Events: Participate in local fairs, workshops, and seed swaps. These gatherings are not just social events but also treasure troves of practical advice and networking opportunities.
Learning from Other Homesteaders’ Successes and Mistakes
- Homesteading Blogs and Podcasts: Follow insightful blogs and podcasts dedicated to homesteading. They often feature personal stories that provide a realistic view of both triumphs and challenges. A great place to start is the Pioneering Today Podcast.
- Ask for Advice: Reach out for guidance from seasoned homesteaders. Most are eager to share their knowledge and experiences.
- Share Your Own Journey: Document and share your gourd seed preservation adventures. Your story could be a guiding light for a beginner.
Resources for Further Learning and Community Engagement
- Online Courses and Webinars: Enroll in online courses or attend webinars focused on seed preservation and gardening. Platforms like Udemy offer a range of relevant courses.
- Homesteading Books and Magazines: Invest in comprehensive books and subscribe to magazines that delve into self-sufficient living and gardening. Mother Earth News is a great resource.
- Community Gardens and Co-ops: Get involved with community gardens or local agricultural co-ops. These organizations often host workshops and provide hands-on experience with experienced gardeners.
Engaging with the homesteading community is a fulfilling journey that not only enhances your skills in areas like gourd seed preservation but also fosters a sense of belonging and shared growth. Remember, every homesteader brings unique experiences and insights to the table, and there’s always something new to learn and share.
Conclusion: Gourd Seed Preservation Tips
As we wrap up our journey through the intricacies of ‘Gourd Seed Preservation Tips: Essential Techniques for Longevity,’ let’s take a moment to reflect on the key insights we’ve gathered. This guide has been a comprehensive exploration, designed to empower you, the aspiring homesteader, with the knowledge and confidence to embark on your own gourd seed preservation journey.
We began by understanding the fundamentals of gourd seed preservation, emphasizing its significance in sustaining a thriving homestead. Selecting the right seeds is crucial, and we delved into how to choose viable, healthy seeds, distinguishing between heirloom and hybrid varieties. The art of harvesting gourd seeds was our next stop, where we learned the best practices for timing and techniques to ensure the highest quality seeds.
Cleaning and preparing the seeds is a vital step, and we covered effective methods to remove pulp and residue, followed by drying techniques crucial for long-term storage. Speaking of storage, we explored various methods, discussing the ideal conditions needed to maintain seed viability, including temperature and humidity control.
Monitoring and maintaining seed viability is an ongoing process, and we shared techniques for regular check-ups and refreshing your seed stock. Troubleshooting common issues like mold, pests, and reduced viability was also a key focus, providing you with solutions to ensure the success of your preservation efforts.
Finally, we emphasized the importance of engaging with the homesteading community. Sharing experiences, learning from others, and accessing resources for further learning are invaluable aspects of this journey.
As you embark on your gourd seed preservation adventure, remember that each step is a learning opportunity, a chance to grow alongside your garden. We invite you to share your experiences, ask questions, and engage with fellow homesteaders. Your journey contributes to a rich tapestry of knowledge and community spirit.
Stay tuned to our blog for more insights into homesteading, where we continually explore new ways to live sustainably and self-sufficiently. Your journey in gourd seed preservation is just the beginning of a fulfilling and enriching homesteading experience. Happy planting, and may your seeds flourish!
Disclaimer: The information provided in this article is for general informational purposes only and is not intended to be a substitute for professional advice. The author of this article does not claim to be an expert in homesteading and the information provided should not be relied upon to make decisions about your own homesteading journey. Please do your own research and consult with a qualified professional before making any decisions about your homestead.
Share via:
Shaun Alexander is the main writer and editor for HomesteadingSimple.com. With a strong passion for homesteading and sustainability, Shaun has dedicated his life to learning and sharing information about a simple, fulfilling existence tied to the land. His expertise ranges from gardening and livestock management to off-grid living and DIY projects, reflecting the diverse skills necessary for a successful homesteading lifestyle. Shaun’s goal is to inspire and educate others about the possibilities of homesteading, whether in rural, suburban, or urban settings, and to provide practical advice and tips for both beginners and seasoned homesteaders. He believes in a future where more people return to their roots, embracing a life of self-sufficiency and harmony with nature.