Introduction
Welcome to the world of homesteading, where every small step can lead to a more sustainable and self-sufficient lifestyle! Today, we’re diving into the delightful and practical world of DIY Gourd Seed Storage. For those of you who cherish the art of gardening and the joy of growing your own food, understanding how to store your gourd seeds effectively is a game-changer.
Seed storage might seem like a minor detail in the grand scheme of homesteading, but it’s actually a cornerstone of sustainable gardening. By preserving seeds, especially those from your best gourds, you’re not just preparing for the next planting season; you’re also safeguarding the genetic diversity of your garden and ensuring that those unique, heirloom varieties continue to thrive on your homestead.
In this article, we’re going to simplify DIY Gourd Seed Storage for beginners. Whether you’re a seasoned gardener or just starting out, you’ll find that storing your seeds can be both fun and immensely rewarding. We’ll walk you through the basics, from harvesting to the perfect storage conditions, all in a way that’s easy to understand and implement.
So, let’s embark on this journey together, and by the end, you’ll be equipped with all the knowledge you need to turn a handful of seeds into a flourishing garden year after year!
The Basics of Gourd Seed Storage
Embarking on the journey of DIY Gourd Seed Storage is like stepping into a world where each seed holds the promise of future harvests. It’s not just about keeping seeds safe; it’s about preserving a legacy of your garden’s best performers. Let’s break down the essentials of gourd seed storage, ensuring your seeds stay viable and ready for the next planting season.
Understanding Gourd Seed Storage
Gourd seed storage is more than just putting seeds away; it’s an art in itself. It involves carefully preserving the seeds from your gourds so they remain viable for planting in the next season or even years later. This practice is crucial for those who cherish heirloom varieties and aim for a sustainable garden year after year.
Why Seed Storage Matters
- Sustainability: By saving seeds, you’re participating in an age-old tradition of sustainability. You’re not just growing plants; you’re nurturing a cycle of life that goes beyond a single season.
- Preserving Heirlooms: Heirloom gourd varieties, with their unique characteristics, are treasures in the gardening world. Storing these seeds means you’re keeping these rare gems alive for future generations.
Key Requirements for Successful Seed Storage
- Dryness: Moisture is the enemy of stored seeds. Ensure your seeds are thoroughly dried before storage to prevent mold and rot.
- Temperature Control: Seeds thrive in cool, stable temperatures. A consistent, cool environment prolongs their viability.
- Protection from Pests: Seeds are a feast for many pests. Store them in airtight containers to keep hungry critters at bay.
By understanding these basics, you’re well on your way to mastering DIY Gourd Seed Storage. Remember, each seed you save is a step towards a more self-reliant and sustainable gardening journey. So, let’s cherish these tiny capsules of life and give them the care they deserve!
Harvesting and Preparing Gourd Seeds
When it comes to DIY Gourd Seed Storage, the journey begins in the garden, with the careful harvesting and preparation of your gourd seeds. This process is as rewarding as it is crucial, ensuring that each seed has the best chance for future growth. Let’s walk through the steps to harvest and prepare your gourd seeds, turning this task into a fulfilling part of your gardening routine.
Step-by-Step Guide to Harvesting Gourd Seeds
Harvesting seeds from gourds is a process filled with anticipation and potential. Here’s how to do it right:
- Choose the Right Gourds: Look for mature, healthy gourds. The seeds from these will have the best chance of germinating next season.
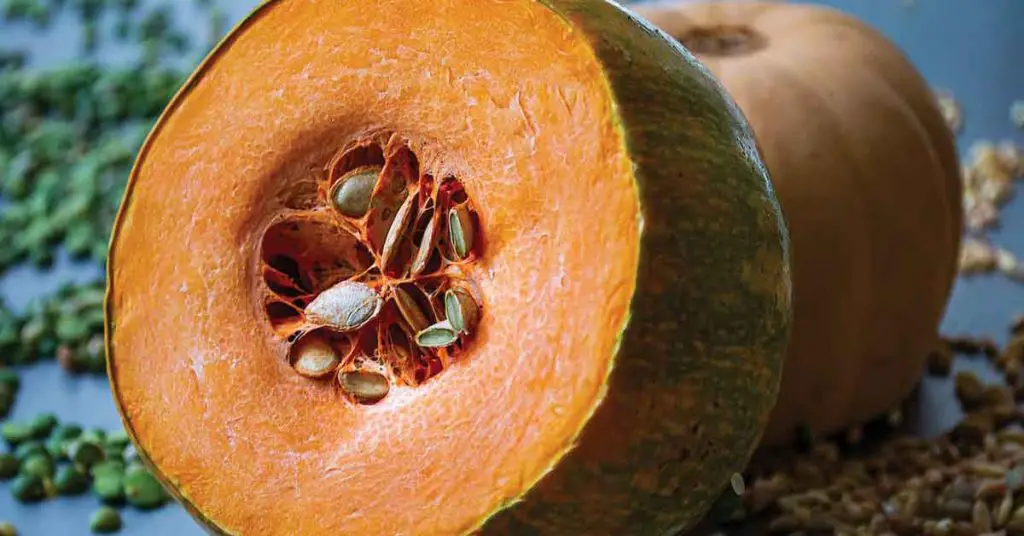
- Cut Open the Gourd: Carefully slice open your chosen gourd. Aim to make a clean cut to avoid damaging the seeds inside.
- Scoop Out the Seeds: Gently scoop out the seeds and the surrounding pulp. This is a bit messy but incredibly satisfying!
Tips for Cleaning and Drying Seeds
- Cleaning the Seeds: Separate the seeds from the pulp. Rinse them under cool water to remove any remaining pulp. Be gentle to avoid damaging the seeds.
- Drying Process: Spread the cleaned seeds on a dry paper towel or a mesh screen. Make sure they’re in a single layer for even drying. Place them in a warm, dry area away from direct sunlight. This might take a few days, so be patient.
Knowing the Right Time to Harvest
- Timing is Key: The best time to harvest gourd seeds is when the gourds are fully matured. This is usually indicated by a hard shell and a hollow sound when tapped.
- Watch the Weather: If frost is approaching, it’s time to harvest, even if the gourds aren’t fully mature. Frost can damage the seeds, reducing their viability.
Harvesting and preparing gourd seeds is a delightful blend of art and science. By following these steps, you’re not just collecting seeds; you’re capturing the essence of the season and preparing for the next cycle of growth. Remember, each seed holds the promise of a new beginning, so treat them with care and respect as you embark on your DIY Gourd Seed Storage journey.
Choosing Your Storage Containers
In the world of DIY Gourd Seed Storage, selecting the right container is as important as the seeds themselves. It’s not just about keeping the seeds safe; it’s about embracing creativity and sustainability. Let’s dive into some imaginative and eco-friendly options for storing your precious gourd seeds.

Creative Ideas for Homemade Seed Containers
- Repurposed Jars: Old spice jars, mason jars, or any small glass containers can be excellent for seed storage. They’re airtight and transparent, so you can easily see what’s inside.
- Origami Seed Packets: If you’re into crafting, making your own paper seed packets can be a fun project. Use recycled paper to create these little packets, perfect for storing smaller quantities of seeds.
- Upcycled Tin Cans: Small tin cans, like those used for tea or mints, can be repurposed as seed containers. Just make sure they’re dry and clean before use.
Pros and Cons of Different Materials
Glass Containers:
- Pros: Airtight, durable, and moisture-resistant. Great for long-term storage.
- Cons: Fragile and heavy, not ideal for large quantities of seeds.
Plastic Containers:
- Pros: Lightweight, durable, and often airtight.
- Cons: Not as eco-friendly unless recycled or repurposed.
Paper Packets:
- Pros: Biodegradable, lightweight, and easy to make or customize.
- Cons: Not moisture-resistant, better for short-term storage or seeds used within a year.
Emphasizing the Use of Recycled and Eco-Friendly Materials
- Sustainability First: Whenever possible, opt for recycled or upcycled materials. This not only reduces waste but also adds a personal touch to your DIY Gourd Seed Storage.
- Eco-Friendly Labels: Use recycled paper or biodegradable labels for marking your containers. This helps in keeping track of the seed varieties and planting dates.
- Community Sharing: Engage with your local gardening community to exchange containers or ideas. This not only fosters community spirit but also promotes a culture of sustainability.
Choosing the right container for your gourd seeds is a blend of practicality and creativity. Whether you opt for glass jars for their durability or handmade paper packets for their charm, the key is to ensure that your seeds are stored in a dry, cool place. By using recycled and eco-friendly materials, you’re not just storing seeds; you’re nurturing a sustainable future.
Organizing and Labeling Your Seeds
When it comes to DIY Gourd Seed Storage, organization is key. Proper labeling and categorization not only save time but also prevent the confusion of mixing up seed varieties. Let’s explore some simple yet effective ways to keep your seeds well-organized and easily identifiable.
Importance of Labeling for Easy Identification
- Avoid Guesswork: Clearly labeled seeds mean you won’t have to guess what you’re planting come spring.
- Track Seed Viability: Labeling helps you keep track of how old your seeds are, which is crucial for germination success.
- Ease of Access: When seeds are labeled and organized, it’s much easier to find what you need without rummaging through every container.
DIY Labeling Ideas and Techniques
- Handwritten Labels: Use waterproof markers to write directly on containers or on stick-on labels. This is a quick and easy method.
- Printed Labels: For a more professional look, print labels with a home printer. You can get creative with designs and fonts.
- Natural Markers: For an eco-friendly approach, use natural materials like small wooden sticks or stones, and write on them with a non-toxic pen.
Organizing Seeds by Variety, Planting Season, or Other Categories
- By Variety: Group similar types of seeds together – all your gourd seeds in one place, for instance. This makes it easier when planning your garden layout.
- By Planting Season: Organize seeds based on when they need to be planted. This can be especially helpful for planning your planting schedule.
- Other Categories: Consider other categorizations like the amount of sunlight needed, water requirements, or even color categories for a visually pleasing arrangement.
Organizing and labeling your seeds might seem like a small step, but it’s a significant one in your DIY Gourd Seed Storage journey. Not only does it bring a sense of order to your gardening preparations, but it also adds a personal touch to your homesteading practice. With your seeds neatly labeled and organized, you’re all set for a successful planting season, knowing exactly what and when to plant for a bountiful harvest.
Ideal Storage Conditions
Creating the perfect environment for your DIY Gourd Seed Storage is crucial for preserving their viability and ensuring a successful garden. Let’s dive into how you can maintain the ideal conditions to keep your seeds safe and ready for planting.
Best Environment for Storing Gourd Seeds
- Cool and Dry: Seeds thrive in a cool, dry environment. High temperatures and moisture are the enemies of seed longevity.
- Stable Temperature: Fluctuations in temperature can damage seeds. Aim for a consistent, cool temperature, ideally between 40-50°F (4-10°C).
- Darkness: Exposure to light can trigger some seeds to start using their stored energy. Store them in a dark place or in opaque containers.
Tips on Maintaining the Right Humidity and Temperature
- Use Silica Gel Packs: These can be placed in seed storage containers to absorb excess moisture.
- Refrigerator Storage: For long-term storage, placing seeds in a refrigerator can provide a stable, cool environment.
- Avoid Attics and Garages: These areas often experience extreme temperature changes and can be damp, which is not ideal for seed storage.
Solutions for Common Storage Challenges
- Moisture Control: Ensure your storage area is well-ventilated. Use airtight containers with moisture-absorbing materials to keep seeds dry.
- Pest Deterrence: Store seeds in hard containers to prevent rodents and insects from getting to them. Regularly inspect your storage area for signs of pests.
- Regular Check-ups: Periodically check your seeds for any signs of mold or spoilage, especially if they are stored for an extended period.
By understanding and implementing these ideal storage conditions, you can significantly extend the life of your gourd seeds. This not only saves you money but also preserves the quality and genetic diversity of your seeds. Remember, the care you put into your DIY Gourd Seed Storage today will result in a more fruitful and rewarding gardening experience tomorrow.
Long-Term Seed Viability
In the world of DIY Gourd Seed Storage, understanding how to maintain long-term seed viability is key. It’s like safeguarding a treasure trove for future planting seasons. Let’s explore how you can ensure your gourd seeds stay viable and ready for when you need them.

Ensuring Seed Viability for Future Planting
- Proper Initial Storage: Start with correctly harvested and dried seeds. This foundational step is crucial for long-term viability.
- Controlled Environment: Store seeds in a consistently cool, dry place. Fluctuations in temperature and humidity can reduce viability.
- Airtight Containers: Oxygen can degrade seeds over time. Using airtight containers helps in preserving their quality.
Techniques for Testing Seed Viability
- The Water Test: Place seeds in a bowl of water. Viable seeds typically sink, while non-viable seeds float. However, this isn’t a foolproof method, as some healthy seeds may also float.
- Germination Test: Plant a few seeds in a damp paper towel and keep them in a warm place. Check for germination after a few days to gauge overall seed health.
- Visual Inspection: Look for signs of mold, discoloration, or damage. Healthy seeds usually have a uniform appearance and texture.
Discussing the Shelf Life of Gourd Seeds
- General Lifespan: Gourd seeds, when stored properly, can remain viable for about 4-6 years. However, this can vary based on the seed variety and storage conditions.
- Renewal: It’s a good practice to refresh your seed stock periodically. Plan to grow and harvest new seeds every few years to maintain a fresh supply.
- Record Keeping: Keep detailed records of when seeds were harvested and stored. This helps in tracking their age and planning for replacements.
By following these guidelines, you can ensure that your DIY Gourd Seed Storage efforts lead to a bountiful garden year after year. Remember, the key to successful long-term seed viability lies in the care and attention you give to each step of the storage process.
Creative Seed Storage Solutions
In the realm of DIY Gourd Seed Storage, creativity isn’t just a bonus—it’s a necessity. Let’s dive into some unique and imaginative ways to store your seeds, turning the mundane into something both functional and visually appealing. Think of it as crafting a small art project that also serves your garden’s future.
Unique and Creative DIY Storage Ideas
- Upcycled Treasures: Look around your home for items that can be repurposed. Old film canisters, mint tins, and even pill bottles can become quaint seed storage containers.
- Nature-Inspired Containers: Use natural materials like hollowed-out gourds or bamboo segments. These not only store seeds but also add an organic touch to your homesteading space.
- Handcrafted Pouches: If you’re into sewing, create small fabric pouches. Choose breathable materials and add labels for a personal touch.
Repurposing Household Items for Storage
- Glass Jars: Small glass jars, like those from spices or baby food, are excellent for seed storage. They’re airtight and allow you to see the contents at a glance.
- Paper Envelopes: Make your own paper envelopes from scrap paper. They’re perfect for short-term storage and can be easily labeled and decorated.
- Egg Cartons: Use egg cartons for sorting and organizing seeds. They’re especially handy when dealing with multiple varieties.
Innovative Seed Storage from the Homesteading Community
- Community Showcase: Share photos or stories of inventive seed storage solutions. It’s not just about the practicality but also the story and creativity behind each idea.
- Social Media Inspiration: Encourage readers to explore social media platforms like Pinterest or Instagram for inspiration. There’s a wealth of creative ideas shared by fellow homesteaders.
- Homesteading Forums and Blogs: Many homesteading forums and blogs feature unique DIY projects, including seed storage. These can be great resources for new and interesting ideas.
Incorporating these creative solutions into your DIY Gourd Seed Storage practices not only makes the process more enjoyable but also adds a personal touch to your homesteading journey. Remember, the best storage solutions are those that blend functionality with personal flair, making the art of seed saving as enjoyable as the gardening itself.
Engaging with the Homesteading Community
In the journey of DIY Gourd Seed Storage, one of the most enriching aspects is connecting with the wider homesteading community. This isn’t just about storing seeds; it’s about sharing knowledge, experiences, and fostering a sense of camaraderie. Let’s explore how engaging with fellow homesteaders can enhance your seed storage practices and overall homesteading experience.

Sharing Seed Storage Ideas and Experiences
- Community Forums and Social Media: Platforms like homesteading forums, Facebook groups, or Instagram can be goldmines for sharing and discovering new ideas. Post pictures of your seed storage solutions and engage with others’ posts.
- Local Homesteading Meetups: Attend local gatherings or workshops. These are great places to exchange ideas and see how others approach seed storage and other homesteading challenges.
The Importance of Community in Homesteading
- Learning from Each Other: Every homesteader has unique experiences and insights. By sharing stories and tips, we can learn from each other’s successes and mistakes.
- Support and Encouragement: Homesteading can be challenging. Having a supportive community provides encouragement and motivation, especially when trying new techniques like DIY Gourd Seed Storage.
Inviting Reader Participation
- Comment and Share: Encourage readers to comment on the article with their own seed storage solutions. It’s a great way for readers to engage with the content and each other.
- Photo Submissions: Invite readers to submit photos of their DIY seed storage. This could be featured in future blog posts or social media, creating a sense of community contribution.
- Question and Answer Sessions: Host Q&A sessions on your blog or social media platforms. This encourages readers to ask questions and share their knowledge on seed storage and other homesteading topics.
By fostering engagement within the homesteading community, we not only enrich our own practices but also contribute to a collective pool of knowledge and experience. Whether it’s through social media, local meetups, or interactive blog sections, every shared idea or tip can be a stepping stone for someone else in their DIY Gourd Seed Storage journey. Let’s continue to grow and learn together in this vibrant community of homesteaders.
Conclusion: DIY Gourd Seed Storage
As we wrap up our journey through DIY Gourd Seed Storage: Creative Solutions for Preserving Seeds, let’s take a moment to reflect on the key insights we’ve gathered. This guide wasn’t just about storing seeds; it was a doorway into a more self-sufficient and sustainable way of living, a core aspect of homesteading.
Recap of Key Points
- We delved into the basics of gourd seed storage, understanding its importance in sustainable gardening.
- Harvesting and preparing seeds was a crucial step, ensuring the longevity and viability of your future crops.
- We explored creative and practical container choices, emphasizing eco-friendly options.
- Organizing and labeling emerged as essential for easy management and future planting.
- We discussed ideal storage conditions, balancing humidity and temperature to protect your seeds.
- The section on long-term viability provided techniques to ensure your seeds stay potent for seasons to come.
- And finally, we celebrated creative storage solutions and the importance of engaging with the homesteading community.
Embarking on Your DIY Seed Storage Journey
Now, it’s your turn. Start your own DIY Gourd Seed Storage project. Use the tips and techniques discussed to preserve your seeds and, in turn, preserve a piece of nature’s bounty.
Stay Connected and Keep Learning
Follow our blog for more homesteading insights. We’re here to guide you through every step of your homesteading journey, from seed storage to sustainable living practices.
We invite you to share this post with fellow homesteaders. Let’s spread the knowledge and joy of self-sufficient living. Your comments, questions, and suggestions are what keep this community thriving. Have a topic you want us to explore? Drop a comment below.
As we conclude, remember that DIY Gourd Seed Storage is more than a task; it’s a celebration of life and growth. It’s about taking small steps towards a more sustainable future, one seed at a time. Happy homesteading!
Disclaimer: The information provided in this article is for general informational purposes only and is not intended to be a substitute for professional advice. The author of this article does not claim to be an expert in homesteading and the information provided should not be relied upon to make decisions about your own homesteading journey. Please do your own research and consult with a qualified professional before making any decisions about your homestead.
Share via:
Shaun Alexander is the main writer and editor for HomesteadingSimple.com. With a strong passion for homesteading and sustainability, Shaun has dedicated his life to learning and sharing information about a simple, fulfilling existence tied to the land. His expertise ranges from gardening and livestock management to off-grid living and DIY projects, reflecting the diverse skills necessary for a successful homesteading lifestyle. Shaun’s goal is to inspire and educate others about the possibilities of homesteading, whether in rural, suburban, or urban settings, and to provide practical advice and tips for both beginners and seasoned homesteaders. He believes in a future where more people return to their roots, embracing a life of self-sufficiency and harmony with nature.