Introduction to Homesteading in Mid-Summer
The sun is high, the weeds are stubborn, and the zucchini won’t stop multiplying — welcome to the peak of the homesteading season. By mid-summer, even the most seasoned homesteaders can start to feel the weight of the heat, the pests, and the to-do list that never seems to shrink. If you’re standing in your garden wondering why your lettuce bolted overnight or how your chickens are still laying in 100°F heat — you’re not alone.
Homesteading in mid-summer is a balancing act between survival and success. It’s the time when your systems get tested, your energy wanes, and your homestead either stalls… or shines. The good news? A few smart adjustments can make all the difference.
In this guide, you’ll find 11 practical, field-tested tips to help your homestead thrive through the hottest months — from keeping crops alive and animals cool to staying motivated and connected when the days are long and draining. Whether you’re in your first summer season or your tenth, these mid-season strategies will help you protect your hard work and set you up for a strong finish into fall.
Let’s beat the heat — together.
Tip 1: Adjust Your Garden for Mid-Summer Conditions
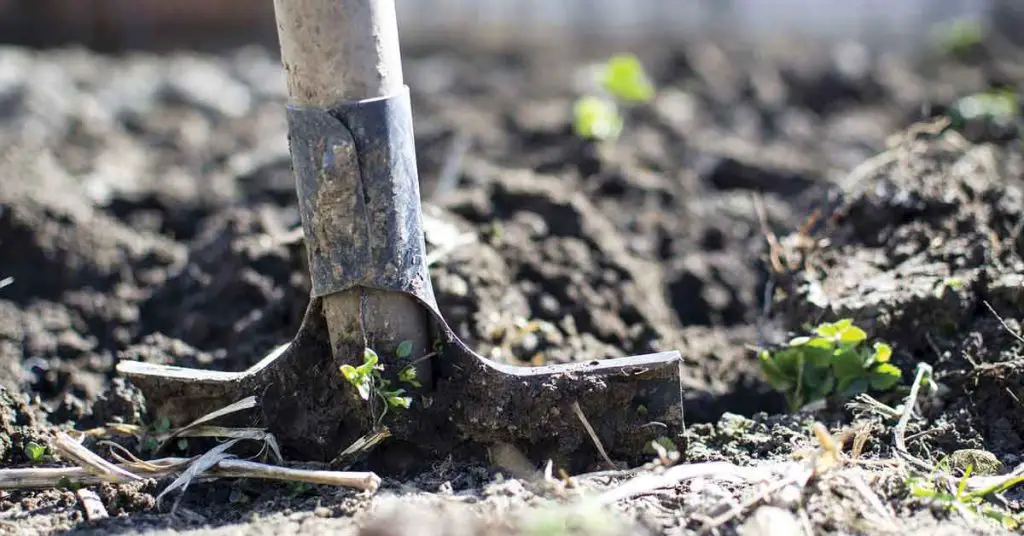
When you’re homesteading in mid-summer, it often feels like you’re gardening on a timer. The intense sun, unpredictable storms, and drying soil can turn even the best-laid garden plans upside down. But here’s the good news: with a few intentional shifts, your garden can bounce back and carry you into a successful fall harvest.
Let’s dig into some practical, field-tested advice to help you adapt.
Mid-Summer Gardening Tips for Homesteaders
By July, spring crops are either harvested or bolting, and many gardeners find themselves in a lull — not quite fall, but past the cool-season rush. This is where homesteading in mid-summer requires a little creativity.
The key is staying flexible:
- Watch your local forecast closely — a short heatwave can mean the difference between thriving peppers and wilted beans.
- Mulch generously to retain moisture and reduce soil temperatures.
- Keep soil nutrients up with light compost top-dressing or a quick compost tea boost.
“Mid-summer is when I switch gears from survival mode to strategy,” says Carmen, a homesteader in southern Missouri. “I start eyeing my fall garden, but I still sneak in a last round of cucumbers — if you time it right, you can get a second wave!”
Succession Planting to Extend Your Harvest
Don’t let empty garden beds sit idle. Succession planting is your best friend right now.
Try these mid-summer winners:
- Bush beans: Fast-growing and heat-loving — plant every 2–3 weeks through August.
- Zucchini & summer squash: They’ll mature in 45–60 days, just in time before fall frost.
- Lettuce (under shade cloth): Go for heat-tolerant varieties like Jericho or Black Seeded Simpson.
Rotate beds smartly and replenish with compost to give new crops a strong start.
Shade-Tolerant Vegetables That Can Take the Heat
Not everything loves full sun in July — and neither do your lettuces. If you have dappled shade, north-facing plots, or even a spare patio, these crops will thank you:
- Malabar spinach: Thrives in humidity and partial shade.
- Swiss chard: Hardy, colorful, and slow to bolt.
- Arugula: Fast-growing and peppery; protect with a lightweight shade cloth.
You can even set up temporary shade using old sheets, scrap wood, or burlap. It doesn’t have to be pretty — just functional.
Late-Season Crops to Plant in July and August
If you’re in Zones 5–8, July isn’t too late to sow for a fall harvest — in fact, it’s just the beginning.
Here are some late-season favorites:
- Carrots, turnips, and beets (plant by mid-July for October harvest)
- Radishes (can be planted every 10–14 days)
- Collards, kale, and mustard greens (best flavor after a light frost)
- Snap peas (sow in late July for an early fall flush)
Tip from Leo in Kansas: “I plant carrots the last week of July and water with a mister every evening. By September, I’ve got the sweetest roots you’ve ever tasted.”
Using the USDA Planting Zone Guide to Time Your Crops
Timing is everything in homesteading in mid-summer — and that’s where the USDA Plant Hardiness Zone Map becomes a real asset.
Visit USDA Zone Guide to:
- Pinpoint your frost dates
- Match planting windows to your specific zone
- Plan succession crops and fall starts with confidence
Read our in-depth guide on the new USDA plant hardiness zone map to learn more about choosing the right crops for your zone.
Pro tip: Bookmark your local Extension Service calendar too — it often provides zone-specific reminders and planting checklists.
Mid-Summer Garden Survival
Mid-summer is a test of endurance — for both you and your garden. But with a little strategy and a few well-timed plantings, you’ll turn the dog days into harvest days. Trust your instincts, use your zone as a guide, and don’t be afraid to experiment. That’s what homesteading in mid-summer is all about.
Tip 2: Use Smart Watering and Soil Moisture Strategies
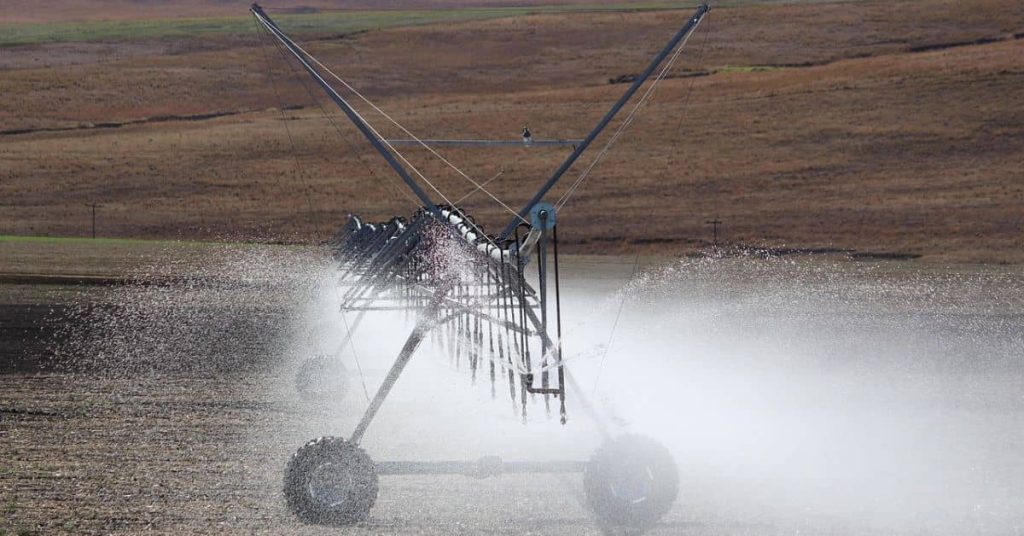
When you’re homesteading in mid-summer, water becomes one of your most valuable resources — especially when temps climb past 90°F and rainfall slows to a trickle. The trick isn’t just watering more… it’s watering smarter. With the right strategies, you can conserve water, keep your crops thriving, and reduce garden stress without driving up your utility bill or hauling buckets across your yard at dusk.
Let’s talk real-world solutions that are simple, sustainable, and work for homesteaders across the U.S.
Homestead Water Conservation Techniques That Actually Work
The goal here is efficiency. You want your plants hydrated, but you also want to waste as little water as possible. That means:
- Watering deeply but less often, encouraging strong root systems.
- Focusing on early morning or late evening watering to minimize evaporation.
- Prioritizing crops that need water most — your fruiting vegetables and leafy greens — over those that can go longer without a drink.
“Iowa summers can be unpredictable,” says Grace, a second-year homesteader. “I learned to stop watering everything every day and start watering where it counted — it saved me time and the garden looks better than ever.”
How to Set Up a Simple Drip Irrigation System
Drip irrigation is a game-changer when homesteading in mid-summer — it waters your plants at the root zone, right where they need it most.
Here’s a quick setup guide:
- Use a basic hose timer to automate watering at dawn and dusk.
- Lay down 1/2-inch drip tubing or soaker hoses between rows.
- Connect emitters or punched holes at the base of each plant.
- Anchor with landscape staples and cover with mulch for protection and efficiency.
Budget tip: Many local conservation districts or Extension offices offer rebates or discounts for first-time drip irrigation setups.
Mulching Strategies to Lock in Moisture
Mulch isn’t optional in the heat — it’s essential. Think of it as your soil’s sunscreen.
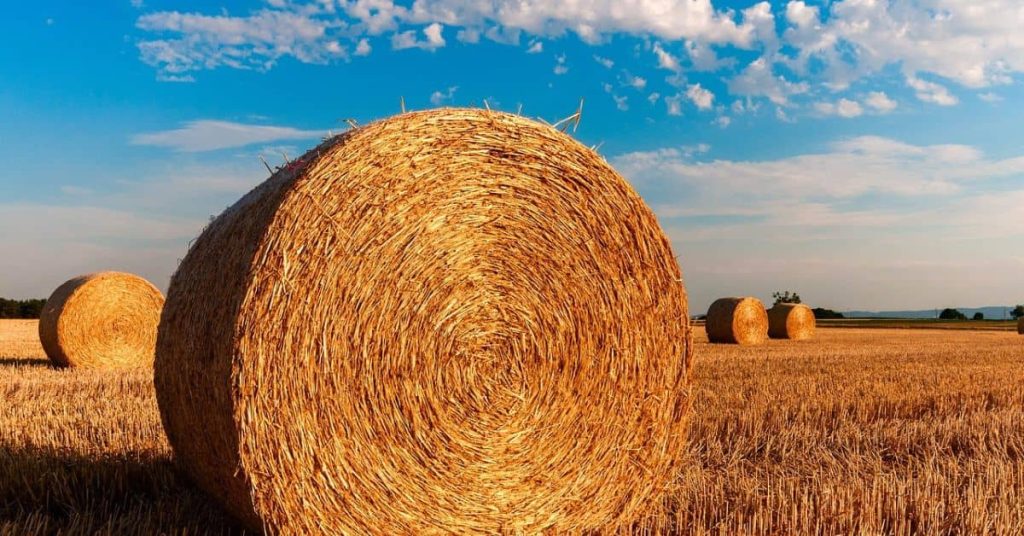
Best mid-summer mulch materials:
- Straw or grass clippings (let them dry first)
- Shredded leaves or wood chips (best for trees and perennial beds)
- Compost topped with straw — dual function for nutrients and moisture
Spread 2–4 inches around plants, keeping it an inch away from stems to prevent rot. Bonus: It keeps weeds down too.
“The year I mulched heavy, my peppers doubled,” says Tom in Texas. “I didn’t even realize how much water I was losing to evaporation until I saw the difference.”
Composting in Hot Weather: Do’s and Don’ts
Compost piles can dry out fast in summer — or worse, get smelly and slimy. Here’s how to keep yours thriving in the heat:
DO:
- Turn the pile weekly to aerate.
- Water lightly to keep it damp like a wrung-out sponge.
- Cover with a tarp or lid to retain moisture and heat.
DON’T:
- Add too much wet green waste without balancing with dry “browns.”
- Let your pile sit exposed to the hot sun (dries out and slows down microbes).
- Overwater — soggy compost turns anaerobic and stinks.
How to Make and Use Compost Tea in Summer Heat
Compost tea gives your plants a gentle, organic boost — especially useful when they’re heat-stressed.
Quick brew method:
- Fill a 5-gallon bucket ¾ full with water (let it sit for 24 hours if using tap).
- Add a shovel of finished compost in a mesh bag or old pillowcase.
- Stir occasionally and steep for 1–2 days in the shade.
Use this tea to:
- Water seedlings or newly transplanted crops.
- Foliar spray in the evening for quick nutrient uptake.
- Rehydrate soil around heavy feeders like tomatoes, corn, or squash.
“I call it garden Gatorade,” laughs Lena from Georgia. “My tomato plants perk right up the morning after a compost tea soak.”
Water Smarter, Not Harder
Whether you’re facing a dry July in Montana or a humid August in Alabama, conserving water is one of the smartest moves you can make when homesteading in mid-summer. From drip systems to compost tea, these little shifts can yield huge returns in plant health, water savings, and peace of mind.
Tip 3: Shade and Shelter: Keep Plants and Animals Cool

If there’s one thing homesteading in mid-summer teaches you quickly, it’s that both plants and animals need relief from the heat — just like we do. Scorched lettuce, panting goats, wilting tomato vines… it all starts to pile up fast when the thermometer climbs. But with a few budget-friendly shade and airflow strategies, you can keep your entire homestead breathing a little easier.
Let’s walk through some tried-and-true ways to bring the temperature down without breaking the bank.
DIY Shade Solutions for Homesteads on a Budget
Shade doesn’t need to be expensive or fancy — just practical. Whether you’re protecting your garden, animals, or work areas, there are lots of low-cost ways to beat the heat:
- Old bedsheets or tarps: Drape them over trellises, hoop houses, or fences.
- Pallet boards or scrap lumber: Build quick lean-to shelters for goats, rabbits, or even raised beds.
- Upcycled patio umbrellas: Great for movable shade over individual plants or chicken dust baths.
“I zip-tied an old beach umbrella to my raised beds in Kansas last year,” laughs Shawn, a backyard grower in Zone 6b. “Not pretty — but my basil was the only thing in the neighborhood still standing after that heat wave.”
Creating Natural Windbreaks and Tree Canopies
If you’ve got the space (and the patience), natural shade is the most sustainable kind.
Try:
- Planting fast-growing trees like hybrid poplar or mulberry on the west side of your garden or coop for afternoon shade.
- Using tall crops like corn or sunflowers as natural barriers against wind and harsh sun.
- Training vining plants (like runner beans or grapes) over an arbor or hoop frame to cast filtered shade over lettuce or spinach beds.
Not only do these methods reduce temperature and evaporation — they also add beauty and biodiversity to your homestead.
Shade Cloth Placement for Maximum Efficiency
Shade cloths are a summer homesteader’s secret weapon — especially if you’re in places like Arizona, Texas, or inland California where the sun is relentless.
Here’s how to use them well:
- Use 30–50% shade cloth for most vegetables. Go higher (60–70%) for lettuce, spinach, or baby greens.
- Suspend cloths above your crops, not directly on them, to allow air circulation.
- Install at an angle (slanted toward the afternoon sun) to block the strongest rays.
Bonus Tip: Install removable hooks so you can take shade cloths down on cloudy or cooler days.
Solar-Powered Fans for Barns and Chicken Coops
When airflow stops, the heat gets dangerous — especially in enclosed spaces like coops or goat sheds.
Solar-powered fans are a game-changer for off-grid homesteading in mid-summer:
- They help move stagnant air and reduce moisture buildup.
- They’re easy to set up and require zero electrical wiring.
- Many models run automatically when the sun hits the panel — which is when you need them most.
Mount one on a coop vent or inside a small barn and pair it with a misting system for instant relief.
“We added a $35 solar fan to the coop this year and haven’t lost a single bird to heat stress,” shares Lily from Georgia. “Worth every penny — and it runs itself!”
Building Low-Cost Shelters Using Reclaimed Materials
If you’re handy with a hammer (or even if you’re not), reclaimed wood, pallets, and metal roofing can build:
- Shade lean-tos for sheep or goats
- Covered work benches for food prep or outdoor tool use
- Walk-through trellises that double as garden shade
Pro tip: Check local Craigslist or Facebook Marketplace for free barn removal or scrap wood listings — many farmers are just happy to see it hauled off.
Staying Cool
When you’re homesteading in mid-summer, thinking ahead about shade and airflow isn’t optional — it’s vital. But you don’t need a big budget or fancy supplies to protect your crops and animals. With a little creativity (and maybe a leftover tarp or two), you can beat the heat and keep things running smoothly right through the season.
Tip 4: Plan for Heat-Tolerant Livestock Care
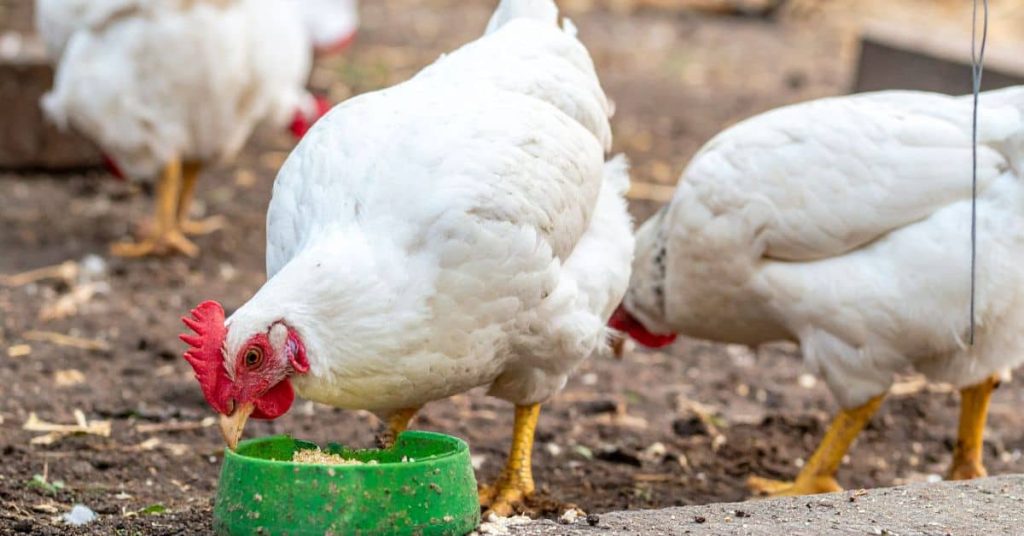
One of the most important — and often overlooked — parts of homesteading in mid-summer is making sure your animals are just as comfortable as your crops. Chickens pant, goats go sluggish, rabbits stop eating, and dairy output drops when the mercury climbs. The good news? With the right care and planning, your livestock can not only survive the heat, but stay healthy and productive through it.
Let’s walk through a few neighbor-to-neighbor tips to help you prep your pastures, coops, and barns for summer success.
Managing Livestock in Summer Heat: A Survival Guide
Here’s the deal: if you’re feeling the heat, your animals are too — only they can’t strip down or head for the AC. That’s why it’s up to us to build a game plan for the hottest weeks of the year.
Start with these essentials:
- Ample, clean water access — not just one trough, but multiple refillable points if you can.
- Plenty of airflow and shade, whether from trees, shelters, or covered pens.
- Minimal midday stress — do chores early or late and avoid handling animals in peak heat.
“My pigs won’t touch food after 11 a.m. in July,” says Reed, a pastured pork farmer in Missouri. “I’ve learned to feed at 6 a.m. and again after 7 p.m. — it keeps them calmer and healthier.”
Choosing Heat-Resistant Breeds for Poultry and Livestock
Not all breeds are built for summer survival. If you’re just starting out or adding to your flock/herd, here are some smart, heat-tolerant options to consider:
Poultry:
- Leghorns – Light-bodied, active layers that thrive in warmer climates.
- Egyptian Fayoumi – Heat-hardy and excellent foragers.
- Red Stars – Productive and adaptable.
Goats:
- Kiko and Spanish goats – Known for heat tolerance and parasite resistance.
Cattle:
- Brahman crosses – Especially suited for the South and Southwest.
- Dexters – Smaller size means less heat stress in tight paddocks.
Rabbits:
- Californian and Satin breeds – Better suited for hot climates than thick-furred giants.
How to Keep Livestock Hydrated in High Temperatures
This may sound obvious, but water is your #1 ally in summer livestock care. Here’s how to stay ahead of dehydration risks:
- Use automatic float valves or large-volume buckets and refill at least twice daily.
- Place extra buckets in shaded spots around pens or pastures.
- Freeze gallon jugs of water and drop them in troughs for temporary cooling.
- Mix electrolytes or apple cider vinegar into water for chickens or goats on especially hot days.
“In Tennessee, I keep a frozen water bottle in my rabbit cages all summer,” shares Lila, a backyard homesteader. “They lean against it when they need a break from the heat.”
Top-Rated Livestock Waterers and Cooling Systems
If you’ve got a little room in your budget, these items go a long way toward summer comfort:
- Rubbermaid stock tanks – Durable and easy to clean.
- Nipple waterer systems for poultry – Cleaner and more efficient than open pans.
- Misting systems – Excellent for shade structures and coops.
- Solar-powered fans – Ideal for barns without electricity.
Pro Tip: Consider burying part of your water line to reduce heat buildup in hoses and spigots — especially if you live in zones 7–10.
Bedding and Shelter Adjustments for Hot Weather
Winter bedding strategies won’t cut it in July.
Try this:
- Switch from deep litter to light straw or wood shavings and clean more frequently.
- Use elevated pallets or slatted floors to improve airflow under bedding.
- Provide portable shelters with open sides to allow breeze but block sun.
And don’t forget — even a tarp between trees or a scrap-metal lean-to can provide life-saving shade when the heat index soars.
Don’t Sweat It, Plan It
When it comes to homesteading in mid-summer, your livestock will thank you for thinking a step ahead. Shade, water, and smart breed choices can make all the difference between a stressful heat wave and a smooth summer season.
Tip 5: Maximize Harvest with Mid-Summer Preservation
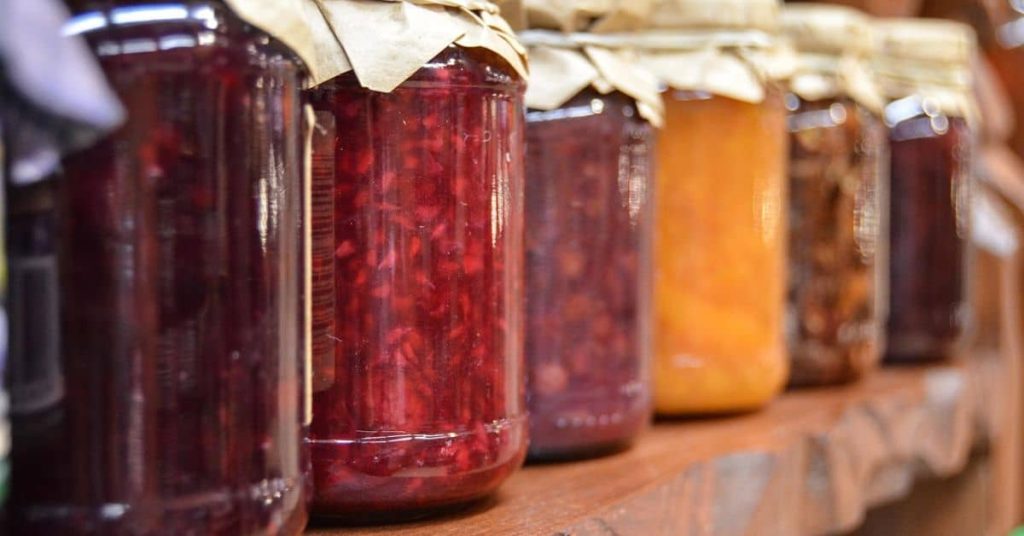
If your garden is bursting with more tomatoes, squash, and beans than you know what to do with—congrats, you’re deep into homesteading in mid-summer. But let’s be honest: while a bountiful harvest feels great, the pressure to use it all before it spoils? Not so fun.
Whether you’re new to food preservation or just looking for ways to make it feel less overwhelming, this is your moment to build up a winter pantry while keeping your sanity intact.
How to Preserve Summer Harvest Without Overwhelm
Here’s the golden rule when preserving food in mid-summer: you don’t have to do it all at once.
Try breaking things down:
- Pick one crop per day to process (e.g., Monday is beans, Tuesday is peaches).
- Batch wash and prep produce early in the morning before the house heats up.
- Freeze anything you don’t have time to deal with—just blanch, label, and bag it.
“I used to stress myself out trying to can everything at once,” says Heather, a homesteader in Kentucky. “Now I keep a simple log of what I froze or canned each day, and it adds up fast without the burnout.”
Canning Basics: Water Bath vs. Pressure Canning
If you’ve never canned before, homesteading in mid-summer is the perfect time to start. Most folks begin with water bath canning, which is ideal for:
- Tomatoes
- Jams and jellies
- Pickles and relishes
You’ll just need a deep pot, a rack, and canning jars with lids. Add boiling water, time it right, and voila — shelf-stable food.
Pressure canning, on the other hand, is necessary for:
- Green beans
- Corn
- Meat and soups
It involves a bit more equipment (and confidence), but once you get the hang of it, it opens up a whole new world of food storage.
Pro Tip: Add a splash of bottled lemon juice to tomatoes before water bath canning — it boosts the acidity for safe storage.
Freezing and Vacuum Sealing for Long-Term Storage
Sometimes the best solution is the simplest. If you’ve got a freezer and a few zip-top bags or a vacuum sealer, you’re good to go.
Great items to freeze include:
- Berries and stone fruits (spread them out on trays first, then bag)
- Corn off the cob
- Chopped peppers and onions
- Shredded zucchini (perfect for winter baking)
Use vacuum sealing to extend freezer life and protect against frost. Label everything with the date and rotate your stock as you go.
“My frozen peach slices saved me this January,” laughs Dani from Alabama. “They tasted like sunshine when the trees were bare and cold wind was blowing.”
Root Cellaring: An Age-Old Method That Still Works
For those in northern or cooler climates, root cellaring is a traditional way to store produce without electricity.
You’ll need:
- A cool, dark, and humid space (think basement, buried barrel, or even an old fridge unplugged in the shed).
- Sawdust, straw, or sand to keep veggies insulated and moist.
What stores well:
- Potatoes, carrots, turnips, parsnips
- Apples (wrapped individually in newspaper)
- Winter squash and sweet potatoes (in warmer, dry corners)
The beauty of root cellaring is that once you set it up, the rest is mostly hands-off.
Trusted Guidelines from the National Center for Home Food Preservation
Want to be absolutely sure your food preservation methods are safe? Stick to tested recipes from the experts:
National Center for Home Food Preservation
They offer:
- Step-by-step canning instructions
- Safe acidity and processing times
- Free printable guides and checklists
Bookmark it now—it’s the best safety net for beginner and seasoned canners alike.
Preserve the Season While It’s Fresh
When you’re homesteading in mid-summer, preservation is your secret weapon. It turns the chaos of an over-productive garden into calm satisfaction come January. And the best part? You don’t have to be a pioneer or spend a fortune on gear — just take it one small batch at a time.
Tip 6: Stay Ahead of Pests and Disease

If there’s one thing that loves the heat as much as your tomatoes — it’s garden pests. Aphids, squash bugs, hornworms, and fungal diseases can swoop in just when you’re finally getting those zucchini to grow. That’s why staying proactive with pest and disease control is absolutely essential when homesteading in mid-summer.
The good news? You don’t need harsh chemicals or a full-time entomologist to keep your garden healthy. Let’s go over some practical, neighbor-approved strategies to help you stay ahead of the bugs and blights.
Summer Pest Control for Gardens: What Works Best
By mid-July, pest pressure ramps up in nearly every U.S. region. The combination of heat, humidity, and ripe produce creates the perfect buffet for unwanted visitors.
Here’s your general approach:
- Inspect daily: Walk your garden each morning while it’s cool and catch pest problems early.
- Remove by hand: Yes, it’s old-school — but flicking hornworms into a jar of soapy water works.
- Rotate crops: Avoid planting the same crops in the same spots each year to break pest life cycles.
“We got overrun by squash bugs two summers ago,” says Jeremy in Kansas. “Now I plant nasturtiums nearby and check under every leaf at least twice a week. Way fewer issues since I got ahead of them early.”
Identifying and Controlling Common Mid-Summer Pests
Here’s a cheat sheet of mid-summer troublemakers and what to do about them:
- Squash bugs: Look for clusters of coppery eggs on the underside of leaves. Remove them immediately and use row covers early in the season.
- Tomato hornworms: Big green guys that munch fast. Pick them off or attract parasitic wasps (they look like tiny white eggs on the worm’s back).
- Cabbage loopers: Use floating row covers and BT spray (a safe, organic caterpillar control).
- Aphids: Blast with a hose or spray with soapy water — don’t let them settle in.
Keep in mind that pest issues vary by zone. For example:
- Florida and the Southeast see more whiteflies and root-knot nematodes.
- Northern states deal more with flea beetles and cutworms.
Organic Pest Control Products That Are Safe and Effective
There’s a sweet spot between “do nothing” and “nuke the garden.”
Here are a few organic-friendly tools most homesteaders swear by:
- Neem oil: A natural insecticide/fungicide that disrupts pest life cycles.
- Diatomaceous earth (DE): A fine powder that dries out soft-bodied insects like slugs and earwigs.
- Insecticidal soap: Great for aphids and spider mites — just don’t use during full sun.
- BT (Bacillus thuringiensis): A bacteria that specifically targets caterpillars.
“I mix neem oil and castile soap once a week and spray in the evening,” says Tina in North Carolina. “Keeps my tomatoes clean and my conscience clear.”
Companion Planting as a Natural Pest Defense
This is where homesteading in mid-summer gets smart. Planting the right crops together not only saves space — it can repel pests, attract pollinators, and improve yields.
Here are some proven combos:
- Basil + tomatoes: Repels hornworms and improves flavor.
- Marigolds + squash or beans: Discourage nematodes and beetles.
- Nasturtiums + cucumbers: Act as a trap crop for aphids and beetles.
- Chives + carrots: Repel carrot flies.
“I plant marigolds on the ends of every raised bed,” shares Linda from Idaho. “I don’t even like flowers that much — but I love pest-free peppers!”
How to Use Neem Oil and Diatomaceous Earth Safely
Both of these are excellent tools — but you need to use them wisely.
Neem Oil Tips:
- Always dilute as directed (usually 1–2 tablespoons per gallon).
- Spray in the early morning or evening to avoid leaf burn.
- Reapply every 7–10 days or after heavy rain.
Diatomaceous Earth Tips:
- Apply to dry soil/leaves only — it stops working when wet.
- Focus on the base of plants, where crawling insects travel.
- Wear a mask when applying — the powder can irritate your lungs.
Be Proactive, Not Reactive
When homesteading in mid-summer, pest and disease control is all about staying one step ahead. A daily walk-through, a few well-placed companion plants, and a bottle of neem oil in the garden shed can save your entire season’s effort. The key? Don’t wait until something’s visibly wrong. Prevent, observe, and act early.
Tip 7: Use Mid-Summer for Homestead Maintenance

When you’re homesteading in mid-summer, the temptation is to focus entirely on harvests, weeds, and heat management. But don’t forget — this is also one of the best times to catch up on all those maintenance tasks that slipped through the cracks during spring planting. With longer daylight hours and (hopefully) a more predictable routine, now’s the perfect window to get ahead of repairs and cleanup before fall rolls in.
So grab your gloves, take a look around, and let’s tune up your homestead with some good old-fashioned DIY.
DIY Repairs for Homesteaders Before Fall Arrives
Mid-summer maintenance isn’t just about aesthetics — it’s about preventing emergencies when the weather turns cooler. Tackling small fixes now can save you from bigger, pricier problems down the road.
Start by walking your property and jotting down anything that looks worn or weak:
- Sagging gates
- Cracked garden bed corners
- Leaky hose connections
- Drafty spots in your coop or barn
“In July, I always patch up what I call my ‘quiet failures’ — the things that haven’t broken yet but are just waiting to,” says Tommy from Nebraska. “That 30 minutes of patching in summer saved me two days of scrambling in November.”
Fencing Fixes Every Homesteader Should Know
Fences take a beating during spring growth and early livestock rotation. Mid-summer is a great time to:
- Check for loose staples and nails on wooden fences
- Walk electric fencing lines and test voltage
- Replace cracked or brittle insulators
- Tighten sagging wire or woven wire panels
Tip: Use T-post clips and a handheld fencing tool to make fast repairs without dragging out your whole toolkit.
Tool Sharpening Tips for Longer-Lasting Equipment
Nothing slows you down like dull tools — and let’s be real, mid-summer weeds don’t wait.
Set aside one morning to:
- Sharpen pruners, hoes, and loppers using a file or whetstone
- Clean off sap or rust using steel wool and vinegar
- Oil wooden handles to prevent cracking and splinters
Store sharpened tools in a dry place or hang them up to reduce wear.
“I’ve had the same garden shears for seven years,” says Mel from North Carolina. “I sharpen and oil them every July and they work like new.”
Coop Cleaning and Irrigation Checks for Healthier Systems
High heat and humidity can quickly turn coops and water systems into breeding grounds for bacteria and flies. Mid-summer is the time for a deep clean.
For coops:
- Remove all bedding, clean with a vinegar-water mix, and let it air dry fully.
- Re-line with fresh straw or pine shavings.
- Check ventilation and consider adding shade or a solar-powered fan.
For irrigation:
- Flush out drip lines and check for blockages or leaks.
- Make sure sprinkler heads aren’t clogged with dirt or calcium.
- Inspect rain barrels or water storage tanks for algae or sediment buildup.
“We clean our coop solid once a season and mid-summer is the sweet spot,” says Rachel in Utah. “It keeps smells down and the birds lay better when things are tidy.”
Inventory and Organize Feed, Supplies, and Tools
August is the perfect time to restock before fall — without the rush.
Here’s a checklist:
- Count bags of feed, scratch grain, and hay bales — how long will they last?
- Check expiration dates on meds, supplements, and sprays.
- Clean and reorganize your tool shed or barn aisle to make fall prep easier.
Label bins, sweep the floor, and make a list of what to buy before autumn hits.
“I do a full inventory while the kids are swimming,” laughs Marissa in Ohio. “That way I know exactly what I need before fall and I don’t overspend at the feed store.”
A Little Maintenance Goes a Long Way
Homesteading in mid-summer isn’t just about picking tomatoes and fighting weeds — it’s also about protecting everything you’ve worked so hard to build. A morning spent sharpening tools, fixing fences, or deep-cleaning your coop might not feel glamorous, but come fall, you’ll be thanking yourself.
Tip 8: Prep for Fall: What to Start Planting Now

It may feel like the season is winding down, but ask any seasoned grower and they’ll tell you: homesteading in mid-summer isn’t the end of the garden season — it’s the turning point. Right now, while the tomatoes are still pumping and the zucchinis keep multiplying, it’s also the ideal moment to start prepping your soil (and your mindset) for a productive fall garden.
Let’s roll up our sleeves and plan for that second wave of abundance.
Preparing for Fall Planting in Late Summer
Late July through early September is your sweet spot. You’re looking for crops that mature quickly, tolerate cooler nights, and can handle shortening daylight.
Start by refreshing your beds:
- Pull out any spent or diseased summer crops.
- Add compost to restore nutrients.
- Water deeply and let the soil rest for 2–3 days before planting.
“By the end of July, I’m already pulling out my succession planting chart,” says Danielle from Iowa. “My fall kale tastes better than my spring batch — the cold sweetens it up!”
Fast-Growing Fall Crops to Plant in August
Here are some superstar fall crops that love a late summer start and thrive as the temps cool:
- Radishes – Harvest in as little as 25 days!
- Turnips – Perfect for soups or roasting, ready in 45–60 days.
- Bush beans – If your zone allows (Zones 6+), you might squeeze in a second crop.
- Beets – Both roots and greens are harvestable in 55–70 days.
- Carrots – Choose early maturing varieties (e.g., Napoli or Mokum).
Tip: Don’t forget to check your USDA planting zone and count backward from your expected first frost date. That’s your planting deadline.
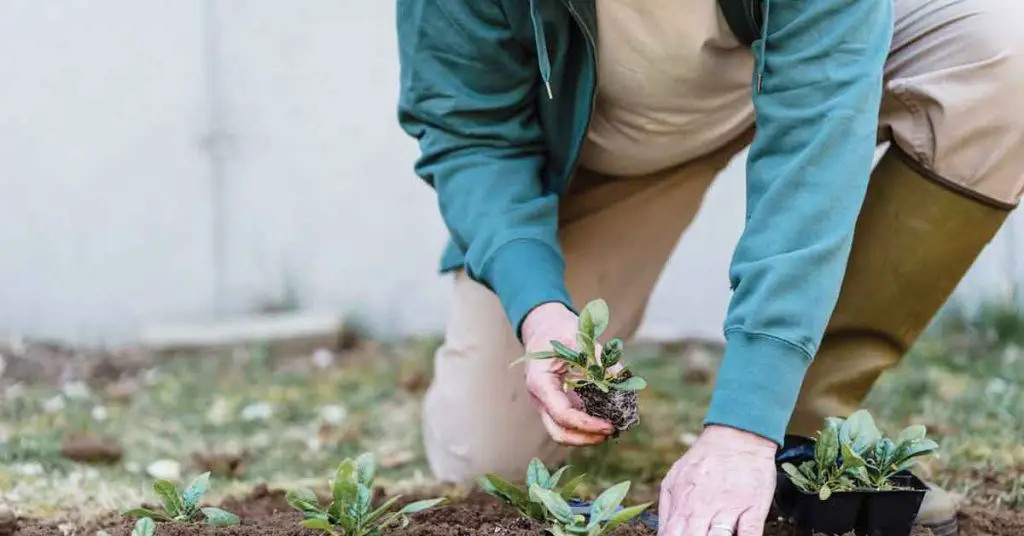
Starting Cool-Weather Greens in Partial Shade
While the sun is still strong, delicate greens need a little protection to get started.
Try this setup:
- Plant lettuce, kale, mustard greens, and spinach in the shade of taller crops like corn or tomatoes.
- Use a 30–40% shade cloth if needed to prevent bolting.
- Water gently and consistently — early morning is best.
“I use the west side of my shed to start all my fall greens,” says Miguel from Arizona. “That shade gives me a 10-degree advantage in August.”
Using Cold Frames and Row Covers to Extend Your Season
Looking to push your harvest well into November? A simple cold frame or row cover setup makes all the difference — especially in zones 5–7.
What to try:
- Cold frames made from old windows or clear plastic totes work great for lettuces, carrots, and herbs.
- Floating row covers protect against light frost while allowing airflow.
- Low tunnels made with PVC and greenhouse plastic are ideal for spinach and beets.
You’ll not only protect your plants from cold snaps, but also from late-summer pests.
Ordering and Storing Garlic, Onions, and Fall Seeds
Fall is prime time to plant garlic and overwintering onions, especially in northern states.
Here’s how to stay ahead:
- Order your garlic in July or August — popular varieties sell out fast.
- Store bulbs in a cool, dry place until planting (usually 4–6 weeks before your ground freezes).
- Buy extra seeds for fall and early spring sowing, especially cool-season greens and hardy herbs like parsley and cilantro.
“I plant my garlic in mid-October here in Ohio,” says Jess. “Come July, I’ve got huge, flavorful bulbs and barely any weeding to do.”
Plant Now, Harvest Later
If you think the best days of the growing season are behind you — think again. Homesteading in mid-summer is your chance to regroup, refresh your beds, and set yourself up for a truly satisfying fall harvest. Whether it’s carrots, collards, or garlic, a little effort now can bring you leafy greens and root veggies just when everything else starts to fade.
Tip 9: Check Your Energy Efficiency
When you’re homesteading in mid-summer, energy use can quietly creep up. Fans run longer, water pumps work overtime, and your battery bank might be working harder than your rooster at sunrise. But here’s the thing — this is also the perfect time to take a step back and evaluate how your energy setup is holding up. A few small tweaks now can save you real money, preserve your equipment, and keep your homestead running smoothly, even on the hottest days.
Let’s talk practical energy-saving tips — whether you’re on the grid, off-grid, or somewhere in between.
Solar-Powered Homesteading Tips for Mid-Summer
Sunshine is one thing you’ve probably got plenty of this time of year, so make it work for you. Homesteading in mid-summer is ideal for reviewing your solar setup — both where you’re gaining and where you might be losing.
Start with:
- Cleaning your panels: Dust, pollen, and bird droppings can cut solar efficiency by 10–15%.
- Checking connections: Look for loose wires or corrosion around the charge controller and batteries.
- Evaluating output: Monitor daily wattage — if it’s lower than expected, it might be time to reposition panels or upgrade components.
“After I wiped down my panels with vinegar water in July, I saw a 12% boost in charging,” says Rob from Utah. “I couldn’t believe how much buildup there was.”
Where to Install Panels for Maximum Exposure
Not all sun is equal, and even a single afternoon shadow can dramatically affect panel output. Here’s what to consider:
- Face panels true south (in the U.S.) for maximum exposure.
- Avoid placing panels near trees or tall structures that cast shade during midday.
- Use tilting racks to adjust the panel angle throughout the year — steeper in winter, flatter in summer.
Bonus Tip: Apps like Sun Surveyor or PVOutput help you visualize sun paths and monitor performance by zone.
Off-Grid Cooling Tips to Beat the Heat Naturally
Let’s be real — AC isn’t usually an option on a solar setup. But you can still stay cool with smart strategies:
- Use thermal curtains or reflective window film in south- and west-facing windows.
- Set up ventilation pathways in barns, sheds, and living areas to encourage passive airflow.
- Build shade structures over animal housing and workspaces using scrap metal, pallets, or reclaimed wood.
“We built a grape arbor outside the kitchen window and it dropped the indoor temp by 6 degrees,” says Ashley from Tennessee. “Plus, we get fruit!”
Improving Barn and Coop Ventilation on a Budget
Barns and coops heat up quickly, and poor airflow can lead to heat stress in animals — especially chickens and rabbits. Here’s what you can do on a shoestring:
- Add vents near the roofline and low to the floor for convection cooling.
- Use solar-powered exhaust fans — most models start under $50.
- Cut openings and cover with hardware cloth for predator-safe airflow.
- Install removable panels or roll-up sides on hoop houses and sheds.
“I swapped the solid door on my goat barn with a screen door in July,” says Monica in Texas. “The difference in smell, flies, and animal mood was immediate.”
How to Reduce Battery Drain During Peak Use Hours
Even the best batteries need a break when it’s hot. Mid-summer is prime time for energy spikes, so managing battery usage is critical:
- Run high-drain appliances (blenders, well pumps, etc.) during peak sunlight hours (10 a.m. – 3 p.m.).
- Use DC appliances wherever possible — they’re more efficient for off-grid setups.
- Install a battery monitor to track usage and avoid over-discharge.
Also, consider adding a second backup charge source, like a wind turbine or even a manual crank well pump for emergencies.
Small Fixes, Big Gains
Homesteading in mid-summer isn’t just about tending your crops and animals — it’s also about making sure your energy system can handle the season’s demands. A little effort goes a long way when it comes to maintaining your solar panels, airflow, and off-grid efficiency. You don’t need to overhaul your whole system; you just need to stay ahead of the heat.
Tip 10: Connect with Other Homesteaders for Support

Let’s be honest — homesteading in mid-summer can be isolating. While the tomatoes are exploding and the goats are cranky in the heat, it’s easy to feel like you’re the only one fighting through it all. But here’s the truth: you’re not alone. There’s a thriving, generous community of homesteaders out there who’ve been where you are — and they’re full of tips, encouragement, and even a few laughs to share.
Whether you need a troubleshooting trick, a new preserving recipe, or just someone who gets it, reaching out can make all the difference.
Reddit Homesteading Community Summer Advice You Can Trust
Reddit might surprise you — it’s one of the most active, honest, and helpful spaces for modern homesteaders.
Check out:
- r/homestead: A go-to for general Q&A, photos, and progress updates
- r/smallfarms: Ideal for those growing for markets or looking to scale up
- r/Permaculture: A goldmine for sustainable practices and zone-based advice
Search threads like:
- “What crops are thriving for you in Zone 7 right now?”
- “My tomato plants are stalling in the heat — what now?”
- “Best shade setup for laying hens?”
“I’ve learned more about dealing with squash bugs from Reddit threads than any book,” laughs Anna from Kentucky. “People aren’t shy — and that’s exactly what I need when I’m stuck.”
Tip: Use the search bar to look for mid-summer topics by region. It’s a lifesaver for hyper-local advice.
Must-Join Facebook Groups and Online Forums
Facebook still holds strong when it comes to real-time support and group wisdom. Many groups have tens of thousands of active members posting daily about summer planting, heat stress solutions, and food preservation.
Top picks:
- Homesteading Today
- Homesteaders Of America Community
- Off Grid and Homestead Ladies
- Canning, Preserving, Jam making and everything else
And don’t forget regional options — search your state + “homesteaders” to find neighbors in your climate zone.
“Our Iowa Homesteaders group just helped me solve a mystery duck illness last week,” says Greg. “Turns out I wasn’t the only one seeing weird behavior during the heat spike.”
YouTube Mid-Summer Homesteading Tutorials to Follow
Need visual, step-by-step help from folks who walk the talk? YouTube is a treasure trove of summer-specific content.
Search for:
- “How to mulch your garden for summer drought”
- “DIY goat shade shelter from pallets”
- “Canning beans from the garden”
- “Solar dehydrator build mid-summer”
Reliable channels for mid-summer content:
- Roots and Refuge Farm – Honest, heartfelt advice with a Southern lens.
- Homesteading Family – Step-by-step skills from a big Idaho-based crew.
- This Farm Wife – Meredith Bernard – Relatable humor and behind-the-scenes looks at a working farm.
“I watched a YouTube video on solar fans for coops — built mine the next day!” shares Tom in Alabama. “Best $30 upgrade I’ve ever made.”
How to Find and Attend Local Fairs and Extension Workshops
While online communities are great, sometimes the best help is in-person, hands-on learning — especially during the summer.
Here’s where to start:
- Check your local county extension office website — they often offer free workshops on canning, composting, and garden pest ID.
- Search for county fairs, seed swaps, or community garden events near you (often held July–September).
- Visit your local farmers market and ask vendors what events or groups they recommend — chances are, they’re already connected.
Bring a notebook and business cards (or a sheet of paper with your contact info). Summer events are a great place to meet mentors, barter goods, or even find used tools and livestock for sale.
You’re Part of Something Bigger
Homesteading in mid-summer can feel like a sweaty solo mission — but it’s really a team effort when you tap into the wisdom of others. Whether it’s an online message board, a YouTube tutorial, or chatting with a neighbor at the farmers market, community is what makes homesteading sustainable, joyful, and doable.
Tip 11: Review Your Homesteading Goals and Adjust

Let’s take a deep breath. You’ve made it through planting season, fought off weeds and pests, and you’re still standing — maybe a little sunburned, maybe a little tired — but your homestead is still growing. That’s no small feat. Homesteading in mid-summer is the perfect time to pause, reflect, and ask: Is what I’m doing working for me, my land, and my family?
This isn’t about being perfect. It’s about getting smarter and staying flexible — two traits every successful homesteader learns over time.
How to Start Homesteading with No Experience
If this is your first year — or even your first few months — welcome. You’re not behind. In fact, this part of the season is the best teacher you’ll find. The heat, the bugs, the water shortages… they all show you what’s truly important.
Start where you are:
- Keep a simple list of what went right and what totally flopped (and don’t worry — we all have flops).
- Choose one area to improve before fall — whether it’s soil health, composting, or better animal care.
- Talk to people. Ask questions. Visit a neighbor’s homestead or join an online forum. Nobody learns this life alone.
“I burned out my first year trying to do everything,” says Karen from Indiana. “Now I pick three priorities per season — and let the rest be learning opportunities.”
Journaling Lessons Learned and Planning Ahead
Mid-summer is a great time to pull out your notebook (or that dusty garden journal you meant to use) and jot down what’s working.
Try writing these prompts:
- What surprised me this season — good or bad?
- Which crops did better than expected, and why?
- Where did I waste the most time or resources?
- What do I wish I’d planted more or less of?
You’ll thank yourself come January when you’re ordering seeds or plotting next year’s pasture rotation.
“My ‘mid-season journal’ is just a note on my phone, but I update it every year,” shares Daniel from Missouri. “It keeps me sane when I’m overwhelmed.”
What Qualifies You as a Homesteader (Legally and Practically)
There’s no single definition of a homesteader — and that’s kind of the beauty of it. Whether you’ve got 5 acres and goats or a patio garden and some hens, you’re part of the movement.
That said, if you’re aiming for legal recognition or tax breaks, here’s what to know:
- In many states, including Iowa, Missouri, and Texas, homestead exemptions apply to your primary residence, offering tax relief or protection from certain debts.
- Some counties define “ag use” or homestead eligibility based on your land use (raising livestock, growing crops, etc.).
- Check with your local assessor’s office or extension agent to learn the specifics for your state.
But in practical terms? A homesteader is someone actively working toward self-reliance — whether through food production, energy conservation, DIY repairs, or community building.
“You don’t need to ‘qualify’ for this life,” says Jay, a backyard grower from Ohio. “If you care for your land and try to improve each season, you’re doing it.”
Budgeting and Resource Use: How to Assess Mid-Summer Efficiency
July and August are notorious for hidden costs — whether it’s unexpected water bills, last-minute shade fixes, or running to the feed store (again).
Do a quick audit:
- How much have you spent this season on feed, irrigation, fencing, etc.?
- Where are you seeing returns — in harvests, eggs, savings on groceries?
- Are there low-cost or free alternatives to any recurring expenses?
Now’s the time to adjust your spending, buy in bulk before fall, and set realistic budgets for any big winter or spring projects.
Tip: Sites like Budget101 or your local extension service often have homestead-specific tracking sheets and calculators.
Resetting Your Goals Before the Fall Rush Hits
Fall creeps up fast — and the last thing you want is to stumble into it feeling unprepared. Take this moment to reset:
- Choose 1–2 goals to focus on for the next 6–8 weeks.
- Set a timeline: “Build low tunnel over fall bed by Sept. 15” is clearer than “improve garden.”
- Make room for grace: Let go of what didn’t work. Plan for what can still grow.
“I treat August like halftime,” says Linda in Wisconsin. “It’s messy, a little chaotic, but it’s the best time to regroup and play smarter in the second half.”
Progress Over Perfection
If homesteading in mid-summer has left you sweaty, sore, and second-guessing your choices — you’re doing it right. Growth comes with heat, effort, and reflection. And right now, you’ve got everything you need to finish the season strong, smarter, and even more prepared for the road ahead.
FAQs About Homesteading in Mid-Summer

Below are some of the most common questions I’m asked about navigating the heat, hustle, and hopes of homesteading in mid-summer across the U.S.
Is homesteading still legal in the U.S.?
Yes, homesteading is 100% legal in the United States. While the original Homestead Act of 1862 is no longer active, many states still offer homestead exemptions, off-grid living allowances, and support for self-sufficient rural lifestyles. Always check your local zoning laws and property codes.
What are the three rules for homesteaders?
The three (3) core rules most homesteaders live by are:
- Grow your own food whenever possible.
- Reduce reliance on outside systems (utilities, supply chains).
- Use your land responsibly to support sustainability and long-term living.
These aren’t laws — they’re guiding principles to help build a resilient homestead.
Can I start homesteading in mid-summer?
Yes, you can absolutely start homesteading in mid-summer. Begin small with quick-start crops like lettuce, radishes, and bush beans, and focus on water conservation, shade structures, and pest management. It’s also a great time to learn preservation techniques like canning and freezing.
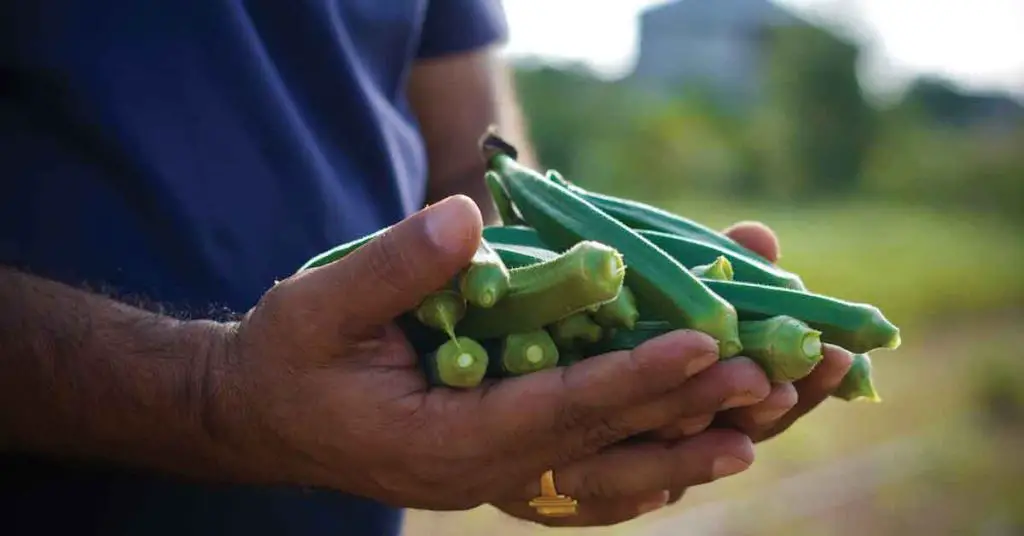
What crops grow best in extreme heat?
Some of the best crops for extreme summer heat include:
- Sweet potatoes
- Okra
- Malabar spinach
- Hot peppers
- Black-eyed peas
These thrive in high temps and still provide great yields with smart watering.
Recap: 11 Smart Tips for Homesteading in Mid-Summer
Homesteading in mid-summer isn’t easy — but it’s incredibly rewarding. By now, you’ve seen how simple actions like adjusting your garden layout, managing water wisely, building shade for animals, and keeping pests in check can make a huge difference in your homestead’s health and productivity. You’ve also learned that this season isn’t just about survival — it’s a perfect time to regroup, connect, and plan ahead for fall.
Here’s a quick reminder of the smart tips we covered:
- Adjust your garden for the summer heat
- Use efficient watering and soil strategies
- Provide cooling shade and ventilation
- Choose and care for heat-tolerant livestock
- Preserve your harvest without overwhelm
- Stay ahead of pests and disease naturally
- Tackle key homestead maintenance tasks
- Plant fall crops while summer’s still here
- Check your energy systems and efficiency
- Connect with other homesteaders for support
- Reflect on your goals and adjust as needed
Each one of these tips can help you build a homestead that’s more resilient, more efficient, and more joyful — even during the toughest stretch of summer.
Now it’s your turn: Try 1–2 of these strategies this week and tell us how it goes. What’s working for you? What’s still a challenge? We’d love to hear your thoughts in the comments!
And if you’re eager to take your seasonal prep even further, check out these helpful follow-up reads:
- 14 Tips for Homesteading in Mid-Spring
- Homesteading in Early Summer: Essential Tips for a Thriving and Productive Season
Let’s keep growing — one season, one lesson, and one smart step at a time.
Disclaimer: The information provided in this article is for general informational purposes only and is not intended to be a substitute for professional advice. The author of this article does not claim to be an expert in homesteading and the information provided should not be relied upon to make decisions about your own homesteading journey. Please do your own research and consult with a qualified professional before making any decisions about your homestead.
Share via:
Shaun Alexander is the main writer and editor for HomesteadingSimple.com. With a strong passion for homesteading and sustainability, Shaun has dedicated his life to learning and sharing information about a simple, fulfilling existence tied to the land. His expertise ranges from gardening and livestock management to off-grid living and DIY projects, reflecting the diverse skills necessary for a successful homesteading lifestyle. Shaun’s goal is to inspire and educate others about the possibilities of homesteading, whether in rural, suburban, or urban settings, and to provide practical advice and tips for both beginners and seasoned homesteaders. He believes in a future where more people return to their roots, embracing a life of self-sufficiency and harmony with nature.