Introduction to Homesteading in Mid-Spring
Mid-spring is a time of renewal and rapid change on the homestead. The frost has faded, the soil is warming, and everything—from your crops to your livestock—is entering a period of intense growth and preparation. It’s a season that requires careful planning, but if done right, it lays the foundation for a thriving homestead in the months ahead.
Whether you’re tending to a garden, managing livestock, or maintaining essential structures, homesteading in mid-spring comes with a unique set of challenges and opportunities. What should you plant right now? How do you keep livestock healthy as temperatures fluctuate? And with unpredictable spring weather, how do you protect your land and resources from the unexpected?
In this guide, we’ll walk through 14 essential mid-spring homesteading tips, covering everything from crop rotation strategies and livestock care to fireproofing your property and adapting to changing weather patterns. These practical, time-tested strategies will help you stay ahead of the season and ensure your homestead is set up for success.
So, grab your work gloves, step outside, and let’s make the most of this season!
Why Mid-Spring is a Critical Season for Homesteaders
Mid-spring is a pivotal time on the homestead. It marks the shift from the unpredictable chill of early spring to the steady warmth of late spring and early summer, bringing a flurry of activity that determines the success of the months ahead. This is when soil conditions improve, livestock require seasonal care adjustments, and infrastructure must be secured before summer’s challenges arrive.
Failing to act during this window can lead to stunted crops, health risks for animals, and avoidable maintenance issues that become much harder to manage later. Understanding why mid-spring matters and what tasks should take priority can make the difference between a homestead that thrives and one that struggles through the growing season.
How Seasonal Changes in Mid-Spring Affect Your Homestead
Mid-spring is a transitional period that influences every aspect of homesteading, from planting schedules to livestock management. The key changes to watch for include:
1. Warming Soil and Extended Daylight
- By mid-spring, soil temperatures rise enough to support a wider variety of crops, making this a critical time to start heat-tolerant vegetables and succession planting for a steady summer harvest.
- Longer daylight hours increase photosynthesis, accelerating plant growth—but also boosting weed and pest activity, requiring early intervention.
Tip: Use a soil thermometer to ensure temperatures are optimal for planting. Generally, above 50°F (10°C) is ideal for warm-season crops.
2. Increased Rainfall and Moisture Management
- Spring showers replenish water sources but can also lead to soil erosion, root rot, and mold issues if not managed properly.
- Excess moisture in livestock areas raises the risk of foot infections, parasite outbreaks, and compromised feed storage.
Tip: Implement mulching to retain soil moisture and prevent erosion. In animal shelters, ensure proper drainage and ventilation to avoid damp conditions.
3. Rising Pest Populations and Disease Risks
- Warmer temperatures activate common garden pests like aphids, flea beetles, and cabbage worms.
- Livestock also face seasonal health concerns, with internal parasites thriving in damp, warm environments.
Tip: Introduce beneficial insects such as ladybugs to control pests naturally and use rotational grazing to minimize parasite infestations in pastures.
4. Peak Energy and Nutrient Demands for Livestock
- As grazing pastures become more abundant, animals shift from winter feed to fresh forage, requiring diet adjustments to prevent bloating and deficiencies.
- Spring birthing seasons demand extra care for newborn livestock, ensuring proper warmth, nutrition, and predator protection.
Tip: Transition livestock to fresh pasture gradually and supplement with minerals like salt blocks to maintain balanced nutrition.
5. Infrastructure Maintenance Before Summer Stress
- Mid-spring is the best time to repair fences, barns, and irrigation systems before summer’s intense heat makes outdoor work more difficult.
- Checking roofing, water troughs, and electrical setups ensures reliable operations when demand increases in the hotter months.
Tip: Perform a full homestead inspection now to prevent costly repairs later. Focus on fixing leaks, securing loose fencing, and testing irrigation efficiency.
The Ultimate Mid-Spring Homesteading Checklist: What You Need to Do Now
To stay ahead of seasonal challenges, use this checklist to tackle essential mid-spring tasks in a timely manner:
Garden & Crop Management
✔ Test soil quality and apply organic compost or amendments
✔ Plant warm-season crops like corn, beans, tomatoes, and peppers
✔ Start succession planting to stagger harvests and maximize production
✔ Install mulch and drip irrigation to conserve water and reduce weeds
✔ Inspect and reinforce trellises, raised beds, and row covers
Livestock & Pasture Care
✔ Transition animals to fresh pasture gradually to prevent digestive issues
✔ Check livestock parasite prevention plans, including natural deworming options
✔ Clean and dry coops, barns, and shelters to reduce disease risks
✔ Ensure birthing areas are safe and properly stocked for newborn animals
✔ Secure fencing and check for predator vulnerabilities
Homestead Infrastructure & Sustainability
✔ Inspect and clean rainwater collection systems before summer dry spells
✔ Repair or reinforce gates, barns, and sheds before summer storms
✔ Maintain or install firebreaks if you live in wildfire-prone areas
✔ Assess solar panels, wind turbines, or off-grid power systems for efficiency
✔ Organize tools, equipment, and storage areas for a more efficient workflow
Pest & Wildlife Management
✔ Introduce beneficial pollinators like bees and butterflies to the garden
✔ Set up natural deterrents to keep deer, rabbits, and rodents out of crops
✔ Monitor compost piles for pest and rodent activity
✔ Apply organic pest control solutions to protect vegetables and fruit trees
Food Preservation & Preparation
✔ Start drying or fermenting early harvests like herbs and leafy greens
✔ Plan for summer canning by organizing jars, lids, and preservation tools
✔ Prepare for meat or dairy processing if raising livestock for food production
Why Acting Now Will Set You Up for a Thriving Season
Mid-spring is the homesteader’s last chance to set everything in motion before the demands of summer take over. By following this checklist and addressing seasonal changes proactively, you’ll avoid common pitfalls and create a more productive, self-sufficient homestead.
Taking the time now to plant strategically, manage livestock carefully, and maintain infrastructure will not only make summer easier but also improve long-term sustainability.
As you work through your mid-spring tasks, consider what’s working and what might need adjusting for next year’s homesteading season.
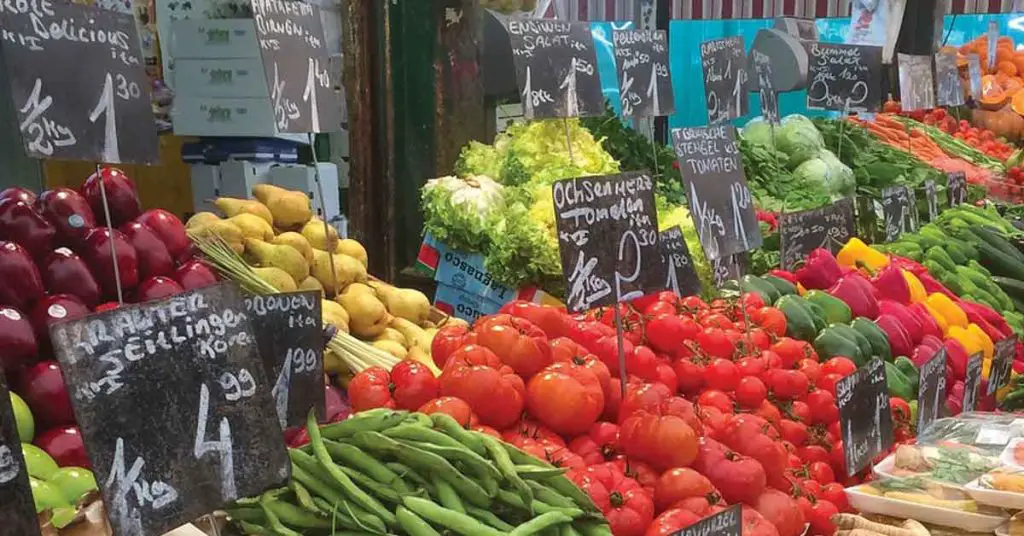
Tip 1: What to Plant in Mid-Spring for a Thriving Garden
Mid-spring is a pivotal time for planting, as the soil has warmed enough to support a wide variety of vegetables and fruits while still being early enough to take advantage of the full growing season. Choosing the right crops, using strategic companion planting, and implementing crop rotation will ensure higher yields, healthier plants, and a more resilient garden.

The Best Vegetables and Fruits to Grow in Mid-Spring for a High Yield
By mid-spring, soil temperatures have stabilized, making it the perfect time to plant warm-season crops while still allowing for the final round of cool-season plants in some regions.
Vegetables to Plant in Mid-Spring:
✔ Tomatoes – Start transplants in well-draining soil; provide support with stakes or cages.
✔ Peppers (Bell, Jalapeño, Banana Peppers) – Require full sun and consistent watering.
✔ Beans (Bush and Pole Beans) – Fast growers that thrive in warming soil.
✔ Cucumbers – Train them on a trellis to save space and prevent rot.
✔ Zucchini & Squash – Heavy producers that need ample space and pollinators.
✔ Corn – Best planted in blocks to ensure proper pollination.
✔ Carrots & Beets – Still viable in cooler soil but should be planted soon before the heat sets in.
✔ Lettuce & Spinach – One last succession planting before they bolt in warm weather.
Fruits to Plant in Mid-Spring:
✔ Strawberries – Best planted early in spring for a summer harvest.
✔ Blueberries – Mid-spring is an ideal time for new bush transplants.
✔ Melons (Watermelon, Cantaloupe, Honeydew) – Thrive in warming temperatures with plenty of space.
✔ Grapes – Establishing vines now allows them to settle before summer heat.
Expert Tip: Always check your local frost dates before planting, as unexpected cold snaps can still occur in some regions. If frost is a concern, use row covers or cold frames to protect young plants overnight.
Companion Planting Secrets to Boost Growth and Keep Pests Away
Companion planting is an age-old gardening method that maximizes space, improves soil health, and naturally deters pests. By pairing mutually beneficial plants together, homesteaders can reduce chemical pesticide use and increase plant productivity.
Best Companion Planting Combinations for Mid-Spring Crops:
✔ Tomatoes + Basil & Marigolds – Basil enhances tomato flavor, while marigolds deter aphids and nematodes.
✔ Cucumbers + Radishes & Dill – Radishes repel cucumber beetles, while dill attracts beneficial pollinators.
✔ Corn + Beans & Squash (Three Sisters Method) – Beans fix nitrogen in the soil for corn, and squash provides ground cover to reduce weeds.
✔ Carrots + Onions & Chives – Onions deter carrot flies, reducing damage to the roots.
✔ Lettuce + Garlic & Chives – Garlic keeps slugs and aphids away from tender lettuce leaves.
Expert Tip: Be mindful of plants that do not grow well together. For example, avoid planting beans near onions or garlic, as they can stunt each other’s growth.
Mid-Spring Crop Rotation Strategies to Keep Your Soil Healthy
Crop rotation is one of the most effective ways to maintain soil health and prevent diseases in the garden. By rotating crops seasonally, you can reduce soil nutrient depletion, minimize pest problems, and break disease cycles.
Simple Crop Rotation Plan for Mid-Spring:
Legumes (Beans, Peas) → Leafy Greens (Lettuce, Spinach) → Root Crops (Carrots, Beets) → Fruit-Producing Crops (Tomatoes, Peppers)
- Legumes fix nitrogen in the soil, which benefits leafy greens planted after them.
- Root crops help break up compacted soil, improving aeration.
- Fruit-producing crops, which are heavy feeders, thrive after nutrient-restoring rotations.
Additional Crop Rotation Tips:
✔ Avoid planting the same family of crops in the same spot for consecutive seasons.
✔ Follow heavy feeders (tomatoes, corn, squash) with nitrogen-fixing plants (beans, peas) to restore soil nutrients.
✔ Use cover crops like clover or rye at the end of the season to rebuild soil health.
Expert Tip: If space is limited, use container gardening or raised beds to manage soil health while still rotating crops efficiently.
Setting Up Your Garden for Mid-Spring Success
Mid-spring is a key time to establish a thriving garden by choosing the right plants, pairing them strategically, and maintaining soil health through rotation. With the right combination of vegetables and fruits, smart companion planting, and a well-planned rotation system, your homestead can enjoy a productive and resilient growing season.
By taking the time now to prepare the soil, plant strategically, and monitor for pests, you’ll ensure a bountiful harvest well into summer and beyond.
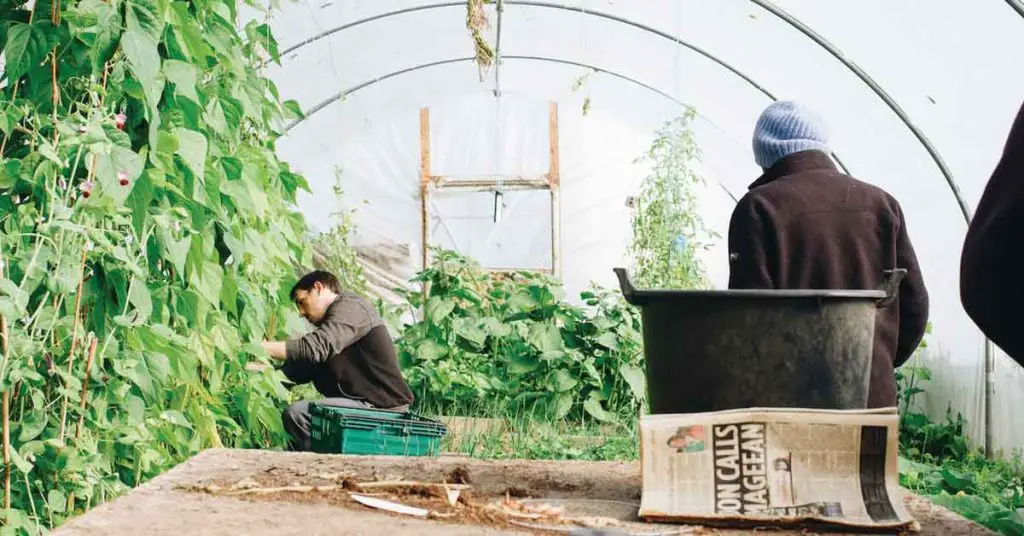
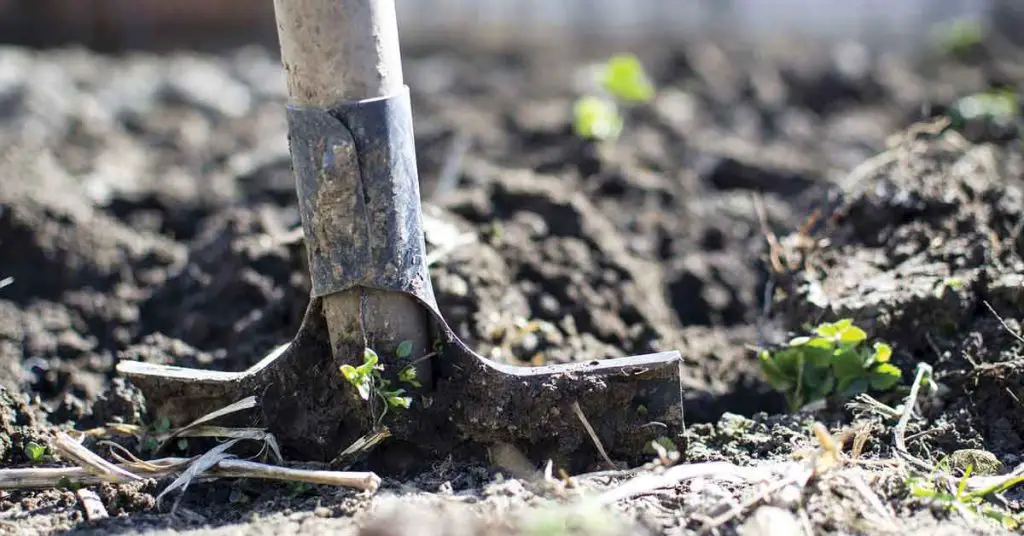
Tip 2: Get Your Soil Ready: How to Prepare for Mid-Spring Planting
Soil is the foundation of a productive homestead garden, and mid-spring is the perfect time to test, amend, and revitalize it before planting begins in full force. Whether you’re growing vegetables, fruits, or herbs, healthy soil ensures strong root development, better water retention, and higher yields.
Neglecting soil preparation can lead to stunted plant growth, nutrient deficiencies, and an increase in pests and diseases. With a few strategic steps, you can build nutrient-rich, well-structured soil that will support your garden through the season.
How to Test and Improve Your Soil for the Best Growing Conditions
Before planting anything, it’s essential to understand your soil’s current condition. Different plants have specific nutrient and pH requirements, and soil testing can help you determine exactly what amendments are needed.
Step 1: Perform a Soil Test
A soil test measures pH levels, nutrient availability, and organic matter content. You can:
- Purchase a home soil test kit from a garden center.
- Send a sample to your local agricultural extension office for a detailed analysis.
Interpreting the Results:
- pH Below 6.0 (Too Acidic)? Add agricultural lime to raise the pH.
- pH Above 7.5 (Too Alkaline)? Incorporate sulfur or peat moss to lower the pH.
- Low Nitrogen? Add composted manure, coffee grounds, or cover crops.
- Low Phosphorus? Use bone meal or rock phosphate.
- Low Potassium? Apply wood ash or kelp meal.
Personal Insight: Many homesteaders skip soil testing, assuming that all soil is the same. But over the years, I’ve found that testing before planting saves weeks of frustration by ensuring plants receive the nutrients they need from the start.
Step 2: Improve Soil Structure for Better Root Growth
Mid-spring is a great time to loosen compacted soil, increase drainage, and enhance aeration.
✔ For Heavy Clay Soil (prone to waterlogging): Add sand, gypsum, or organic matter to improve drainage.
✔ For Sandy Soil (drains too quickly): Mix in compost or aged manure to retain moisture.
✔ For Loamy Soil (ideal structure): Maintain fertility with regular additions of organic matter.
Best Practices for Loosening Soil:
- Use a broadfork or garden fork to aerate without disrupting soil life.
- Avoid excessive tilling, as it can destroy beneficial microbes.
Expert Tip: Planting cover crops like clover or rye in fall and cutting them back in spring can naturally improve soil structure and add nutrients before planting.
Organic Composting Methods to Supercharge Your Spring Garden
One of the best ways to replenish soil nutrients and improve moisture retention is by adding high-quality compost before planting. Compost introduces beneficial microbes, organic matter, and essential minerals that promote plant health.
Step 1: Choosing the Right Compost for Your Garden
✔ Finished Compost (Well-Aged & Decomposed): Ideal for direct application before planting.
✔ Composted Manure (From Chickens, Cows, Horses): Best when aged at least 6 months to avoid burning plants.
✔ Leaf Mold (Decomposed Leaves): Great for improving moisture retention and soil aeration.
✔ Mushroom Compost: Excellent for boosting phosphorus and nitrogen levels.
How to Apply:
- Spread 1-2 inches of compost over your garden beds.
- Mix lightly into the topsoil or let worms and rainfall incorporate it naturally.
- For new garden beds, layer compost, straw, and soil to create a nutrient-dense growing space.
Expert Tip: Avoid using uncomposted manure or fresh kitchen scraps in planting areas, as they can attract pests and introduce pathogens.
Step 2: Add Natural Fertilizers for Extra Nutrients
Beyond compost, organic fertilizers can target specific nutrient needs based on your soil test results.
✔ Fish Emulsion or Kelp Meal: Boosts nitrogen and encourages leafy green growth.
✔ Bone Meal or Rock Phosphate: Enhances root and flower development.
✔ Wood Ash or Greensand: Provides potassium for stronger stems and fruit production.
Application Tips:
- Apply fertilizers 2-3 weeks before planting to give them time to break down in the soil.
- Mix fertilizers into the top few inches rather than leaving them on the surface.
Step 3: Protect and Preserve Soil with Mulching
Once amendments are added, mulching helps retain moisture, suppress weeds, and prevent erosion.
Best Mulching Materials for Mid-Spring:
✔ Straw or Hay: Perfect for vegetable gardens, breaks down slowly.
✔ Shredded Leaves: Retains moisture and adds organic matter.
✔ Wood Chips: Ideal for perennial plants and pathways.
✔ Grass Clippings: Rich in nitrogen, but should be applied in thin layers.
Expert Tip: Apply mulch after the soil has warmed up—if applied too early, it can trap cold moisture and slow plant growth.
Setting the Stage for a Thriving Garden
Preparing soil in mid-spring ensures plants have the nutrients, structure, and moisture retention needed for a successful growing season. By testing, amending, and enriching the soil now, you’re setting up your homestead for stronger crops, healthier plants, and better yields.
Taking a little extra time to fine-tune soil conditions before planting will save weeks of trouble down the road.
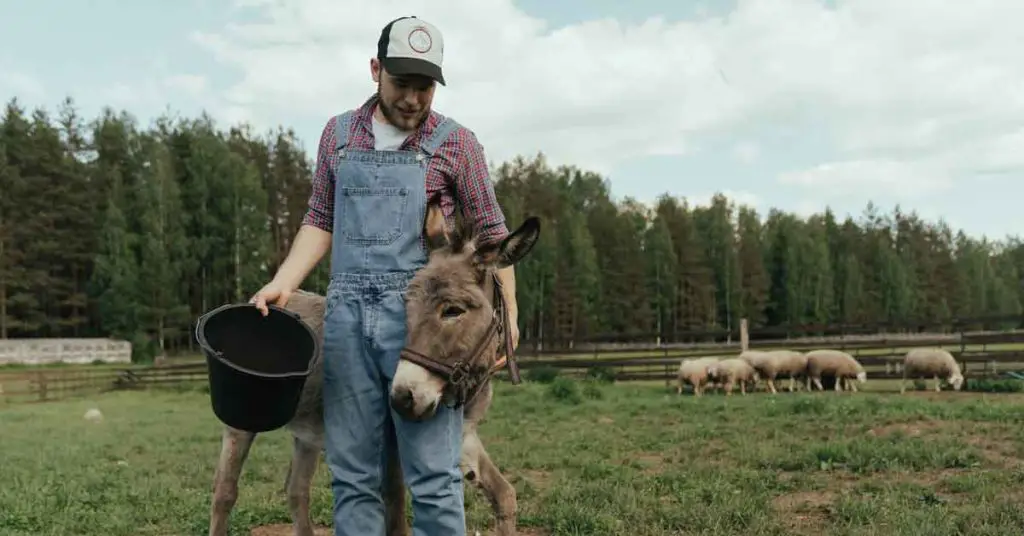
Tip 3: Keeping Your Livestock Healthy in Mid-Spring: What You Must Know
Mid-spring brings warmer temperatures, increased forage availability, and changing nutritional needs for livestock. While it’s a season of growth, it also comes with challenges such as parasite outbreaks, fluctuating pasture quality, and hydration concerns. Ensuring that your animals remain healthy and productive during this transition is crucial for sustaining a thriving homestead.
By adjusting feeding strategies, managing parasites proactively, and optimizing pasture rotation, homesteaders can maximize livestock health and efficiency before the summer heat sets in.

Essential Nutrition and Feeding Tips for Livestock in Warmer Weather
As temperatures rise, livestock diets naturally shift from winter grains and stored hay to fresh pasture and forage. However, this transition must be managed carefully to prevent digestive upset and nutrient deficiencies.
1. Transitioning from Stored Feed to Fresh Forage
- Introduce fresh pasture gradually to prevent bloat and digestive issues, especially in ruminants like cattle, sheep, and goats.
- Feed high-fiber hay alongside fresh grass for the first 7-10 days to balance gut bacteria.
- Monitor for signs of nutritional imbalance, such as weight loss, reduced milk production, or changes in manure consistency.
2. Ensuring Proper Hydration
As days get warmer, water intake increases significantly. Ensure:
✔ Clean water sources are available at all times.
✔ Automatic waterers or troughs are checked daily for contamination.
✔ Electrolytes are added to water for animals under heat stress.
Expert Tip: Place water sources in shaded areas to prevent overheating and reduce algae growth in troughs.
3. Supplementing Nutrients for Healthy Growth
- Mineral and salt blocks should be accessible, especially for goats, cattle, and sheep, to prevent deficiencies.
- Provide extra protein sources (alfalfa, soy meal) for pregnant or lactating animals to support healthy offspring.
- For poultry, increase calcium intake (crushed oyster shells, eggshells) to support strong eggshell production.
Personal Insight: I once struggled with a sudden drop in egg production from my chickens in mid-spring. After adding more calcium and boosting their protein intake, egg-laying returned to normal within a week. Small changes in nutrition can make a big difference.
How to Prevent and Treat Springtime Parasites in Your Animals
Warmer temperatures bring an increase in parasites, which can harm livestock health and reduce productivity. Prevention is key, but early detection and treatment can stop minor issues from becoming major problems.
1. Identifying Common Springtime Parasites
Internal Parasites (Worms & Coccidia):
✔ Found in cattle, goats, sheep, and poultry.
✔ Symptoms: Weight loss, diarrhea, rough coats, anemia (pale gums).
✔ Prevention: Use rotational grazing and natural dewormers (pumpkin seeds, diatomaceous earth).
External Parasites (Ticks, Mites, Lice, Fleas):
✔ Thrive in warmer weather, affecting goats, sheep, horses, and poultry.
✔ Symptoms: Excessive scratching, bald spots, feather loss in chickens.
✔ Prevention: Diatomaceous earth in bedding, regular dust baths for poultry, and herbal sprays (neem oil, garlic water).
2. Natural vs. Chemical Deworming
Natural Dewormers:
✔ Pumpkin seeds, garlic, and apple cider vinegar support parasite prevention.
✔ Diatomaceous earth (food grade) mixed into feed can help reduce worm loads.
Chemical Dewormers:
✔ Necessary for severe infestations but should be used strategically to prevent resistance.
✔ Always rotate dewormers every season to maintain effectiveness.
Expert Tip: Monitor animals weekly for early signs of infestation. A simple fecal test can reveal parasite levels, allowing for targeted treatment before symptoms appear.
The Best Pasture Rotation Techniques for Sustainable Grazing
Proper pasture rotation prevents overgrazing, improves soil health, and reduces parasite loads in livestock. Mid-spring is the ideal time to implement or refine grazing strategies to maximize long-term sustainability.
1. Why Rotational Grazing is Critical in Mid-Spring
- Reduces the risk of parasite buildup by moving animals before manure-borne larvae hatch.
- Allows pastures to regrow naturally, providing higher-quality forage for animals.
- Prevents soil degradation and encourages healthy root development.
2. How to Implement a Rotational Grazing System
✔ Divide grazing areas into sections (paddocks).
✔ Rotate livestock every 3-5 days to prevent overgrazing.
✔ Allow grass to regrow to 6-8 inches before returning animals to the same area.
✔ Keep a sacrificial paddock for emergencies (excess rain or drought conditions).
Personal Insight: When I first introduced rotational grazing, I noticed a significant improvement in pasture quality within a single season. My sheep were healthier, parasite issues dropped, and hay costs decreased because they had better forage.
3. Maintaining Soil and Forage Health in Grazing Areas
✔ Plant clover and legumes to naturally fix nitrogen in the soil and provide extra protein for livestock.
✔ Avoid grazing wet pastures to prevent soil compaction and hoof damage.
✔ Use portable fencing to make rotation easier and adjust paddock sizes as needed.
Expert Tip: If space is limited, small-scale rotational grazing using movable electric fencing can still increase forage quality while preventing soil degradation.
A Healthy Herd Leads to a Thriving Homestead
Mid-spring is a critical period for livestock health, with shifting nutritional needs, increasing parasite risks, and grazing management challenges. By adjusting feeding routines, monitoring for parasites, and improving grazing strategies, homesteaders can ensure healthy, productive animals throughout the season.
Taking the time to plan now will prevent costly issues later.
Tip 4: Mid-Spring Homestead Maintenance: 5 Essential Fixes Before Summer Hits
Mid-spring is the perfect time to assess, repair, and strengthen your homestead’s infrastructure before the high demands of summer set in. Harsh winter conditions and early spring rains can cause wear and tear on fences, barns, roofs, and drainage systems, making it crucial to handle maintenance tasks now rather than scrambling during peak summer workloads.
A well-maintained homestead not only saves time, money, and stress but also ensures safety for livestock, secure water systems, and efficient farm operations when temperatures rise.

The Homesteader’s Guide to Repairing Fences, Barns, and Water Systems
Winter storms, ice buildup, and falling debris can leave roofs, gutters, and drainage systems clogged or damaged, leading to water leaks, mold growth, and soil erosion. Tackling these issues in mid-spring ensures your homestead stays dry and protected during summer storms.
1. Checking and Reinforcing Fences for Strength and Security
Winter and early spring weather can weaken fences, creating vulnerabilities that allow livestock to escape and predators to get in.
✔ Inspect fence lines for loose posts, broken wires, or rotting wood.
✔ For electric fences, test voltage and replace weak sections to maintain effectiveness.
✔ Check gates for proper alignment, securing hinges and latches to prevent sagging.
Pro Tip: Walk your fence line with a notepad and repair tools in hand, fixing small issues immediately instead of postponing them.
2. Inspecting and Reinforcing Barns and Animal Shelters
With warmer weather approaching, barns and coops need to be properly ventilated and structurally sound to provide a safe environment for animals.
✔ Check for leaks in barn roofs and patch weak spots before heavy spring rains.
✔ Inspect wooden beams and walls for signs of rot, termites, or mold growth.
✔ Ensure windows and vents are clear to improve airflow and reduce heat stress in summer.
Personal Insight: One spring, I neglected to check my chicken coop’s ventilation, which led to overheating in the nesting area. After adding extra vents, my flock became healthier and more active—a small fix that made a big difference.
3. Servicing and Maintaining Water Systems
A functioning water system is the backbone of a successful homestead, and mid-spring is the time to prevent breakdowns before peak summer usage.
✔ Check for leaks in pipes, hoses, and troughs to prevent wasted water.
✔ Clean out water storage tanks and rain barrels to remove algae and debris.
✔ Ensure water pumps and well systems are working efficiently, especially if you rely on them for irrigation.
Pro Tip: If you use rainwater collection systems, install mesh covers over barrels to prevent mosquito breeding and contamination.
4. Checking and Repairing Roofs for Leaks and Damage
A leaking roof can lead to costly damage in barns, coops, greenhouses, and homes.
✔ Inspect metal, shingle, or thatched roofs for cracks, missing tiles, or rust spots.
✔ Use waterproof sealants or patching materials to fix small leaks before they worsen.
✔ Check attic or barn interiors for signs of water damage like stains or mold.
Personal Insight: I once ignored a small leak in my equipment shed, thinking it wasn’t urgent. By summer, the leak had rotted an entire section of the roof, leading to a costly repair. Lesson learned—fix it early, save big later.
5. Cleaning and Clearing Gutters and Drainage Systems
Mid-spring rains can overwhelm clogged gutters and drainage ditches, leading to flooding in gardens, animal shelters, and pathways.
✔ Remove leaves, twigs, and debris from gutters to prevent overflow.
✔ Check that downspouts direct water away from structures to avoid foundation damage.
✔ Inspect ditches and culverts to ensure water flows freely, reducing the risk of erosion.
Pro Tip: Adding gravel or stone around high-drainage areas can improve water absorption and prevent muddy conditions near barns and animal enclosures.
Setting Up Your Homestead for a Problem-Free Summer
By taking care of these five essential mid-spring fixes, you’ll prevent larger issues from emerging in the heat of summer. Strong fences, secure barns, a dependable water system, and efficient drainage will make your homestead more resilient, productive, and safe in the months ahead.
Tip 5: Maximize Rainwater Harvesting: How to Store and Use Spring Showers Efficiently
Mid-spring often brings consistent rainfall, making it the perfect time to capture and store water for use during the drier months. Rainwater harvesting is one of the most cost-effective and sustainable ways to ensure a steady water supply for gardens, livestock, and general homestead use. By setting up efficient collection systems and implementing smart irrigation techniques, homesteaders can reduce reliance on municipal water, lower costs, and improve long-term resilience.

How to Set Up Rain Barrels for Sustainable Water Collection
Rain barrels are one of the simplest and most effective ways to collect and store rainwater from rooftops. They allow homesteaders to capture runoff during mid-spring showers and store it for drier periods.
1. Choosing the Right Rain Barrel
✔ Plastic or Food-Grade Barrels – Durable, lightweight, and resistant to rust.
✔ Metal Drums – Sturdy but prone to corrosion if not properly treated.
✔ Repurposed Containers – Ensure they are non-toxic and safe for water storage.
Capacity Tip: A 55-gallon rain barrel can collect hundreds of gallons of water over a season, especially when linked to multiple barrels.
2. Setting Up a Rain Barrel System
✔ Locate a Downspout – Position barrels under gutters or sloped roof edges to maximize water collection.
✔ Install a Screen Filter – Prevents debris, leaves, and mosquitoes from contaminating stored water.
✔ Elevate the Barrel – Raising it on cinder blocks or a wooden platform increases water pressure and makes it easier to use.
✔ Add a Spigot and Overflow System – A spigot allows for easy access, while an overflow system directs excess water away from foundations.
Expert Tip: Paint barrels a dark color to prevent algae growth and keep water cooler in warm weather.
Using Rainwater Efficiently Around the Homestead
Stored rainwater can be used in multiple ways, making it a valuable resource for gardens, livestock, and general homestead needs:
✔ Garden Irrigation – Use rainwater for watering vegetables, fruit trees, and flower beds.
✔ Livestock Watering – Ensure water is filtered before giving it to animals.
✔ Compost Activation – Moisture aids in breaking down organic material faster.
✔ Cleaning Tools & Equipment – Wash farm tools, wheelbarrows, and buckets without using potable water.
Personal Insight: I once underestimated how much rainwater could be stored in spring. After setting up multiple barrels, I was able to cut my well-water use by nearly half during summer droughts—a huge savings on both water and effort.
Smart Irrigation Techniques to Keep Your Garden Thriving with Less Water
Capturing rainwater is only part of the equation—efficient use is equally important. Smart irrigation ensures maximum water retention and minimal waste, helping plants stay hydrated even in dry conditions.
1. Drip Irrigation for Targeted Watering
Instead of overhead watering (which leads to evaporation and runoff), use drip irrigation to deliver water directly to plant roots.
✔ Install drip lines or soaker hoses in garden beds.
✔ Set up a gravity-fed drip system using rain barrels for slow, steady watering.
✔ Place buckets or small reservoirs at the base of fruit trees for deep root hydration.
Expert Tip: Water in the early morning or late evening to reduce evaporation loss.
2. Mulching to Retain Moisture
Mulch acts as a protective barrier, helping the soil retain moisture longer and reducing the need for frequent watering.
✔ Organic Mulch (Straw, Wood Chips, Leaves): Locks in moisture and enriches soil.
✔ Grass Clippings: A free, nitrogen-rich option that decomposes quickly.
✔ Living Mulch (Clover, Cover Crops): Prevents soil erosion and keeps moisture levels stable.
Personal Insight: I used to water my garden daily until I started mulching properly. Now, I only need to water every 3-4 days, even during dry spells. The difference was instant and long-lasting.
3. Rain Garden Design for Natural Water Absorption
A rain garden is a low-maintenance solution that collects and stores rainwater right where plants need it.
✔ Dig shallow depressions in low-lying areas to capture runoff.
✔ Plant deep-rooted perennials (daylilies, sedges, ferns) to absorb excess water.
✔ Use rocks or gravel to slow down water flow and reduce erosion.
Setting Up Your Homestead for Water Sustainability
By implementing rainwater harvesting and smart irrigation, homesteaders can reduce dependency on external water sources, conserve resources, and ensure a steady water supply during dry periods. Spring showers are a gift to the homestead—capturing and using them wisely will lead to a stronger, more resilient garden and farm.
Tip 6: Stop Pests Before They Take Over: Natural Pest Control for Mid-Spring
Mid-spring brings warmer temperatures, longer days, and an explosion of plant growth—but it also signals the arrival of garden pests looking to feed on fresh greenery. If left unchecked, these pests can damage crops, weaken plants, and reduce yields, making early prevention key to maintaining a thriving homestead garden.
Instead of turning to harsh chemical pesticides, many homesteaders prefer organic, sustainable methods to keep their gardens healthy while protecting pollinators and beneficial soil life. By using companion planting, organic deterrents, and predator-friendly strategies, you can effectively manage pests without harming your garden’s ecosystem.

The Best Organic Pest Control Methods to Keep Bugs Away
1. Companion Planting for Natural Pest Repellent
Companion planting is an age-old technique that pairs certain plants together to repel pests, attract beneficial insects, and enhance plant health.
✔ Marigolds – Repel aphids, nematodes, and whiteflies.
✔ Basil – Deters mosquitoes, flies, and tomato hornworms.
✔ Garlic & Onions – Keep away cabbage worms, carrot flies, and aphids.
✔ Lavender – Protects against moths, fleas, and beetles.
✔ Nasturtiums – A “trap crop” that attracts aphids away from vegetables.
Personal Insight: I once struggled with an aphid infestation in my tomato patch. After planting marigolds and basil between rows, the issue significantly decreased within a few weeks. Simple, natural solutions often work better than store-bought sprays.
2. DIY Organic Pest Sprays for Garden Protection
Homemade pest sprays work effectively against common garden pests without harming beneficial insects or contaminating crops.
✔ Neem Oil Spray – An organic pesticide that disrupts insect life cycles.
Recipe: Mix 1 teaspoon neem oil, 1 teaspoon dish soap, and 1 quart of water. Spray on affected leaves.
✔ Garlic & Chili Spray – Repels aphids, caterpillars, and beetles.
Recipe: Blend 2 garlic cloves, 1 chili pepper, and 1 quart of water. Strain and spray directly on plants.
✔ Diatomaceous Earth (DE) – A natural powder that dehydrates and kills soft-bodied pests like slugs, fleas, and ants. Sprinkle around the base of plants.
Expert Tip: Apply sprays early in the morning or late in the evening to prevent leaf burn from the sun.
3. Mulching and Row Covers for Physical Protection
Using physical barriers can prevent pests from laying eggs or reaching plants, reducing infestations naturally.
✔ Floating Row Covers: Protects young seedlings from flea beetles and caterpillars.
✔ Mulch (Straw or Wood Chips): Deters slugs and prevents insect eggs from hatching in the soil.
✔ Copper Tape: Placing copper around raised beds repels snails and slugs.
Personal Insight: When I switched from using synthetic pesticides to simply adding straw mulch around my lettuce beds, slug damage dropped by over 70%. Small changes can have big impacts.
How to Use Beneficial Insects to Protect Your Homestead Garden
Encouraging natural predators in the garden is one of the most effective long-term pest control strategies. These insects feed on harmful pests and help maintain a balanced ecosystem without human intervention.
Introducing Beneficial Predators
✔ Ladybugs – Consume aphids, scale insects, and spider mites.
✔ Lacewings – Excellent at controlling caterpillars, thrips, and mealybugs.
✔ Praying Mantises – Eat a variety of pests, including grasshoppers, moths, and beetles.
✔ Parasitic Wasps – Lay eggs inside caterpillars and larvae, stopping infestations before they grow.
How to Attract Them:
✔ Plant pollinator-friendly flowers like dill, fennel, and yarrow.
✔ Avoid using broad-spectrum pesticides that kill both pests and beneficial bugs.
✔ Provide habitat diversity (tall grass, flower beds, native shrubs) for shelter.
Pro Tip: If you don’t have enough natural predators in your area, purchase live ladybugs or lacewing larvae from garden centers and release them into your garden.
Setting Up Your Garden for a Pest-Free Growing Season
Mid-spring is the best time to take proactive steps against garden pests. By using organic pest control methods, promoting beneficial insects, and implementing physical barriers, you can create a balanced, resilient garden without relying on chemicals.
Tackling pest issues early in the season will prevent widespread infestations and ensure your crops grow healthy and productive well into summer.
Tip 7: Seasonal Crop Rotation: The Key to a More Productive Mid-Spring Harvest
Crop rotation is one of the most effective and time-tested methods for maintaining soil health, preventing disease, and increasing harvest productivity. Many homesteaders overlook this practice, but rotating crops seasonally ensures that essential nutrients are replenished, pest populations are disrupted, and soil remains fertile for years to come.
By planning your crops strategically and understanding how different plant families interact with soil, you can maximize your mid-spring harvest while reducing your reliance on fertilizers and pesticides.

How to Plan Your Crops for Healthier Soil and Bigger Yields
A good crop rotation plan ensures that plants don’t deplete the same nutrients from the soil year after year. Instead, each crop plays a role in restoring balance and improving soil conditions.
Understand Plant Families for Better Rotation
Different crops belong to different families, each affecting the soil in unique ways. The key to rotation is not planting the same family in the same spot consecutively.
✔ Legumes (Beans, Peas, Clover) – Add nitrogen back into the soil.
✔ Leafy Greens (Lettuce, Spinach, Kale, Cabbage) – Benefit from nitrogen-rich soil.
✔ Root Vegetables (Carrots, Beets, Onions, Garlic) – Help break up compacted soil.
✔ Fruiting Crops (Tomatoes, Peppers, Squash, Corn, Cucumbers) – Heavy feeders that need nutrient-rich soil.
A simple four-year crop rotation plan follows this cycle:
Year 1: Plant legumes to restore nitrogen.
Year 2: Follow with leafy greens that thrive in nitrogen-rich soil.
Year 3: Rotate to root crops that loosen and aerate the soil.
Year 4: Finish with heavy-feeding fruiting crops before returning to legumes.
Pro Tip: If space is limited, use raised beds or intercropping methods to mimic rotation benefits in smaller garden spaces.
Why Rotating Crops in Spring Can Prevent Common Plant Diseases
Soil-borne diseases can linger in the soil for years, attacking plants from the same family season after season. Rotating crops disrupts these disease cycles, reducing the likelihood of outbreaks.
1. Preventing Fungal and Bacterial Diseases
✔ Tomato and Potato Blight: Avoid planting tomatoes, potatoes, or peppers in the same spot for at least three years to prevent blight.
✔ Clubroot in Brassicas (Cabbage, Broccoli, Kale): Rotate with legumes or root vegetables to minimize disease risk.
✔ Powdery Mildew and Downy Mildew: Switch plant locations to break the cycle of fungal spores in the soil.
Personal Insight: One season, I ignored rotation and planted tomatoes in the same bed as the previous year. By mid-spring, early blight had set in, stunting plant growth and reducing yields. After switching to a proper rotation plan, blight issues dropped significantly the following season.
2. Natural Weed and Pest Management
Pests often target specific plant families, laying eggs in the soil and emerging year after year. Crop rotation prevents pest populations from establishing long-term habitats.
✔ Cabbage worms and root maggots thrive in the same soil—rotating brassicas (cabbage, broccoli) every year reduces their impact.
✔ Corn earworms and squash bugs can be controlled by alternating with nitrogen-fixing legumes like beans.
✔ Nematodes that attack carrots and onions are suppressed by planting cover crops like mustard or marigolds in between rotations.
Pro Tip: Integrating cover crops such as clover, rye, or buckwheat between planting cycles improves soil fertility and prevents weed overgrowth.
A Well-Rotated Garden Leads to a Stronger Harvest
By rotating crops seasonally, homesteaders can improve soil health, minimize pests and diseases, and boost overall yields. A well-planned rotation cycle reduces the need for chemical fertilizers and pesticides, leading to a more sustainable and productive homestead.
Taking the time to map out your planting areas now will set your garden up for long-term success.
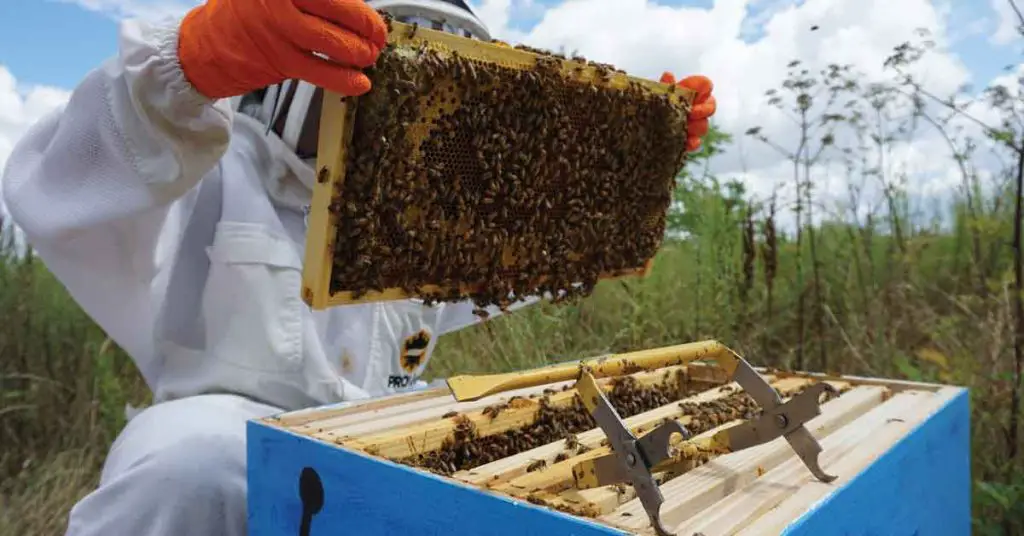
Tip 8: Spring Beekeeping Tips: How to Keep Your Hive Productive in Mid-Spring
Spring is a crucial time for beekeepers as hives come out of winter dormancy and ramp up activity. By mid-spring, honeybee colonies are expanding rapidly, with new brood hatching, nectar flow increasing, and swarming season beginning. Proper hive management during this period ensures that bees stay healthy, productive, and ready for the peak honey season ahead.
For homesteaders, mid-spring is the perfect time to inspect hives, provide additional food sources if necessary, and plant nectar-rich flowers to support honey production.
What Every Homesteader Needs to Know About Mid-Spring Bee Management
Mid-spring beekeeping is about balancing hive growth with colony stability. Here’s what homesteaders need to focus on during this time:
1. Perform a Full Hive Inspection
By mid-spring, hives should be fully active, but it’s essential to check their condition after winter.
✔ Look for Healthy Brood Patterns – The queen should be laying eggs in a solid, even pattern, which indicates a thriving colony.
✔ Inspect for Disease or Parasites – Check for signs of varroa mites, foulbrood, or chalkbrood and take action early.
✔ Monitor Hive Strength – A healthy hive will have plenty of workers, foragers, and nurse bees actively tending to the brood.
Pro Tip: If you notice low numbers of bees, consider feeding sugar syrup or pollen supplements to boost their energy until nectar flow increases.
2. Prevent Swarming by Managing Space and Population Growth
Swarming is a natural process where the colony splits and part of the hive leaves with a new queen. While this is normal, losing a swarm means losing honey production for the season.
✔ Add Supers for Expanding Colonies – If the hive is growing fast, provide extra space to prevent congestion.
✔ Check for Swarm Cells – If queen cells are present, consider splitting the hive to prevent bees from swarming.
✔ Ensure Proper Ventilation – As temperatures rise, improving airflow inside the hive can keep bees comfortable and reduce stress.
Personal Insight: I lost a prime honey-producing hive one spring because I didn’t catch early swarm signs. After learning to inspect for queen cells and adding extra hive space, I kept my colonies intact the following year.
3. Feed Bees When Nectar Flow is Unpredictable
Mid-spring nectar flow can fluctuate depending on the climate. If there’s a shortage of blooms, bees may struggle to find food.
✔ Use Sugar Syrup (1:1 ratio of sugar to water) for Boosting Energy
✔ Provide Protein Patties or Pollen Substitute for Brood Development
✔ Ensure Water Sources Are Available Nearby
Pro Tip: If natural food sources are scarce, place shallow water dishes with pebbles near the hive so bees can drink safely without drowning.
The Best Spring Flowers to Plant for Maximum Honey Production
A diverse mix of nectar and pollen-rich flowers provides consistent food sources for bees throughout spring and summer.
1. Early Spring Bloomers (March–April)
✔ Crocus – Provides an early nectar source when bees first emerge.
✔ Dandelions – Often dismissed as weeds, these are highly beneficial to bees.
✔ Willow & Maple Trees – Offer pollen and nectar for early brood development.
2. Mid-Spring Flowers (April–May)
✔ Lavender – A favorite for bees and great for producing fragrant honey.
✔ Wild Blackberries – Provide abundant nectar and contribute to rich, dark honey.
✔ Apple & Cherry Blossoms – Fruit trees offer a strong nectar flow for colonies.
3. Late Spring to Early Summer Flowers (May–June)
✔ Clover (Red & White) – One of the best nectar sources for large honey harvests.
✔ Bee Balm (Monarda) – A magnet for bees, boosting honey production.
✔ Sunflowers – Provide pollen for stronger worker bees and brood growth.
Personal Insight: One year, I planted extra clover and wildflowers around my hives. The result? A noticeable increase in honey production and healthier colonies heading into summer.
Setting Your Bees Up for a Strong Season
Mid-spring is the most important time to ensure your hives are healthy, well-fed, and properly managed before peak honey flow begins. By monitoring hive health, preventing swarming, and planting pollinator-friendly flowers, homesteaders can support strong colonies that produce high-quality honey throughout the season.
Tip 9: Introducing New Livestock? How to Make the Transition Stress-Free
Bringing new livestock onto the homestead is an exciting step, whether you’re expanding your flock, adding diversity to your farm, or replacing animals. However, a poorly managed introduction can lead to stress, injuries, and disease outbreaks. Mid-spring is an ideal time for new additions, as warmer temperatures and increased forage availability create a smoother adjustment period for animals.
By gradually introducing livestock, managing biosecurity, and ensuring proper nutrition, homesteaders can minimize stress and maximize success when integrating new animals into existing groups.

When and How to Introduce New Animals Without Disrupting Your Flock
Introducing animals into an established herd or flock can be challenging, as territorial behavior, dominance disputes, and biosecurity risks must be carefully managed. Here’s how to do it safely and effectively:
1. Choose the Right Time for Introduction
✔ Spring is ideal for new livestock since pastures are lush, and animals are less stressed by extreme temperatures.
✔ Avoid introducing animals during breeding or birthing seasons, when herd dynamics are already sensitive.
✔ Give new animals time to acclimate before peak summer heat increases stress levels.
2. Quarantine Before Introducing to the Main Herd
Before bringing new livestock into established enclosures, quarantine them for 2–4 weeks to prevent spreading diseases or parasites.
✔ Set up a separate pen or pasture away from the main herd.
✔ Monitor for signs of illness, such as coughing, diarrhea, or lethargy.
✔ Conduct health checks and deworming if necessary.
Personal Insight: A few years ago, I introduced a new goat without a quarantine period, thinking she looked perfectly healthy. Within a week, my entire herd developed respiratory infections, costing me time, money, and stress. Now, I always follow a strict quarantine routine—better safe than sorry.
3. Use Gradual Introduction Methods to Reduce Stress
Animals need time to establish a hierarchy without aggressive encounters. A rushed introduction can lead to fighting, injuries, or social rejection.
✔ Fence-line Introductions: Place new animals in a separate but adjacent enclosure so they can see and smell each other before physical interaction.
✔ Supervised First Meetings: Introduce animals in a neutral area where neither side feels territorial.
✔ Use a Buddy System: If possible, introduce at least two new animals at a time to reduce stress and prevent isolation anxiety.
Pro Tip: For poultry, place new chickens in a separate coop within the main run for a few days before allowing them to mingle freely. This prevents immediate pecking order disputes.
The Best Practices for Keeping New Livestock Healthy in Spring
Healthy animals adjust faster and integrate better into their new environment. Ensuring proper care from day one prevents common health issues during the transition.
1. Provide Proper Nutrition for a Smooth Adjustment
Diet changes can shock an animal’s digestive system, so it’s crucial to gradually transition feed rather than making abrupt changes.
✔ Ask about their previous diet and mix new feed with their old feed over 7–10 days.
✔ Ensure plenty of fresh water and electrolyte supplements for hydration.
✔ Introduce them to new grazing areas slowly to prevent bloat or digestive issues.
Pro Tip: For ruminants like goats, sheep, and cows, sudden diet changes can lead to serious digestive problems. Slowly transitioning their feed prevents bloating and acidosis.
2. Minimize Stress with a Calm, Consistent Environment
Stress weakens the immune system, making new animals more susceptible to illness.
✔ Keep handling to a minimum in the first few days to let them settle in.
✔ Provide adequate shelter from wind, rain, and predators.
✔ Observe behavior for signs of distress, such as excessive pacing, hiding, or aggression.
Personal Insight: When introducing a new flock of ducks, I found that playing soft background music in their coop helped reduce stress and night-time restlessness. Small environmental adjustments can make a big difference.
3. Monitor for Signs of Illness or Injury
New animals should be observed closely for the first two weeks to catch any health issues early.
✔ Check body condition daily for weight loss or lethargy.
✔ Watch for signs of respiratory distress, limping, or diarrhea.
✔ Ensure they are eating and drinking normally—decreased appetite can signal illness or stress.
If any concerns arise, consult a livestock vet immediately to prevent the spread of disease.
A Smooth Transition Leads to a Thriving Homestead
Introducing new livestock doesn’t have to be stressful if managed with patience, planning, and the right techniques. By following proper quarantine, gradual introductions, and providing high-quality nutrition and care, homesteaders can successfully expand their flocks and herds without disrupting the existing balance.
Tip 10: Fireproofing Your Homestead: Essential Steps for Spring Safety
Wildfires are an increasing concern for many homesteaders, especially in dry, windy regions where vegetation becomes highly flammable by summer. Mid-spring is the best time to take preventive measures to reduce fire risks, protect your home, and ensure livestock and emergency plans are in place before fire season peaks.
A fire-resistant homestead starts with landscape management, structural precautions, and well-thought-out evacuation plans. By preparing now, you can minimize fire hazards and increase your chances of protecting your property in case of an emergency.

How to Create a Fire-Resistant Homestead Landscape Before Summer
A fire-resistant landscape slows down or prevents wildfires from spreading to homes, barns, and animal shelters. By carefully planning defensible space, reducing dry vegetation, and using fire-resistant materials, homesteaders can significantly lower the risk of fire damage.
1. Establish Defensible Space Around Buildings
Defensible space is the buffer zone between structures and flammable vegetation, giving firefighters room to operate and reducing the likelihood of fires spreading.
Zone 1: 0-5 Feet from Structures
- Keep this area completely clear of dry grass, leaves, and flammable materials.
- Use gravel, stone, or fire-resistant plants instead of mulch near buildings.
- Trim tree branches that overhang roofs or touch structures.
Zone 2: 5-30 Feet from Structures
- Maintain widely spaced trees and remove low-hanging branches.
- Keep grass mowed short and watered to reduce dry fuel.
- Store firewood, propane tanks, and flammable materials at least 30 feet away.
Zone 3: 30-100 Feet from Structures
- Thin out dense brush and deadwood to slow fire spread.
- Use firebreaks (gravel paths, driveways, or tilled soil) to stop fire movement.
- Maintain a water source nearby, such as a pond, well, or rainwater tanks.
Pro Tip: Fire-resistant trees and shrubs like oak, maple, and lavender burn slower than pine or juniper, which ignite quickly and spread flames.
2. Fireproofing Animal Shelters and Barns
Livestock barns and shelters are high-risk areas due to the presence of hay, feed, and wooden structures. Taking steps to fireproof these areas can save animals and prevent loss of valuable assets.
✔ Use Metal or Concrete Structures – Barns and coops built from fire-resistant materials offer better protection than wooden buildings.
✔ Store Hay and Feed Properly – Keep hay off the ground and well-ventilated to prevent spontaneous combustion.
✔ Install Spark Arrestors on Chimneys – This prevents embers from escaping and igniting nearby debris.
✔ Use Fire-Resistant Roofing and Siding – Metal, clay, or asphalt shingles are less flammable than wood.
Personal Insight: A neighbor once lost an entire barn to fire because hay was stored too close to an exposed electrical outlet. After that, I made sure all outlets in my barn were properly enclosed, and my hay was stored in a separate, well-ventilated shed.
3. Clearing Dry Brush and Deadwood Before Peak Fire Season
Wildfires often spread rapidly when dry brush and dead trees act as fuel. Clearing excess vegetation in mid-spring ensures that your property is not a tinderbox by summer.
✔ Regularly mow and remove dead grass, weeds, and brush around all structures.
✔ Thin out densely packed trees and remove fallen branches from pastures and wooded areas.
✔ Create firebreaks using tilled soil, gravel, or non-combustible materials to stop fire spread.
Pro Tip: Instead of burning debris, chip or compost brush piles to eliminate fuel sources without increasing fire risks.
Must-Have Emergency Plans to Protect Your Home and Livestock
A well-prepared homestead emergency plan ensures that everyone—both humans and animals—knows what to do in case of fire. Mid-spring is the time to update evacuation plans, check fire response equipment, and ensure all livestock have a safe escape route.
1. Create a Fire Evacuation Plan for Your Family
✔ Identify multiple evacuation routes in case one road is blocked.
✔ Prepare emergency go-bags with essential supplies (documents, first aid, water, food, medications).
✔ Communicate with neighbors about fire watch alerts and mutual aid plans.
✔ Keep vehicles fueled and ready in case you need to leave quickly.
Pro Tip: Practice fire drills at least once a year so that everyone knows where to go and what to do in an emergency.
2. Develop a Livestock Evacuation Plan
Moving large animals during a fire is challenging, so having a pre-established plan is crucial.
✔ Identify emergency shelter locations—fairgrounds, farms, or community evacuation sites.
✔ Train animals to load into trailers quickly to avoid delays during evacuation.
✔ Have temporary identification (ear tags, spray paint, collars) on animals in case they get separated.
✔ Stock emergency feed and water in case roads are blocked, and you must shelter in place.
Personal Insight: A fellow homesteader once had to release their horses during a fast-moving wildfire. Because they had spray-painted their phone number on each horse, they were able to reunite with all of them within days.
3. Install and Maintain Fire Response Equipment
Having fire suppression tools ready can mean the difference between a minor fire and a major disaster.
✔ Keep fire extinguishers in barns, kitchens, and tool sheds.
✔ Install exterior water hoses or sprinklers around buildings.
✔ Have a backup water supply (pond, well, rainwater collection tanks) in case municipal water pressure drops.
✔ Keep shovels, rakes, and fire beaters easily accessible.
Pro Tip: If you live in an area prone to wildfires, consider investing in a high-pressure water pump that can pull water from ponds or wells to protect structures during a fire.
Protect Your Homestead Now to Avoid Devastation Later
Mid-spring is the best time to implement fire prevention strategies before summer’s dry conditions increase wildfire risks. By creating defensible space, clearing excess vegetation, fireproofing buildings, and having an emergency plan in place, homesteaders can greatly reduce the likelihood of fire damage.
Fire preparedness is not just about protecting property—it’s about ensuring the safety of your family, livestock, and community. Taking action now means you won’t be caught off guard when fire season arrives.
Tip 11: Homesteading in Remote Areas: Overcoming Isolation and Supply Challenges
Living and homesteading in a remote area comes with unique rewards and difficulties. The peace, privacy, and self-sufficiency are unmatched, but isolation, supply limitations, and lack of immediate support can present major challenges.
Mid-spring is an ideal time to strengthen your support network, stockpile essential supplies, and implement sustainable solutions that reduce the stress of living far from urban conveniences. By planning ahead, homesteaders can maintain resilience, improve daily life, and ensure a smoother homesteading experience year-round.

How to Build a Support Network When You’re Homesteading Off the Grid
One of the biggest concerns for remote homesteaders is social isolation and lack of immediate assistance in emergencies. While self-sufficiency is key, having a reliable network of like-minded people can make all the difference.
1. Connect with Nearby Homesteaders and Farmers
Even if your neighbors are miles away, building relationships within your local rural community creates a valuable network for trade, emergency help, and shared resources.
✔ Attend Local Farmers’ Markets & Agricultural Events – A great way to meet other homesteaders.
✔ Join Regional Homesteading Groups – Many rural areas have informal support networks.
✔ Trade Skills and Resources – Bartering can help reduce costs and improve sustainability.
Personal Insight: When my well pump failed one winter, I was grateful to have built a strong relationship with a neighboring homesteader who lent me supplies until I could get repairs done. Even in remote areas, community connections are essential.
2. Use Online Homesteading Communities for Advice & Support
Even if you live off-grid, online forums, social media groups, and homesteading websites can provide a wealth of information.
✔ Join Forums Like Permies, Homesteading Today, or Backyard Chickens for expert discussions.
✔ Follow YouTube Channels & Blogs Focused on Rural Living for hands-on advice.
✔ Participate in Local Facebook Groups – Many remote communities have private online spaces where locals exchange information.
Pro Tip: If internet access is limited, consider satellite internet or offline downloads of essential guides to have resources available when needed.
3. Set Up Emergency Communication Plans
When living remotely, staying in touch during emergencies is crucial.
✔ Invest in a Satellite Phone or Two-Way Radio – Cell service is often unreliable in remote areas.
✔ Set Up a Check-in System with Family or Friends – Regular contact ensures help is available if needed.
✔ Have a Printed Emergency Contact List – Include nearby neighbors, emergency services, and supply providers.
Personal Insight: A power outage once knocked out my cell service for days, but my solar-powered two-way radio kept me connected with nearby homesteaders. Having backup communication options is essential.
Smart Ways to Store and Access Essential Supplies in Remote Locations
Access to stores and emergency services can be limited or nonexistent in remote areas, making strategic supply storage and sustainable solutions essential for a smooth homesteading experience.
1. Maintain a Well-Stocked Pantry & Storage System
✔ Stockpile Long-Lasting Staples – Dried beans, rice, flour, canned goods, and freeze-dried foods should always be available.
✔ Invest in a Large Freezer or Root Cellar – Essential for storing meat, dairy, and vegetables year-round.
✔ Rotate Supplies Regularly – Use the first in, first out (FIFO) method to prevent spoilage.
Pro Tip: Mid-spring is a great time to take inventory and replenish supplies before summer’s workload increases.
2. Plan for Seasonal Supply Runs & Bulk Purchasing
For those far from major stores, strategic supply trips reduce travel time and fuel costs.
✔ Buy in Bulk – Purchasing grains, feed, and other essentials in larger quantities saves money and minimizes trips.
✔ Schedule Supply Runs Every 2-3 Months – Keep a running checklist so no items are forgotten.
✔ Coordinate with Nearby Homesteaders – Group purchases can reduce delivery costs and improve availability.
Personal Insight: A few years ago, I started ordering feed and non-perishables in bulk with neighbors. This not only lowered costs but also ensured we always had access to supplies, even when deliveries were delayed.
3. Secure Alternative Energy and Water Sources
Remote homesteaders must be prepared for power outages and water shortages, as repairs and deliveries can take days or weeks.
✔ Install Solar Panels or a Generator – Ensures a reliable power source for essential equipment.
✔ Harvest Rainwater – Having backup water collection systems reduces dependency on outside sources.
✔ Keep Extra Fuel and Propane On Hand – Stock up on heating fuel before winter arrives.
Pro Tip: If grid electricity isn’t an option, pairing solar power with battery storage can provide year-round energy independence.
Building Resilience in Remote Homesteading
Living in a remote area requires careful planning, strong community ties, and a reliable supply system. By focusing on building support networks, maintaining emergency plans, and securing sustainable resources, homesteaders can overcome isolation and supply challenges while thriving off the grid.
Tip 12: How to Adapt Your Homesteading to Unpredictable Weather Conditions
Weather patterns are becoming increasingly unpredictable, with sudden frosts, extended droughts, excessive rainfall, and temperature extremes affecting homesteaders across the country. Mid-spring is a crucial time to prepare for these fluctuations by selecting resilient crops and livestock breeds, implementing water conservation strategies, and reinforcing homestead infrastructure to handle weather uncertainties.
By anticipating seasonal challenges and making proactive adjustments, homesteaders can build a more resilient, sustainable farm that thrives despite climate fluctuations.

The Best Crops and Livestock Breeds for an Ever-Changing Climate
One of the most effective ways to adapt to unpredictable weather is by choosing crops and animals that can withstand extreme conditions. Whether dealing with unexpected frosts, prolonged heat, or inconsistent rainfall, selecting the right varieties ensures better survival rates and consistent yields.
1. Resilient Crops for Variable Weather
Drought-Resistant Crops – Ideal for regions prone to dry spells.
- Sweet potatoes
- Amaranth
- Black-eyed peas
- Sorghum
- Chickpeas
Cold-Hardy Crops – Survive late spring frosts and sudden temperature drops.
- Kale
- Carrots
- Beets
- Cabbage
- Winter wheat
Flood-Tolerant Crops – Useful in areas prone to heavy rain.
- Rice
- Cranberries
- Water spinach
- Taro
- Certain heirloom corn varieties
Fast-Maturing Crops – Ideal for regions with short growing seasons.
- Radishes
- Leaf lettuce
- Bush beans
- Summer squash
- Mustard greens
Pro Tip: Diversify your crops by planting multiple varieties of the same vegetable to hedge against losses due to unexpected weather shifts.
2. Climate-Resilient Livestock Breeds
Just as certain crops thrive in challenging conditions, some livestock breeds are better suited to handle temperature extremes, droughts, and unpredictable seasonal shifts.
Best Poultry for Weather Extremes:
- Rhode Island Reds – Hardy in both hot and cold climates.
- Buff Orpingtons – Excellent cold tolerance and docile nature.
- Leghorns – Great for hot, dry regions and consistent egg production.
Best Cattle for Unpredictable Climates:
- Scottish Highland – Thick coat protects against cold; does well in heat if given shade.
- Texas Longhorn – Adaptable to drought-prone environments.
- Jersey Cows – Handles moderate temperature fluctuations well and produces high-quality milk.
Best Sheep and Goat Breeds for Variable Conditions:
- Katahdin Sheep – Naturally resistant to parasites and climate extremes.
- Nubian Goats – Thrive in both cold and hot weather, great milk producers.
- Boer Goats – Strong resistance to drought and high temperatures.
Best Pigs for Outdoor Homesteading:
- Berkshire Pigs – Hardy in both extreme heat and cold.
- Tamworth Pigs – Excellent for pasture-based systems with unpredictable weather.
Personal Insight: A few years ago, I switched from traditional broiler chickens to hardier dual-purpose breeds like Rhode Island Reds and Buff Orpingtons. The result? Fewer losses during extreme temperature swings and consistent egg production year-round.
Water Conservation Strategies to Combat Mid-Spring Droughts
Droughts are a serious challenge for homesteaders, affecting crop yields, livestock hydration, and soil health. Implementing smart water conservation techniques ensures that your farm remains productive, even during dry spells.
1. Capturing and Storing Rainwater Efficiently
✔ Install Rain Barrels & Cisterns – Collect runoff from rooftops for later use.
✔ Use Swales & Contour Farming – Dig shallow trenches along slopes to capture and direct rainwater into the soil.
✔ Dig a Farm Pond – Acts as a backup water source during dry spells.
Pro Tip: Line ponds and reservoirs with clay or pond liners to reduce water loss from seepage.
2. Improving Soil Moisture Retention
✔ Apply Thick Layers of Mulch – Reduces evaporation and keeps soil cool.
✔ Use Cover Crops in Off-Seasons – Improves soil structure and moisture retention.
✔ Plant Drought-Resistant Perennials – Fruit trees like figs, pomegranates, and almonds thrive in dry conditions.
Personal Insight: One summer, I started using deep mulch and cover crops in my garden beds. The result? I cut my watering schedule in half while keeping my soil rich and healthy.
3. Efficient Irrigation Techniques
✔ Drip Irrigation Systems – Deliver water directly to plant roots, reducing waste.
✔ Use Ollas (Clay Pot Irrigation) – A buried clay pot slowly releases moisture into the soil.
✔ Water in the Early Morning or Late Evening – Reduces evaporation loss.
Pro Tip: Use greywater recycling systems (filtered household wastewater) for watering non-edible crops, trees, and pasture areas.
Building Resilience Against Climate Uncertainty
Unpredictable weather is one of the biggest challenges homesteaders face, but by choosing adaptable crops and livestock, conserving water, and making infrastructure improvements, you can create a more resilient and productive homestead that thrives in any climate conditions.
Tip 13: High-Tech Meets Homesteading: Using Modern Tools for Efficiency
Homesteading is often associated with traditional, hands-on methods, but modern technology has revolutionized self-sufficiency, making tasks more efficient, sustainable, and less labor-intensive. Whether you’re looking to conserve energy, improve water usage, or automate daily chores, integrating solar-powered tools and smart irrigation systems can help maximize productivity while reducing waste.
By adopting the right technology, homesteaders can increase yields, lower operating costs, and ensure long-term sustainability without compromising the core values of self-reliance and environmental stewardship.

How Solar-Powered Tools Can Make Your Homestead More Sustainable
Solar power has become a game-changer for homesteaders who want off-grid energy independence and lower electricity costs. As solar technology becomes more affordable and efficient, it’s easier than ever to integrate it into everyday farm and household operations.
1. Solar-Powered Water Pumps for Remote Homesteads
For those without access to municipal water, solar pumps provide a reliable water supply for gardens, livestock, and household use.
✔ Solar Well Pumps – Draw water from deep wells without relying on the grid.
✔ Solar-Powered Livestock Waterers – Ensure animals have a constant, fresh water source.
✔ Drip Irrigation Systems – Power water distribution directly from a rainwater collection system.
Personal Insight: A fellow homesteader I know switched to a solar-powered well pump, eliminating costly fuel-powered pumping. Within the first year, they saved over $1,200 in fuel costs alone while ensuring consistent water availability.
2. Solar Fencing for Livestock Protection
Traditional electric fencing relies on grid electricity, but solar-powered electric fences offer a cost-effective, low-maintenance alternative.
✔ Keeps Predators Out – Ideal for protecting chickens, goats, and other small livestock.
✔ Low Energy Costs – Once installed, solar fences cost nothing to operate.
✔ Portable & Easy to Install – Move fencing to different grazing areas as needed.
Pro Tip: Choose battery-backed solar fence chargers to ensure continuous operation on cloudy days.
3. Solar-Powered Lighting & Security Systems
Keeping a homestead secure is crucial, and solar lighting and security cameras help monitor and protect your property, even in remote areas.
✔ Motion-Sensing Solar Lights – Illuminate pathways, barns, and tool sheds without electrical wiring.
✔ Solar-Powered Security Cameras – Provide real-time remote monitoring via Wi-Fi.
✔ Portable Solar Lanterns – Useful for off-grid cabins, greenhouses, and night chores.
Pro Tip: Installing solar-powered motion lights near entry points can deter predators and intruders while conserving energy.
The Best Smart Irrigation Systems to Save Water and Boost Growth
Water conservation is critical, especially in regions prone to droughts or unpredictable rainfall. Smart irrigation systems deliver water efficiently, reducing waste and ensuring crops and gardens receive the optimal amount of moisture.
1. Drip Irrigation with Smart Timers
✔ Reduces Water Waste – Water goes directly to plant roots, minimizing runoff.
✔ Prevents Overwatering – Smart sensors adjust watering schedules based on soil moisture levels.
✔ Perfect for Raised Beds & Greenhouses – Automates watering without manual intervention.
Personal Insight: I switched to a drip irrigation system with a soil moisture sensor for my vegetable garden. The results? Healthier plants, fewer weeds, and a 40% reduction in water usage.
2. Rainwater Harvesting with Smart Water Distribution
✔ Automatic Rain Barrel Sensors – Monitors water levels and prevents overflow.
✔ Gravity-Fed Drip Systems – Uses stored rainwater for slow, steady irrigation.
✔ Timed Release Valves – Opens irrigation lines only when necessary, preventing water loss.
Pro Tip: Combine rainwater harvesting with smart irrigation timers to ensure plants are watered efficiently using free, natural resources.
3. Soil Moisture Sensors for Precision Watering
Smart soil moisture sensors detect real-time soil hydration levels and adjust irrigation accordingly.
✔ Prevents Overwatering & Root Rot
✔ Connects to Wi-Fi for Remote Monitoring
✔ Customizes Watering Schedules Based on Weather Forecasts
Personal Insight: I installed moisture sensors in my orchard, and they prevented me from overwatering trees during an unexpectedly rainy spring. Not only did I save water, but my trees grew stronger with less disease pressure.
Modern Technology for a More Efficient Homestead
Combining solar power and smart irrigation systems allows homesteaders to increase efficiency, reduce reliance on outside resources, and ensure a more sustainable future. By adopting these technologies, you’ll spend less time on manual labor and more time enjoying the rewards of your hard work.
Tip 14: Making Money from Your Homestead: Creative Ways to Earn Extra Income
Homesteading is often about self-sufficiency, but it can also be a profitable way of life. Many homesteaders look for ways to turn their hard work into additional income, whether through selling farm-fresh products, offering hands-on experiences, or using their knowledge to educate others.
Mid-spring is a great time to start planning revenue streams as demand for fresh produce, artisanal goods, and educational resources peaks during the warmer months. By diversifying income sources, homesteaders can boost financial security while staying true to the principles of self-sufficiency.
How to Start a Farm-to-Table Business from Your Homestead
The farm-to-table movement continues to grow as consumers seek local, organic, and sustainably sourced food. If you already grow your own produce or raise livestock, turning this into a business can provide steady income while strengthening community ties.
1. Selling Fresh Produce, Eggs, or Meat Locally
✔ Set Up a Farm Stand – Sell vegetables, fruits, eggs, or dairy products directly from your homestead.
✔ Join a Farmers’ Market – A great way to connect with local buyers and build brand loyalty.
✔ Offer Community-Supported Agriculture (CSA) Subscriptions – Customers pre-pay for weekly seasonal produce boxes.
Personal Insight: A friend of mine started selling extra eggs and homemade jams at the local market and quickly built a loyal customer base. Within a year, they expanded to offering CSA boxes, and now their small homestead generates full-time income.
2. Creating Value-Added Products for Higher Profits
Instead of just selling raw products, adding value through processing can increase profit margins significantly.
✔ Canning & Preserving – Sell jams, pickles, sauces, or fermented foods.
✔ Herbal Products & Teas – Dried herbs, homemade tinctures, and essential oils have strong demand.
✔ Handmade Dairy & Meat Products – Cheeses, butter, smoked meats, and jerky command higher prices than raw milk or meat.
✔ Homemade Baked Goods – Sourdough bread, pastries, or gluten-free items attract local customers and foodies.
Pro Tip: Many states have cottage food laws that allow selling homemade goods with minimal regulations—check your local requirements before getting started.
3. Hosting Farm-to-Table Dinners or Events
If you enjoy hospitality, turning your homestead into a destination for farm-to-table experiences can be highly rewarding.
✔ Host Seasonal Farm Dinners – Charge per guest for fresh, local meals paired with storytelling or live music.
✔ Offer U-Pick Experiences – Let visitors harvest their own berries, apples, or vegetables for a fee.
✔ Run Farm Tours & Workshops – Teach guests about gardening, animal husbandry, or sustainable living.
Personal Insight: One summer, I attended a farm-to-table dinner at a small homestead and was amazed by how much people were willing to pay for a simple meal made with homegrown ingredients. The farmer said they sold out every event, making it one of their biggest income sources.
Turning Your Homestead Skills into a Profitable Online Course or Workshop
In today’s digital world, homesteading knowledge is in high demand, and teaching what you know can be an excellent source of passive income. Whether you specialize in permaculture, raising chickens, beekeeping, or DIY home projects, there are people eager to learn from real-life experience.
1. Creating an Online Course About Homesteading Skills
Online courses are a one-time effort that can generate income indefinitely.
✔ Choose a Niche Topic – Focus on what you’re best at (e.g., organic gardening, soap making, or backyard poultry).
✔ Record Step-by-Step Video Lessons – Keep it simple and actionable so students can follow along.
✔ Use Platforms Like Udemy, Teachable, or YouTube Memberships – Sell courses without needing a personal website.
Pro Tip: Pre-sell your course to gauge interest before creating content, ensuring there’s demand for your topic.
2. Offering Virtual or In-Person Workshops
Workshops are an interactive way to teach hands-on skills, and you can charge premium prices for personalized instruction.
✔ Host Virtual Webinars on Zoom – Teach gardening, food preservation, or DIY homestead skills.
✔ Run In-Person Homesteading Retreats – Offer multi-day workshops on sustainable living and farm management.
✔ Sell Workshop Recordings – Create a library of past lessons that new students can access anytime.
Personal Insight: I once paid for a virtual homesteading course on off-grid living, and the instructor earned thousands in course sales alone. The best part? They recorded it once and continue to earn passive income from it every month.
3. Starting a Blog, YouTube Channel, or Patreon for Ongoing Revenue
If you enjoy sharing your journey, content creation can be a steady income stream through ads, sponsorships, and paid memberships.
✔ Start a Homesteading Blog – Use ads, affiliate marketing, and e-books to monetize.
✔ Create a YouTube Channel – Earn from ad revenue, product sponsorships, and super chats.
✔ Offer Exclusive Content on Patreon – Give paid subscribers behind-the-scenes access to your homestead.
Pro Tip: Consistency is key—posting high-quality, useful content weekly helps grow an engaged audience over time.
Diversifying Your Homestead Income for Long-Term Sustainability
Making money from your homestead isn’t just about selling goods—it’s about creativity, skill-sharing, and community building. Whether you focus on farm-fresh products, value-added goods, agritourism, or digital content, having multiple revenue streams ensures long-term financial security.
Recap: Homesteaing in Mid-Spring
Mid-spring is a pivotal season for homesteaders, offering the perfect opportunity to prepare, plant, and protect your land, livestock, and livelihood. From seasonal crop rotation and organic pest control to smart irrigation and fireproofing strategies, each of these 14 tips for homesteading in mid-spring is designed to help you build a thriving, resilient homestead that sustains itself through the changing seasons.
By adopting sustainable practices, integrating modern technology, and planning ahead, you can boost productivity, reduce risks, and create a more self-sufficient lifestyle. Whether you’re growing food, raising animals, or exploring ways to generate extra income from your homestead, the key to success lies in adaptability, efficiency, and preparation.
As the season progresses, take time to observe what’s working, adjust where needed, and continue learning from your experiences. Homesteading is a lifelong journey, and every year presents new challenges and opportunities.
What strategies are you implementing on your homestead this spring? Share your thoughts, questions, and experiences in the comments below! Let’s continue building a strong, supportive homesteading community together.
Disclaimer: The information provided in this article is for general informational purposes only and is not intended to be a substitute for professional advice. The author of this article does not claim to be an expert in homesteading and the information provided should not be relied upon to make decisions about your own homesteading journey. Please do your own research and consult with a qualified professional before making any decisions about your homestead.
Share via:
Shaun Alexander is the main writer and editor for HomesteadingSimple.com. With a strong passion for homesteading and sustainability, Shaun has dedicated his life to learning and sharing information about a simple, fulfilling existence tied to the land. His expertise ranges from gardening and livestock management to off-grid living and DIY projects, reflecting the diverse skills necessary for a successful homesteading lifestyle. Shaun’s goal is to inspire and educate others about the possibilities of homesteading, whether in rural, suburban, or urban settings, and to provide practical advice and tips for both beginners and seasoned homesteaders. He believes in a future where more people return to their roots, embracing a life of self-sufficiency and harmony with nature.