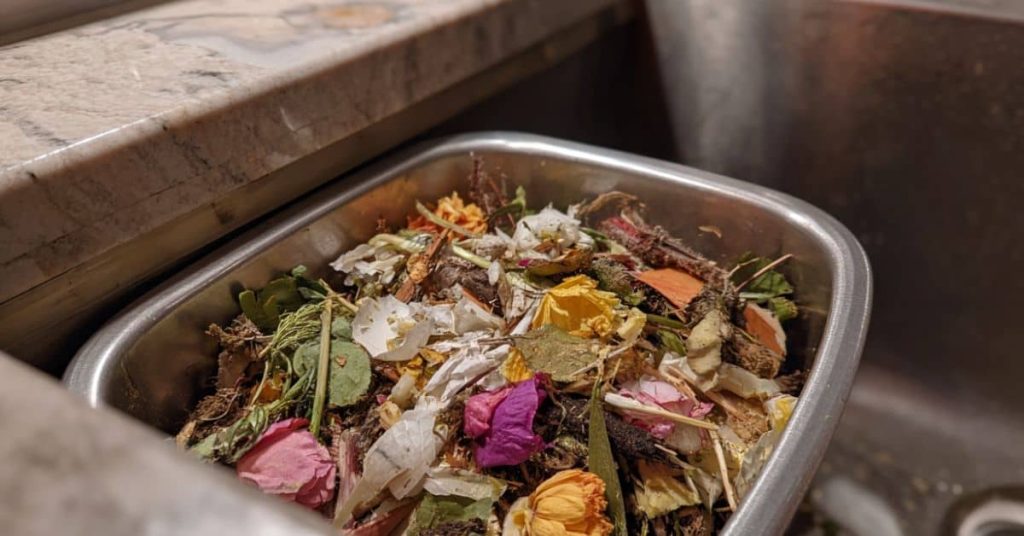
FAQs on Composting Basics for Urban Apartments

If you’re just looking for quick answers to common apartment composting questions, this FAQ section has you covered.
Every composting setup is a little different, especially in apartments. These are the questions I hear most often, from folks who are curious but not sure where to begin. If you’ve been wondering the same things, you’re in good company.
Q1: How to Start Composting in an Apartment?
Start small. That’s my number one tip. You don’t need fancy gear or a green thumb-just a container with a lid, some food scraps, and a little patience.
Steps that worked for me:
- Pick a bin (countertop, under-sink, or Bokashi).
- Add a mix of greens (like veggie peels) and browns (like shredded paper).
- Keep it somewhere cool and dry.
- Stir every few days and keep an eye on the smell.
Ask yourself: Do I want worms, or not right now? That’ll help steer you toward the right method. Composting basics for urban apartments are about finding what fits you.
Q2: How to Compost in Urban Areas?
Urban composting is all about being creative with small spaces and working with what your city offers.
Options include:
- Worm bins under the sink or in closets
- Bokashi systems that ferment scraps instead of decomposing
- Freezer scrap storage with weekly drop-offs
- Joining community compost co-ops or gardens
In NYC, I drop my scraps off every Saturday at the farmers market. In Austin, you might qualify for a rebate if you compost at home.
If you’re wondering, Where can I even put a bin in this tiny space?-you’re not alone. It took me two tries before I found a quiet corner that worked.
Q3: Can You Compost If You Live in an Apartment?
Yes, absolutely. I’ve been doing it in apartments for over a decade.
Whether you use a small electric bin, build a DIY worm system, or just collect scraps for drop-off, there’s a method that’ll fit your routine. The key is keeping it simple and being willing to tweak things when they get messy.
I wasn’t sure this would work when I lived on the third floor of a walk-up. But with a sealed container and weekly drop-offs, it turned out to be easier than I expected.
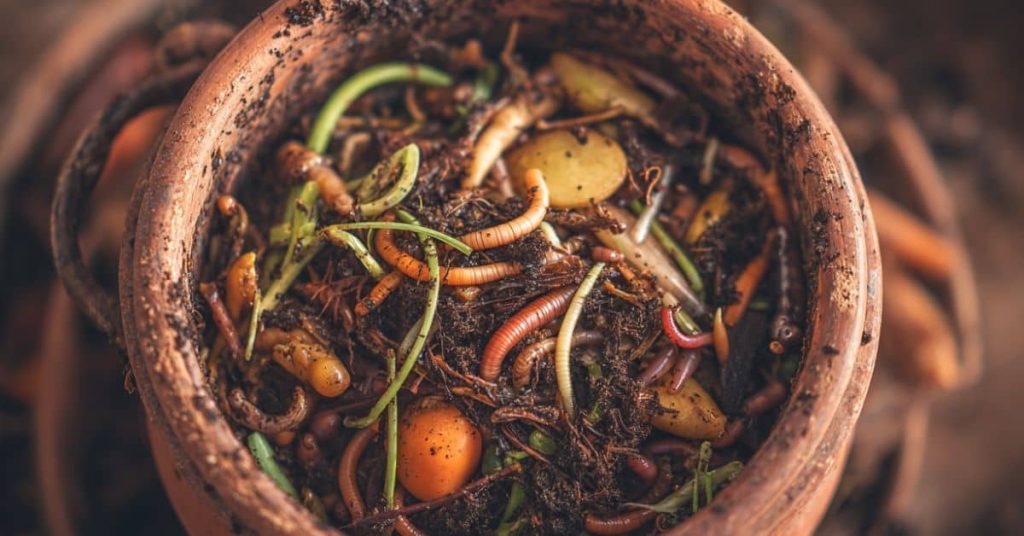
Q4: What Are the 5 Mistakes That People Commonly Make When Composting with Worms?
Here’s the short list-believe me, I’ve made most of these. You’ll find more detail here.
- Overfeeding the Worms
Too many scraps too fast will cause odor and rot. - Not Enough Bedding or Airflow
Worms need dry material like shredded paper and good ventilation. - Too Much Moisture or Heat
If your bin gets too wet or hot, your worms will either leave or die. - Ignoring Smell Clues
A bad smell means your balance is off. Trust your nose. - Using the Wrong Food Scraps
No citrus, meat, dairy, or greasy foods. They’re too much for a small system.
A woman from Boston told me she killed her first worm bin by feeding it leftover chili. We’ve all been there. Keep it simple: veggie scraps, coffee grounds, paper, and calm expectations.
Composting Basics for Urban Apartments: Why It Matters
Most folks living in cities don’t exactly have a backyard compost pile tucked behind a chicken coop. If you’re in an apartment, you’re probably dealing with limited space, close neighbors, and a kitchen that fills up fast with scraps. But here’s the truth: composting isn’t just for folks with acreage or raised beds. It’s for anyone who eats – and tosses what’s left.
Learning the composting basics for urban apartments isn’t about going off-grid or growing all your own food. It’s just about doing something useful with the food waste that would otherwise rot in a landfill. And honestly, once you get the hang of it, it’s pretty satisfying.
Let’s break down why it matters-both for the planet and for your daily life.
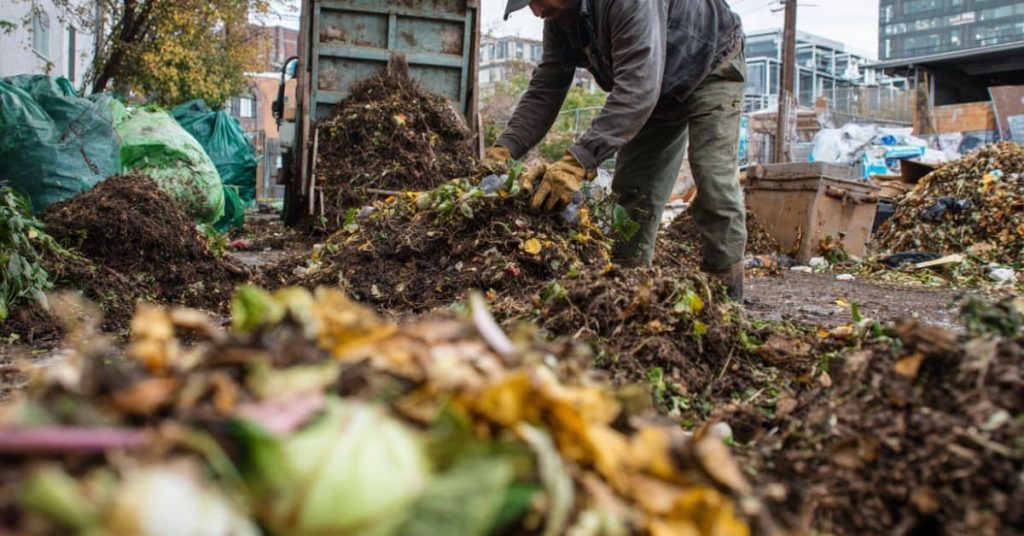
Urban Food Waste and Its Impact
You ever notice how fast food scraps pile up in a small kitchen? One onion skin, half a lemon, a few wilted greens-suddenly your trash smells funky, and you’re taking it out twice a week just to keep flies away.
Now picture that happening in millions of apartments across New York, Chicago, or Phoenix every single day.
According to the EPA, over 30% of what ends up in U.S. landfills is food waste-most of it still perfectly compostable. When all that organic matter gets buried instead of composted, it breaks down without oxygen, creating methane gas. That’s a major contributor to climate issues most folks never think about when tossing apple cores or coffee grounds.
Even if you don’t have a yard, learning the composting basics for urban apartments can actually make a noticeable difference. I didn’t think my little countertop bin would matter much either-until I saw how fast I filled it and how much less trash I had every week.
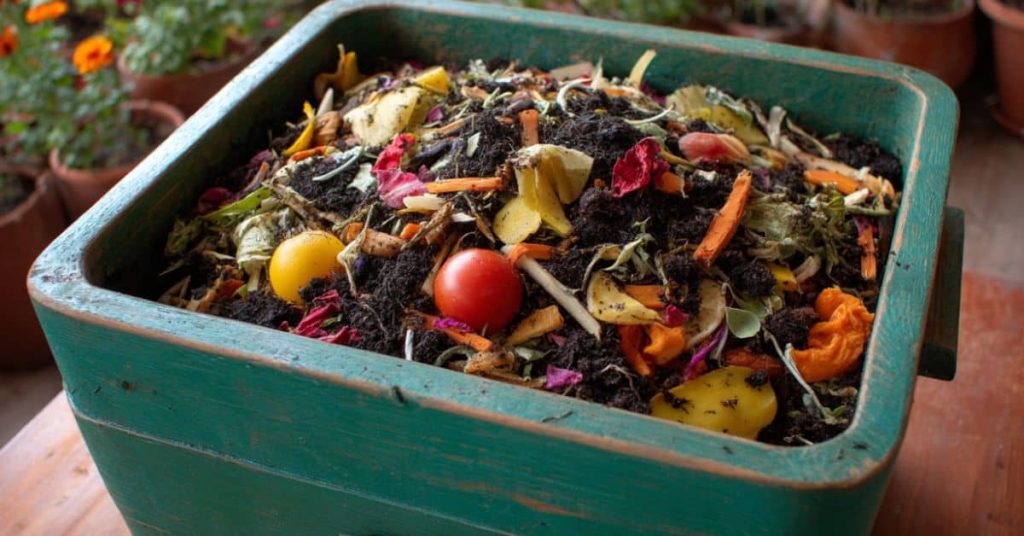
Benefits of Composting in Apartments
Here’s the thing: you don’t need a backyard to compost, and the benefits go way beyond “being green.”
- You’ll take out the trash less. I used to haul trash down three flights almost daily. Once I started composting, I dropped to twice a week. Less stink. Fewer flies.
- You can feed houseplants and balcony herbs. Even a small compost bin turns into rich, crumbly material plants love. My basil’s never been happier.
- You’ll be more mindful of waste. When you separate scraps, you start noticing what you toss-and maybe even cut back on it.
- You might even save money. Cities like Austin and Seattle offer rebates or curbside composting bins for free.
I wasn’t sure this would work in my second-floor walk-up in Brooklyn, but once I got a worm bin going (and learned what not to feed it), it became second nature.
And if worms aren’t your thing, no judgment. A neighbor down the hall uses a Bokashi system. Smells a little vinegary, but it works fast and fits right under her sink.
If you’ve ever asked yourself, “Does composting in an apartment even help?”-the answer is yes. Every banana peel or coffee filter that doesn’t go to a landfill counts.
How to Start Composting in an Apartment
Getting started with composting in a city apartment isn’t as complicated as it might sound. You don’t need a garden. You don’t need to be perfect. You just need to pick a method that fits your space and lifestyle.
When I first looked into composting basics for urban apartments, most of the advice felt written for folks with backyards. But composting works just fine indoors, too-once you figure out a setup that doesn’t stink, doesn’t take over your kitchen, and doesn’t involve hauling heavy bins down a stairwell every weekend.
Let’s walk through how to find the right composting method and how to get going without getting overwhelmed.
Choosing Your Composting Method
The first question to ask is: What kind of composting makes sense for my space and comfort level?
If you’re okay with worms, a worm bin (also called vermicomposting) works great. They’re quiet, don’t smell when managed right, and the castings are pure gold for houseplants. Some folks keep their bin under the sink or in a closet.
Not into worms? No problem. A Bokashi bin is a closed system that ferments scraps using a special bran. It takes about two weeks per batch and doesn’t attract bugs if you keep it sealed. Just be ready for a bit of a sour smell when you open the lid.
There are also electric composters, which cost more upfront but break down food scraps fast. I know a guy in Phoenix who swears by his Lomi-uses it nightly, and it fits on his kitchen counter like a toaster oven.
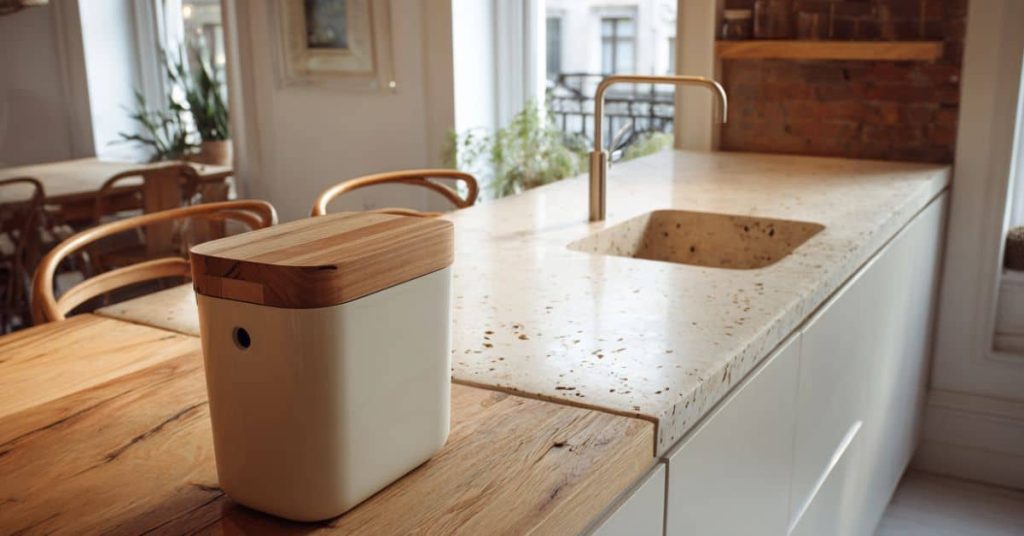
Indoor Composting with a Small Bin – Countertop vs. Under-Sink
If you live in a tight space, think about where your bin will go:
- Countertop bins are great if you’re composting every day. They’re usually 1-2 gallons and come with charcoal filters to cut down on smell.
- Under-sink bins are hidden away and out of sight, but make sure you’ve got airflow. A stale, damp bin under a sink can get gross fast.
I started with a simple stainless steel countertop pail from a hardware store. It worked, but I had to empty it often. Eventually I swapped it for a compact under-sink setup and added a layer of shredded newspaper to keep things dry.
If you’re wondering, “Will this attract bugs?”-it might, if it gets too wet or you toss meat in. But if you stick to veggie scraps, coffee grounds, and brown material (like paper or dry leaves), you’ll be fine.
Beginner Steps to Get Going
Once you’ve picked your method and bin location, here’s how to get started:
- Choose a bin based on your space and method.
- Add bedding (shredded paper, cardboard, or coco coir) if you’re using worms.
- Start slow. Don’t overload your bin in week one. Add a handful of scraps, then wait and watch.
- Keep it balanced. You’ll need a mix of “greens” (like food scraps) and “browns” (like paper or dry leaves).
- Check the moisture. Your compost should feel like a wrung-out sponge. Too wet? Add dry paper. Too dry? Sprinkle a little water.
If you’re using a Bokashi system, just layer your scraps and sprinkle the bran after each addition. Seal the lid tightly, and don’t open it every day – resist the urge to peek.
Tools You’ll Need
Here’s a basic starter list:
- A compost bin (countertop, under-sink, worm bin, or Bokashi)
- A small container or bowl to collect daily scraps
- Shredded paper or cardboard for browns
- Optional: gloves, hand trowel, and a bin thermometer (if you’re curious)
Most of these you might already have lying around. I used old Amazon boxes for bedding and an old yogurt tub for collecting peels during the day.
What Worked for Me
I started composting in a 600-square-foot apartment in San Antonio. I was nervous about the smell and didn’t want a bin full of bugs. So I kept it simple.
I used a stainless steel bin with a filter on the counter and started saving only veggie scraps and coffee grounds. No fruit, no citrus. Just the easy stuff. I added shredded paper every couple of days, and it stayed clean and dry. Within a month, I noticed I was taking out half as much trash, and my spider plant looked healthier than ever.
Later I graduated to a worm bin. I’ll admit-I was squeamish at first. But after a few weeks, the worms did their thing, and now I barely even check on them.
If you’re sitting there wondering, “Can I really compost in my tiny kitchen without making a mess?”-yes, you can. You might have to adjust a few habits, but it doesn’t take much. Just a container, a little patience, and the willingness to learn as you go.
How to Compost in Urban Areas
When people hear the word “compost,” they often picture a big backyard pile out behind a farmhouse. But the truth is, composting can work just fine in the middle of a city-even on the 10th floor of an apartment building.
The trick is working with what you’ve got. Whether you’re in a tiny studio in Manhattan or a one-bedroom in downtown Denver, there’s almost always a way to make composting basics for urban apartments fit into your daily rhythm.
Space Constraints and Creative Solutions
If you’re short on space (and who isn’t in the city?), composting can feel like trying to store a garden in a closet. But it doesn’t have to take over your kitchen.
Here are a few space-conscious ideas that have worked for others:
- Go vertical. One reader from Portland built a worm bin out of stacked plastic drawers that fit in a closet. She keeps it next to her shoes and hasn’t had a single complaint.
- Slide it under the sink. A Chicago renter told me they used a simple 2-gallon Bokashi bin tucked under their kitchen sink. They layer scraps and bran every night after dinner and say the vinegar smell isn’t bad if they keep the lid tight.
- Use your freezer. This one surprised me. A friend in Oakland freezes her food scraps until she’s ready to drop them off at a local collection site. No smell. No flies. Just a couple of repurposed yogurt tubs in the freezer door.
If you’ve ever thought, “I don’t have room for this,” try walking around your place and looking again. Even a corner behind a trash can or a shelf in a laundry closet might work. You don’t need much room. You just need a dedicated spot and a little consistency.
Working with What You’ve Got Indoors
Urban living often means shared walls, tight storage, and very little wiggle room for messes. So composting in an apartment is all about minimizing hassle and keeping things clean.
Here’s how:
- Pick a low-maintenance system. Bokashi or electric composters are great if you want something quick and tidy. Worm bins are low-maintenance once they’re going, but they do need a little learning up front.
- Plan your scraps. Not everything needs to go in. I skip onions, citrus, and meat-too smelly for small bins. Stick with veggie peels, coffee grounds, and paper.
- Label your bin. Especially in a shared kitchen or if you’ve got roommates. A simple “Compost Only – No Meat/Dairy” can save some awkward conversations.
- Use the output. Even if you don’t garden, you can give finished compost to neighbors, local garden clubs, or houseplant lovers in your building.
What worked for me was starting small. I began with a basic 1.5-gallon bin under the sink and limited myself to coffee grounds, banana peels, and carrot shavings. I wasn’t sure it would stick-but once I realized how much less trash I was hauling out, I was sold.
My neighbor across the hall now composts too. We trade tips and share extra compost with a rooftop garden two buildings down. It’s turned into a little community effort, right in the middle of Austin.
If you’re wondering whether composting basics for urban apartments can really work with your lifestyle, the answer is yes-it just might look a little different than the traditional pile out back.
Can You Compost If You Live in an Apartment?
Short answer? Yes. Longer answer? Absolutely, but it helps to know your options – and be a little flexible at first.
A lot of folks assume composting in an apartment is messy, smelly, or just too much trouble. I get it. I had those same doubts when I lived on the third floor of a brownstone with no yard, no balcony, and neighbors who weren’t shy about complaining if anything smelled off. But composting basics for urban apartments are a lot more doable than most people think.
This section covers the worries people usually have and how others have figured it outwithout turning their kitchen into a science experiment.
Common Concerns and Honest Answers
Here are the big ones I hear most often:
- “Will it smell?”
If it smells bad, something’s off. A good compost bin, whether it’s a worm bin, a Bokashi bucket, or a countertop bin with a charcoal lid, shouldn’t stink. Keep it balanced with dry paper or cardboard, avoid dairy and meat, and empty it regularly.
- “Where would I even put it?”
You don’t need a lot of space. I’ve seen bins fit:
- Under the sink
- In a closet
- Behind a trash can
- On a small balcony
- Even in a garage stairwell if you’ve got one
- “What about bugs?”
Bugs show up when it’s too wet, or when you leave the lid open too long. I had a few fruit flies in the beginning, but switching to a sealed Bokashi bin cleared that up fast.
- “What do I do with the compost?”
That’s a good one. If you don’t garden, you still have options:
- Use it for houseplants
- Give it to a friend or neighbor
- Drop it off at a local compost site
- Check if your city has a collection program
Austin, Seattle, and NYC all have curbside compost pickup or free drop-off locations. Some even offer rebates for buying your own bin.
Real-Life Examples from Urban Apartment Dwellers
Karen in San Diego keeps a worm bin in her coat closet. She says, “I feed them once a week, check the moisture, and they do the rest. I give the compost to a friend with a backyard garden.”
Marcus from Detroit composts using Bokashi under his kitchen sink. He told me he was “nervous about the smell,” but it turned out “no worse than vinegar.”
Jenny in Atlanta didn’t want to deal with worms or bins, so she freezes her scraps in reused yogurt tubs. “When they’re full,” she says, “I walk them to the city compost drop-off at the farmers market.”
What worked for me was starting with a small pail and setting some simple rules-no meat, no dairy, add paper when it gets soggy. I wasn’t sure this would work in my cramped kitchen, but after a month, it just felt normal.
If you’ve been asking, “Can you compost if you live in an apartment?”-you’re not alone. The answer is yes, and you’ve got more ways to do it than you probably think. You don’t need a backyard. You just need a bin, a plan, and a little curiosity.
What Are the 5 Mistakes That People Commonly Make When Composting with Worms?
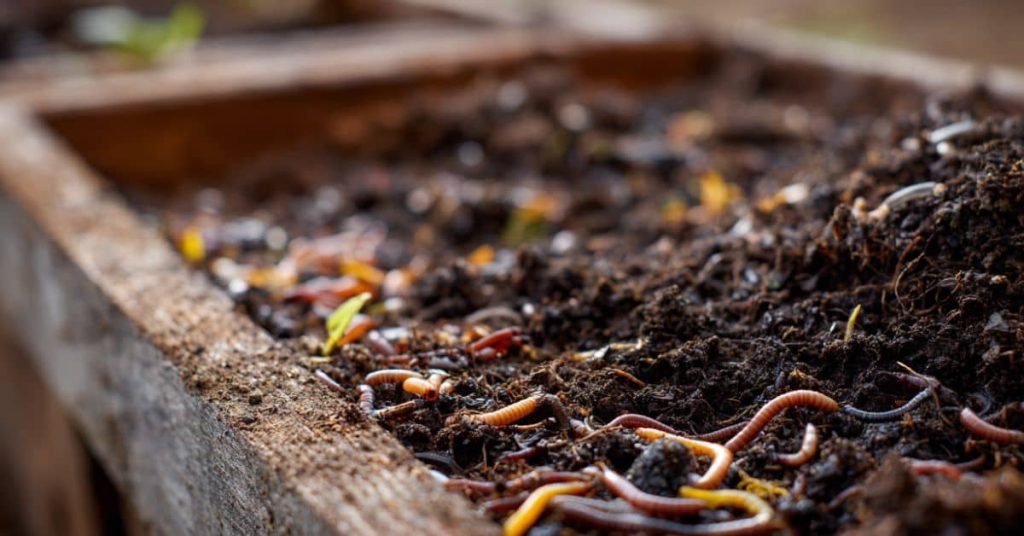
Worm composting is one of the most space-friendly options when it comes to composting basics for urban apartments. But it’s easy to run into trouble if you’re new to it. Worms are hardy, but they do need a little care-especially if they’re tucked under your kitchen sink or in a closet.
If you’ve ever had a worm bin go sour (or smelled one in someone else’s apartment), chances are one of these five things was the culprit.
1. Overfeeding the Worms
It’s tempting to toss in every banana peel and wilted salad all at once. But too much food too fast can overwhelm your worms. It starts to rot before they can get to it, which invites fruit flies and smells.
When I first set up my worm bin in a one-bedroom in Houston, I dumped in two days’ worth of veggie scraps. That was a mistake. Within a week, I had a smelly mess and a dozen gnats hovering over the lid.
Now I feed once or twice a week, just a cup or two at a time. I bury the scraps under fresh bedding and give the worms time to work.
2. Not Enough Bedding or Airflow
Worms breathe through their skin, so they need a moist-but not soggy-environment with good airflow. Bedding like shredded newspaper, cardboard, or coconut coir helps regulate moisture and keeps the bin from turning slimy.
If you’ve ever asked yourself, “Why does my worm bin smell like sewage?” this is probably why.
I keep a paper shredder next to my bin and add a layer of dry paper every time I feed the worms. It keeps things light and airy, and I haven’t had a smell issue since.
3. Too Much Moisture or Heat
Worms thrive in the same conditions most people do: cool, damp, and not too dry. If your bin is dripping wet or sitting next to a heat vent, your worms will either drown or die trying to escape.
One reader in Phoenix told me she kept her bin near a window without realizing how much sun came through. After a couple of hot afternoons, she opened the lid to find a bin full of dead worms.
If your bin feels soggy, add more paper. If it’s drying out, mist it lightly. Try to keep it in a cool corner away from heaters or direct sunlight.
4. Ignoring Smell Clues
If your bin smells like rotting eggs or vinegar, something’s gone sideways. That’s your worms trying to tell you: “Help, we’re struggling in here.”
A healthy worm bin should smell earthy, kind of like a forest floor. If it doesn’t, check your food balance, bedding levels, and airflow.
What worked for me was checking the bin once a week-nothing too hands-on. I look, sniff, and stir things a little. If it looks dark and crumbly and smells fine, I let the worms do their thing.
5. Using the Wrong Food Scraps (e.g., citrus, meat, dairy)
Some foods just don’t belong in a small indoor worm bin. Citrus is too acidic, meat and dairy attract pests, and anything greasy will stink up the place.
Here’s what I stick to:
- Fruit and veggie scraps
- Coffee grounds (and filters)
- Crushed eggshells
- Shredded paper or cardboard
I once tried adding orange peels and leftover mac and cheese. Never again. The worms ignored it, it got moldy, and I had to start over.
Worm composting isn’t complicated, but like anything worth doing, it takes a little patience. If you’re working through the composting basics for urban apartments and leaning toward a worm bin, just start small, keep it balanced, and listen (and sniff) for clues along the way.
Composting Options Without a Backyard
Just because you don’t have outdoor space doesn’t mean composting is off the table. When it comes to composting basics for urban apartments, you’ve got more indoor-friendly options than you might think.
Whether you’re squeamish about worms or live in a building with strict rules about smells and trash, there’s probably a setup that fits your space, lifestyle, and comfort level. Let’s walk through a couple of the best options for indoor composting with no backyard required.
Bokashi Composting System for Apartments
Bokashi might sound like something fancy from a garden center, but it’s actually one of the simplest ways to compost indoors. It’s a fermentation method that uses bran mixed with beneficial microbes to break down food in an airtight bin.
Instead of decomposing like in a traditional pile, your scraps ferment. The bucket stays sealed, so there’s no smell unless you open it too often. Some folks say it smells a little like pickles or cider vinegar-tangy, not rotten.
Fermentation Process and Compost Tea Tips
Here’s how it works:
- Add food scraps to your Bokashi bin.
- Sprinkle the special bran on top.
- Press it down to get rid of air pockets.
- Seal the lid tight.
- Every couple of days, drain the “tea” from the spigot.
That liquid-often called “compost tea” – can be diluted and used to feed your plants. Just don’t use it full strength. I burned a basil plant that way once and learned the hard way.
After a couple of weeks, the scraps will look pickled. At that point, you can bury them in soil (if you’ve got a planter or know someone with garden space) or feed them to a traditional worm bin to finish the job.
A friend of mine in Minneapolis uses two rotating Bokashi buckets in her apartment. One fills while the other ferments. She calls it her “compost tag-team system.”
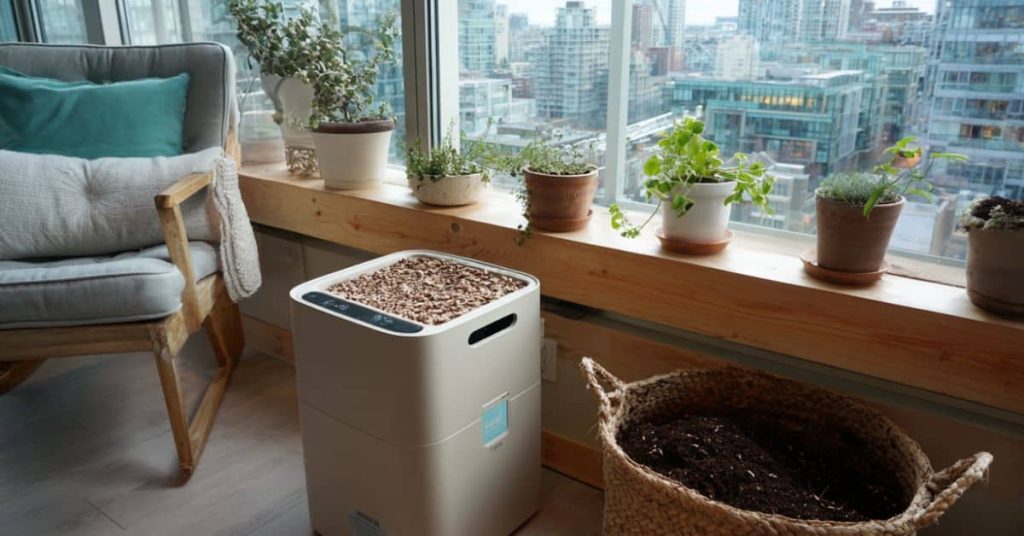
Electric Composters and No-Worm Composting
If you’re after something tidy, fast, and totally bug-free, electric composters might be worth a look. Brands like Lomi and Vitamix offer compact units that live right on your countertop.
These machines heat, grind, and dry your scraps, turning them into a soil-like substance in a matter of hours. It’s not “finished compost,” but it’s pretty close-and perfect for feeding plants or adding to outdoor soil if you’ve got access.
Pros and Cons
Pros:
- No smell
- No pests
- Works quickly
- Easy to use
Cons:
- Higher upfront cost (usually $300-$500)
- Requires electricity
- Some units can be noisy
I’ve tried a Lomi for a few weeks while visiting family in California. I’ll admit, I was skeptical. But it really did reduce scraps overnight, and the final product looked like dried mulch. My aunt used it in her potted succulents with no issues.
If you’re in a small city apartment and want composting basics for urban apartments to feel more hands-off, this might be your best bet.
These indoor options give you flexibility, especially if outdoor bins or worm bins feel too intense. You don’t need a garden to start composting-you just need a container, a plan, and a method that works for your space.
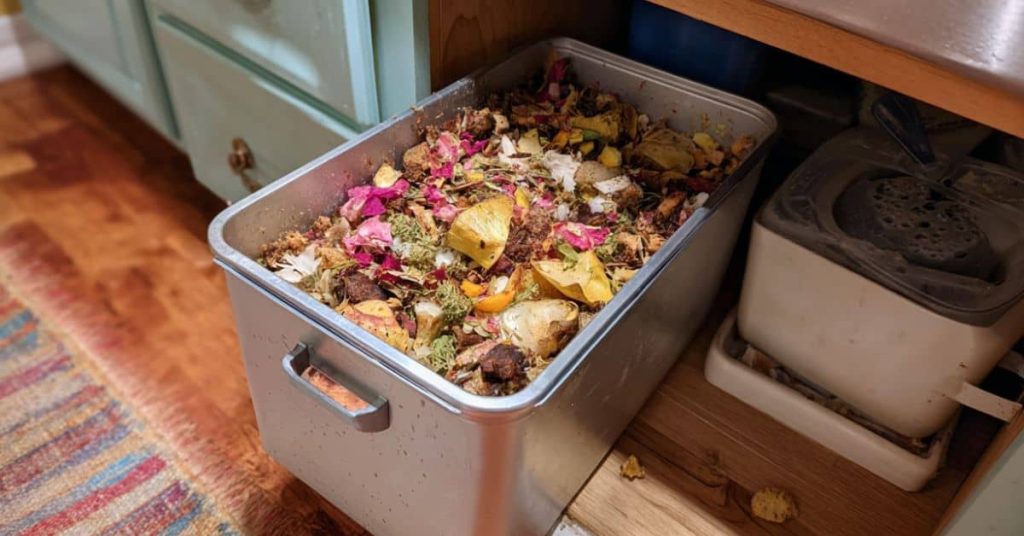
Preventing Fruit Flies in Countertop Compost Bin

If there’s one thing that can make you question composting in an apartment, it’s fruit flies. They show up fast, multiply even faster, and seem to pop out of nowhere the moment you toss in a banana peel.
When I first started with composting basics for urban apartments, fruit flies were the thing I was most nervous about. My kitchen was already small, and the idea of it turning into a fruit fly haven made me hesitate.
But the good news? There are simple, low-cost ways to keep them under control-and even keep them away for good. Here’s what I’ve learned from trial, error, and a few embarrassing “oops” moments.
Best Fly-Prevention Tricks That Actually Work
- Cover scraps with browns.
After every addition of food scraps, toss in a handful of shredded newspaper, paper towels (unbleached), or dried leaves. This creates a barrier that keeps flies from laying eggs on top.
- Freeze your fruit first.
One homesteader I talked to from Los Angeles freezes all her banana peels and fruit scraps before composting. “Kills the eggs before they hatch,” she told me, and I’ve found it works really well.
- Use a sealed bin.
If you’re composting in a countertop pail, make sure it’s got a tight-fitting lid. A charcoal filter in the lid helps with smells, too. I use one I bought for $25, and it sits right by the sink with no issues.
- Empty your bin regularly.
Don’t let it sit too long. I try to empty mine into the worm bin or Bokashi bucket every 2-3 days. Flies love a warm, fermenting mess left too long.
- Set up a trap if needed.
If you do see a few flies buzzing, here’s a quick fix:
- A small jar with apple cider vinegar
- A drop of dish soap
- A plastic wrap lid with holes poked in it
The flies dive in, but they can’t get out. I’ve caught dozens this way during a particularly hot week in July.
Natural Deodorizers and Lid Hacks
Keeping smells down helps deter flies, too. If it doesn’t stink, they’re less likely to show up.
Try these ideas:
- Sprinkle baking soda at the bottom of your bin once a week.
- Place a few pieces of charcoal in a mesh pouch inside the lid.
- Keep citrus peels out (flies love them), or freeze them if you want to compost them later.
What worked for me was lining the bin with brown paper bags, freezing anything too fruity, and switching to a Bokashi system in the summer. I wasn’t sure this would fix things, but after one week without a single fly, I knew I’d found my rhythm.
If you’re tackling composting basics for urban apartments and feel like fruit flies are your dealbreaker, you’re not alone. But with a few tweaks, you can keep them at bay and stay on track.
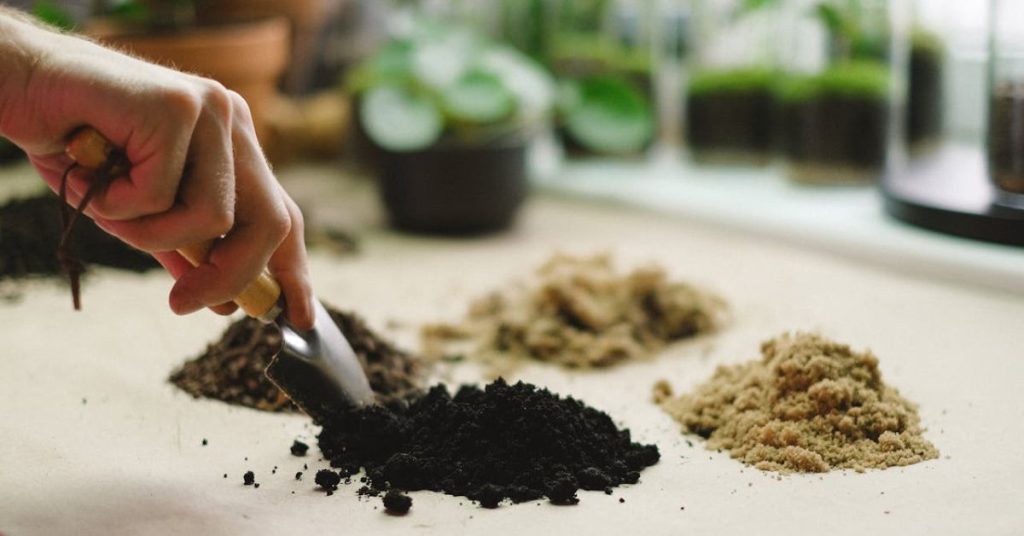
What to Do with Finished Compost in an Apartment
So you’ve been saving your scraps, managing your bin, and now you’ve got a nice little pile of dark, crumbly compost. That’s great. But if you don’t have a backyard to dump it into, you might be wondering: What now?
This is one of the most common questions I get when people are learning the composting basics for urban apartments. You’ve done the work-but now you need a plan for where the finished product goes. Good news: you’ve got options, even in a 500-square-foot studio.
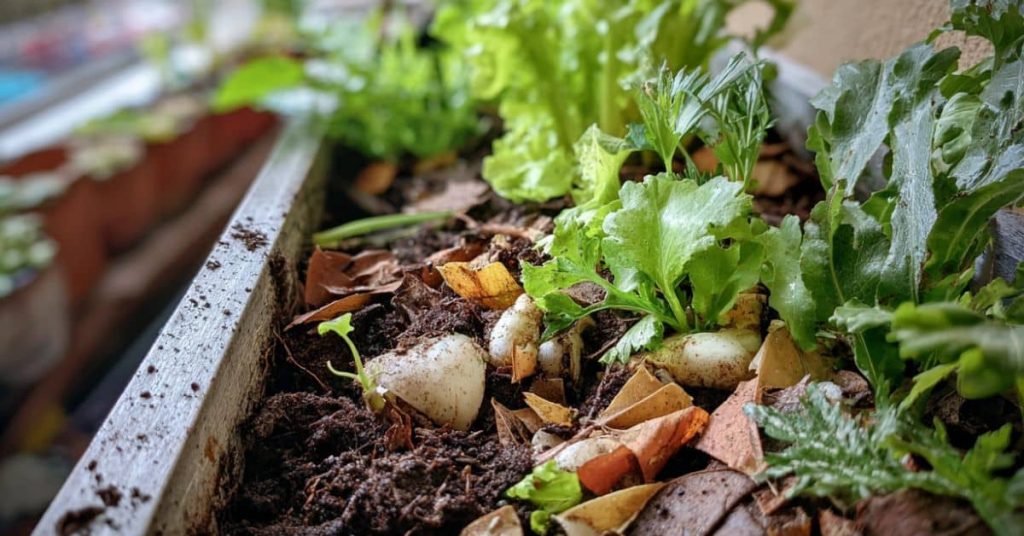
Compost Use for Houseplants and Balcony Gardens
This is the easiest and most satisfying option if you’ve got any plants at all.
Here’s what you can do:
- Top dress your plants. Sprinkle a thin layer of compost on top of the soil in your pots. It slowly feeds the plant every time you water.
- Mix it into potting soil. About one part compost to three parts soil works well for most herbs and veggies.
- Use it in your balcony containers. Compost adds nutrients and helps hold moisture, especially helpful during hot months.
I use mine for container tomatoes, indoor herbs, and a few succulents by the window. My rosemary went from pale and scraggly to full and bushy within a few weeks of getting a compost boost.
If you’re wondering, “Can I use compost straight from the bin?”-yes, as long as it’s fully broken down. It should look like rich soil, with no recognizable food bits left.
Apartment Compost Pickup Service Near Me
If you don’t need the compost (or don’t have any plants), you can still make sure it goes to good use.
Many cities now offer drop-off sites, curbside composting, or community garden programs that welcome small compost donations.
Here’s how to find them:
- Check your local government site. Cities like New York, San Francisco, Austin, and Portland all have compost collection or rebates.
- Search “[your city] compost drop-off.”
- Ask your farmers market. Many set up bins for food scraps or accept bagged compost.
Resource: GrowNYC Compost Drop-Off Locations
One reader from Queens told me she freezes her finished compost in an old takeout container and drops it off every other Saturday at a GrowNYC location.
Another friend in Denver brings hers to a local school garden program. They love getting fresh compost, and she doesn’t have to worry about storing it.
What worked for me was finding a neighbor who gardens. I leave a small tub of compost outside her door once a month, and she gives me fresh basil in return. Win-win.
When you’re working through the composting basics for urban apartments, don’t let the “what now?” stage stop you. Finished compost is valuable, whether you use it yourself or pass it on to someone who can.
Want to go deeper into how city waste systems work with home composting? Check out our guide to Composting in Apartments for practical tips on staying consistent and clean with your scraps.
Best Apartment Compost Bin Under Sink
If you’re short on space-and most of us in apartments are-tucking your compost bin under the sink is a solid move. It’s out of sight, easy to access, and doesn’t eat up precious counter space. I’ve tried a few setups over the years, and there are plenty of under-sink bins that work great with the composting basics for urban apartments.
Whether you’re just starting or replacing a stinky bin that didn’t work out, here are some picks and real-life fixes to help you find a setup that fits your space and your habits.
Budget-Friendly Product Picks
You don’t need a fancy system to start composting under the sink. Some of the best options are simple, inexpensive, and easy to clean.
Top picks I’ve used or seen work well:
- Bamboo-lidded stainless steel pails – Usually around $25-$30. These come with charcoal filters in the lid to keep smells down.
- Bokashi compost bins – A bit more expensive (usually $45-$70) but they’re airtight and perfect for meat or dairy scraps if you want to compost everything.
- Plastic buckets with a tight lid – You can find these at any home improvement store for under $10. Add a charcoal insert, and you’re good to go.
One neighbor in Dallas uses an old cat litter bucket with a flip-top lid. She cleaned it out, drilled a few vent holes in the lid, and lined it with newspaper. Works great and cost her nothing.
I started with a $12 compost pail from a local garden shop. I wasn’t sure it’d hold up, but it lasted over a year and never leaked.
Compact Designs for Studio Living
If you’re living in a studio apartment or a micro-unit, you’ll want something that doesn’t compete with your cleaning supplies or your garbage bin. Here are a few small-space tricks:
- Look for narrow, vertical bins that fit between pipes.
- Use a wall-mount hook or shelf under the sink to get it off the floor.
- Pick bins with a lid that snaps shut. Flip tops can pop open if bumped.
In San Francisco, one reader shared how she fit a slim 1.3-gallon bin right between her under-sink organizer and drainpipe. “I had to turn it sideways, but it fits-and no one ever notices it’s there.”
What worked for me in my old place in Tempe was using an old ice cream tub with a locking lid. It fit perfectly beside the trash bags and never gave me trouble, even in the Arizona heat.
Tips for Hiding Compost Bins in Tight Spaces
Even if you’ve got the space under your sink, you might want to make sure the bin stays out of sight-and out of mind if guests come over.
Here are a few tricks:
- Use a cabinet liner or tray. It catches drips and makes cleaning easy.
- Tuck the bin inside a tote or fabric basket. This camouflages it and gives you a little sound barrier if it rattles.
- Label it clearly so roommates or family don’t accidentally toss in something funky.
If you’re wondering, “Will this smell up my kitchen?”-not if you manage it right. Keep the lid sealed, add dry materials like shredded paper, and empty it regularly. And if it does start to smell, that’s your signal to adjust the balance or give it a rinse.
Finding the best apartment compost bin under sink doesn’t have to be expensive or complicated. The key is choosing one that fits your space, your habits, and your style. Composting basics for urban apartments are all about working with what you have, and even a small, hidden bin can make a big impact over time.
Cheap Worm Bin for Indoor Composting
Worm composting is one of the most effective ways to handle food waste in small spaces, but the price tags on fancy systems can scare folks off. If you’re working with a tight budget, don’t worry-you can set up a cheap worm bin for indoor composting that fits right into the composting basics for urban apartments.
I started my first worm bin with less than $20 and a handful of red wigglers I got from a neighbor. It wasn’t pretty, but it worked-and I’ve been hooked ever since.
DIY Bin Options
You can build a solid, indoor-friendly worm bin with materials from around the house or a quick trip to the hardware store.
Here’s a basic setup:
- Two plastic storage tubs with lids (10-15 gallons)
- Drill for holes in the top (for airflow) and bottom (for drainage)
- Bricks or spacers to lift one bin inside the other
- Shredded newspaper, cardboard, or coconut coir for bedding
- Red wigglers (don’t use garden worms-they won’t thrive indoors)
Stack one tub inside the other so the bottom can catch any liquid. Drill about 15 small holes in the bottom and another 20 in the lid and sides for airflow.
That’s it. No need for special gadgets or trays.
One reader in St. Louis told me she made her bin with old storage containers and leftover packing paper. “It sits in my closet,” she said, “and I forget it’s even there-until my plants need a boost.”
What You Can Repurpose at Home
If you’ve got a recycling bin, you probably already have half of what you need.
Try repurposing:
- Cat litter buckets
- Old coolers
- Styrofoam produce boxes
- Large plastic coffee containers
- Empty diaper wipe tubs (for mini worm bins)
A friend in Seattle used an old beer cooler from a garage sale. She drilled holes in the sides, added shredded junk mail for bedding, and started feeding her worms once a week. “It’s the best $5 I ever spent,” she said.
I wasn’t sure my worms would be happy in a used storage tub, but after a month they were multiplying and munching scraps like champs. No smell. No mess. Just good, rich compost.
Comparing Worm Bin Costs Across Systems
Let’s break it down so you can see how DIY stacks up to store-bought:
| System Type | Approx. Cost | Pros | Cons |
|---|---|---|---|
| DIY Plastic Tub | $10-$25 | Cheap, easy to replace | Not stylish, manual setup |
| Repurposed Container | Free-$10 | Reuses materials, ultra-budget-friendly | May need tweaks for ventilation |
| Commercial Worm Tower | $80-$150 | Designed for airflow and harvesting | Higher cost upfront |
| Fancy Furniture Bins | $200+ | Blends into decor | Pricey, sometimes overcomplicated |
If you’re trying to keep it simple while exploring composting basics for urban apartments, a cheap worm bin made at home is the best place to start. Once you get the hang of it, you can always upgrade.
Composting in a Hot Apartment

If you’re dealing with sweltering summers and no central AC, composting indoors can feel like a risky move. Heat speeds everything up-bacteria, smells, and, unfortunately, flies. But that doesn’t mean you have to give up on composting basics for urban apartments. You just need a few tricks to keep things from getting funky.
I’ve lived through Texas summers with my compost bin tucked under the sink, and while it took a few adjustments, it can absolutely work.
Keeping Bins Cool in Summer
Hot apartment? Don’t sweat it. These tips help:
- Move the bin to a cooler spot. If your kitchen’s the warmest room, try shifting the bin to a shady closet, under a bathroom sink, or even a low hallway shelf.
- Use frozen scraps. Before you toss food into the bin, freeze it overnight. It slows things down and helps keep the temperature from climbing.
- Add extra dry material. Hot bins break down faster, which can get smelly. I double up on shredded cardboard and paper during July and August.
- Crack a window or run a fan. Even a little airflow makes a big difference. I aim a small fan under my sink for a few hours a day when it’s really hot.
- Use smaller batches. During heat waves, I add scraps more often but in smaller amounts. That gives the bin time to keep up without getting overwhelmed.
What worked for me during a record heatwave in Austin was cutting back to every-other-day feedings and switching to frozen food scraps only. I wasn’t sure the worms would handle it, but they kept chugging along.
How to Compost Food Scraps Without Worms in Heat
Not into worms when it’s 90° inside? Totally fair. There are other methods that hold up better when the temperature climbs.
- Bokashi works well in heat. It’s an airtight system, so it doesn’t get smelly or attract flies. Just make sure to keep the lid tight and drain the liquid regularly. A friend in Phoenix told me it actually ferments faster in summer-she gets full breakdown in under two weeks.
- Electric composters also hold up. They’re sealed, fast, and usually well-insulated. If you’ve got the budget and a bit of counter space, it’s an easy way to compost without heat stress.
- Outdoor drop-off can be a backup. If things get too steamy, don’t be afraid to pause indoor composting for a bit. Save your scraps in the freezer and drop them at a local compost site once a week.
During a rough August in Houston, I stopped feeding my worm bin for two weeks and switched to Bokashi. It felt like a step back, but my worms survived, and the Bokashi tea helped revive my potted basil.
If you’re sticking with the composting basics for urban apartments and you’re sweating through summer without AC, you’ve still got options. Just make a few changes, listen to your bin, and don’t be afraid to take breaks if needed.
NYC Apartment Composting Rules and Collection

Living in an apartment in New York City can make composting feel like a puzzle. Small kitchens, shared trash chutes, and neighbors who already complain about the hallway smell. But thanks to curbside collection and local drop-off programs, composting basics for urban apartments are more doable here than you might think.
You don’t have to keep worms under the sink (though you can), and you don’t need a backyard. You just need to know the rules and how to work with the systems already in place.
What’s Allowed in NYC, LA, Austin, and Chicago
New York City:
The NYC Department of Sanitation (DSNY) offers free curbside compost pickup in all five boroughs-though it’s being rolled out in stages. If you live in Queens, you likely already have weekly brown bin service. Other boroughs are following suit.
What you can compost curbside:
- All food scraps, including meat and bones
- Food-soiled paper (napkins, paper towels)
- Yard waste (if you’ve got a stoop garden)
How to participate:
- Use a DSNY-provided brown bin or any lidded container labeled “Compost”
- Set it out on your trash day
- Sign up for service updates on the NYC DSNY site
I wasn’t sure this would work in my Brooklyn apartment, but once I labeled a 5-gallon bucket with “Compost” and left it at the curb, it was picked up no problem. No smell, no mess.
Los Angeles:
LA now requires residents to separate food waste for green bin pickup. Same rules apply-meat, bones, and food-soiled paper all go in. Check with LA Sanitation to request a green bin if your building doesn’t already have one.
Austin:
Austin’s curbside compost program is solid. You can compost all food scraps, including greasy pizza boxes. The city even offers a $75 rebate if you take a composting class and buy a home composting system. Info here: City of Austin Compost Rebate Program
Chicago:
Chicago doesn’t have citywide compost pickup yet, but there are tons of private collection services and community drop-off sites. Block bins, local co-ops, and even some grocery stores will take your scraps.
One reader from Wicker Park uses a private service called Urban Canopy. “They give me a bucket, swap it every week, and I don’t have to deal with the mess,” she said.
Understanding HOA or Landlord Policies
Even if your city offers compost collection, your building rules might be a different story. HOAs and landlords sometimes have concerns about pests or smells, especially if you’re using indoor bins or putting containers in shared hallways.
Here’s what’s helped others:
- Use a sealed bin with a charcoal filter to keep odors down.
- Keep your bin inside your unit until pickup day.
- Show your building manager the city’s composting guide. It often clears up confusion.
One woman in the Bronx told me her landlord was against composting at first – “He thought I was going to bring in rats.” After showing him a city flier and keeping her bin spotless for a month, he stopped objecting.
If you’re serious about composting basics for urban apartments in cities like NYC, the key is understanding the rules and finding what works for your building. Whether that’s freezing scraps until pickup day, sharing a bin with a neighbor, or joining a local drop-off group, there’s always a way to make it work.
Joining a Local Composting Community

One of the best things I did early on in my composting journey wasn’t about bins or worms-it was finding other folks who were figuring it out too. If you’re diving into composting basics for urban apartments and feeling a little unsure, connecting with a local group can give you the confidence boost and practical help you didn’t know you needed.
No one wants to feel like they’re messing it up alone. And the truth is, composting’s a whole lot more fun when you can share tips, trade scraps, or laugh about that time you accidentally composted a moldy quesadilla (guilty).
Finding Local Composting Groups and Apps
Here’s where to look:
- Facebook or Nextdoor groups. Search for composting, gardening, or sustainability groups in your city. I joined one called “Austin Apartment Composters” and got more help there in a week than I’d found in hours of Googling.
- Community gardens and co-ops. Many welcome apartment dwellers to bring their scraps or volunteer. Some even offer a shared worm bin or Bokashi setup.
- Apps like ShareWaste. This app connects people who have scraps with people who want compost. I used it when I didn’t have a bin yet and found a guy two blocks away who was thrilled to take my frozen veggie peels every Sunday.
- Local libraries and farmers markets. Surprisingly, these spots often have bulletin boards or newsletters that list composting workshops or drop-off info.
One reader in Detroit told me her library hosted a free vermicomposting demo. She walked out with a mini worm bin and a bag of shredded newspaper-ready to go.
Reddit and YouTube Tips That Help
If local groups are hard to find, the online composting world is full of kind, helpful folks who’ve already been where you are.
Top spots I keep bookmarked:
- Reddit: Check out subs like r/Composting, r/Vermiculture, and r/ZeroWaste. The comment sections are gold for troubleshooting, especially if your bin goes sour or you’re not sure if something’s compostable.
- YouTube Channels: Look up creators like Rob Greenfield, Epic Gardening, and Homesteady. Their videos aren’t just how-to-they show real setups in small spaces. I learned how to build a worm tower from a retired teacher in Oregon who films everything from her back porch.
When I started, I wasn’t sure I had “enough” scraps to make composting worth it. Seeing everyday folks make it work in tiny kitchens and balconies reassured me I was on the right track.
Whether you’re in New York or Nebraska, there’s a composting community out there-even if it’s just a group chat or a neighbor down the hall. Composting basics for urban apartments aren’t just about reducing waste. They’re about doing something simple, together, that actually makes a difference.
My Apartment Composting Setup: What Worked for Me
If you’ve made it this far, you’re probably thinking, Okay, but what does this actually look like in real life? I’ve tested a bunch of methods over the years, but here’s the apartment composting setup that stuck-and why it worked for me.
Like most folks figuring out composting basics for urban apartments, I started with high hopes, made some wrong turns, and slowly found my groove. No backyard, no balcony, no garage. Just a small Texas kitchen with enough counter space for a toaster and a coffee pot.
Step-by-Step Breakdown of My Process
- I picked the right spot.
I needed something hidden, cool, and easy to reach. Under the sink won. It stayed out of sight, was close to where scraps happened, and had just enough room. - I chose a bin that fit my space.
At first, I bought a fancy $80 countertop bin. It looked nice but didn’t hold much and smelled within a week. What worked better? A repurposed cat litter bucket with a tight lid and charcoal filter taped inside. Cost me nothing. - I started small.
I added scraps every other day, layering in shredded junk mail and cardboard. Once a week, I stirred it with an old wooden spoon. I didn’t weigh scraps or overthink it – I just aimed for balance. - I used frozen food scraps during hot months.
This helped with odor and fruit flies. I kept a bag in the freezer and emptied it into the bin as needed. - I dropped compost at a local farm stand.
Every two weeks, I transferred the finished compost into an old rice sack and biked it over to a community garden that welcomed drop-offs. They even let me trade for seedlings in spring.
Mistakes I Made and What I Changed
Mistake 1: Overloading too fast.
I got excited and dumped in a whole week’s worth of scraps at once. The bin turned into a swamp. I had to dig it out, air it out, and start over.
Mistake 2: Using too much wet stuff.
I added too many coffee grounds and fruit peels without balancing it with dry materials. It got smelly. Now I always keep a basket of paper scraps beside the bin.
Mistake 3: Not asking my landlord first.
He saw the bucket in the hallway one day and panicked. Thought I was hoarding garbage. After I explained and showed him the sealed setup, he was fine with it-but I should’ve asked first.
Mistake 4: Forgetting to drain my Bokashi bin.
When I tested out Bokashi, I didn’t drain the tea regularly. That caused leaks and smells. Now I set a phone reminder every three days to empty it into a mason jar and use it to feed herbs.
What worked for me wasn’t fancy gear or a perfect system. It was starting small, adjusting when things went sideways, and not being too hard on myself when it didn’t look like Instagram.
If you’re following the composting basics for urban apartments and still feel unsure, trust me-you’ll find your rhythm. It might take a couple of tries, but it’ll be worth it. And hey, even the worst batch of compost still teaches you something.
Final Thoughts on Composting Basics for Urban Apartments
If you’ve made it to the end of this guide, take a second to pat yourself on the back. Composting in an apartment isn’t always straightforward, but it’s doable, meaningful, and honestly kind of addictive once you get rolling.
I didn’t grow up composting. I learned by trial and error, usually with a mess under my sink and a few raised eyebrows from houseguests. But now it’s just part of my routine, like brewing coffee or sorting the mail.
Whether you’ve got a countertop bin, a worm farm in the closet, or a Bokashi bucket next to the recycling, you’re part of a growing community that’s making a difference right where you are.
Recap Key Takeaways
Here’s a quick summary of the most important things to remember when it comes to composting basics for urban apartments:
- You can compost without a backyard using small, indoor-friendly systems like worm bins, Bokashi, or electric composters.
- Keep a balance of food scraps (greens) and dry stuff (browns) to avoid odor and flies. Don’t worry about doing it perfectly. Starting small is enough.
- Cities like NYC, Austin, LA, and Chicago offer collection services, drop-offs, or rebates-check your local listings.
- DIY options can save you money and space.
- Finished compost can be used in pots, traded with neighbors, or donated.
- Every little step helps. Even if all you do is start freezing your scraps while you figure out your plan, that’s a move in the right direction.
Try a Simple Step
Not sure where to start? Try one of these:
- Save your food scraps in a container for a week just to see what you’ve got.
- Ask your city or building if compost pickup is available.
- Join a local composting group or Reddit thread to ask questions.
- Build a basic bin from two plastic tubs and see how it goes.
What worked for me was choosing one thing at a time. I didn’t have to commit to worms, tea-making, or fancy setups right away. I just needed to toss apple cores somewhere other than the trash.
If composting’s just one piece of your urban homestead goals, you’ll love our Micro‑Homesteading on Small Urban Spaces article. It’s packed with small-space solutions—from container gardens to compact tools.
Comment, Question and Share
I’d love to hear how composting’s going for you. What’s working? What’s confusing? Did you rig up a worm bin under the bed? Or convince your landlord to let you keep a Bokashi bucket in the hallway?
Drop a comment below, shoot me a message, or share a photo of your setup. If you’ve got questions, I’m all ears. And if you’ve got tips to share with the next reader figuring out composting basics for urban apartments, we’ll all be better for it.
Disclaimer: The information provided in this article is for general informational purposes only and is not intended to be a substitute for professional advice. The author of this article does not claim to be an expert in homesteading and the information provided should not be relied upon to make decisions about your own homesteading journey. Please do your own research and consult with a qualified professional before making any decisions about your homestead.
Share via:
Shaun Alexander is the main writer and editor for HomesteadingSimple.com. With a strong passion for homesteading and sustainability, Shaun has dedicated his life to learning and sharing information about a simple, fulfilling existence tied to the land. His expertise ranges from gardening and livestock management to off-grid living and DIY projects, reflecting the diverse skills necessary for a successful homesteading lifestyle. Shaun’s goal is to inspire and educate others about the possibilities of homesteading, whether in rural, suburban, or urban settings, and to provide practical advice and tips for both beginners and seasoned homesteaders. He believes in a future where more people return to their roots, embracing a life of self-sufficiency and harmony with nature.